Dreamy Room Level 232 Walkthrough & Guide
This guide provides a step-by-step walkthrough for completing Dreamy Room Level 232, focusing on precise object placement to transform the room into a harmonious and aesthetically pleasing space.
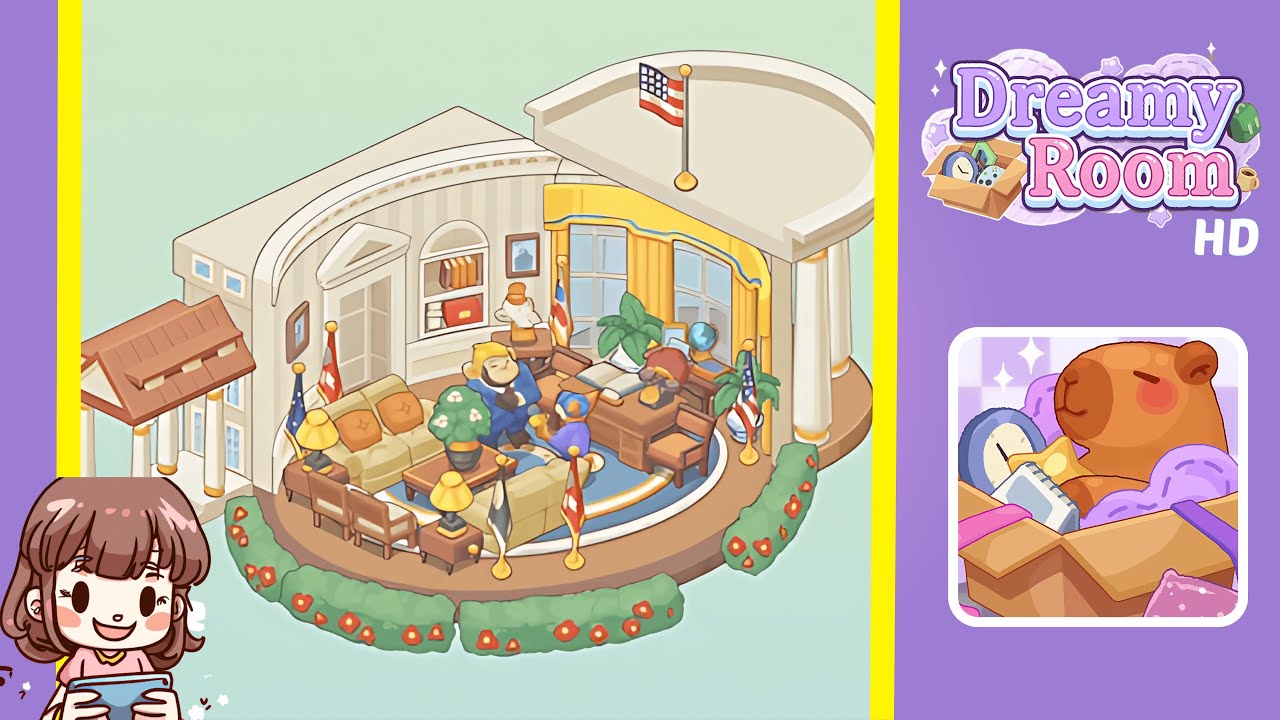
Step-by-Step Guide
- Place the entry porch at the left exterior, aligning it perfectly with the wooden floor platform.
- Install the curved roof segment and attach a flagpole above the right interior windows.
- Add yellow curtains to the large curved windows to enhance the room's brightness.
- Install a built-in arched shelf and decorative pediment for architectural detailing.
- Lay down a circular rug and arrange the seating to create a cozy atmosphere.
- Position the coffee table with a potted plant at the center of the seating arrangement.
- Place side tables and lamps beside the sofa to amplify ambient lighting.
- Set up the desk, chair, and desktop accessories to create a functional workspace.
- Add potted plants behind the desk for aesthetic enhancement.
- Position miniature flag stands around the seating for a touch of formality.
- Place character figurines on the rug to add life to the décor.
- Border the platform with flowering hedges for a colorful finish.
Notes & Precautions
- Mind Your Layering: Follow the sequence closely to prevent smaller items from being hidden.
- Use Zoom and Grid Snap: These tools ensure precise alignments, particularly around curves and corners.
- Check for Clipping: Rotate your view regularly to ensure no items intersect.
- Patience is Key: Rushing can disrupt the visual harmony of the room.
- Performance Tip: Disable background animations to maintain smooth placement if needed.
- Save Often: Use the save feature to prevent loss of progress.
Tips & Tricks
- Pre-Arrange Your Palette: Sort your inventory into groups for efficiency.
- Use Micro-Adjust: Tapping arrow keys ensures consistent alignment.
- Anchor Key Landmarks: Placing key pieces first aids in arranging subsequent items.
- Mirror Placement: Copy and flip symmetrical elements for perfect symmetry.
- Zoom-Out Check: View from a distance to ensure overall layout coherence.
- Quick Layer Toggle: Hide and reveal object groups to access hidden nodes.