Dreamy Room Level 235 Walkthrough & Guide
Welcome to the Dreamy Room Level 235 walkthrough. Follow these detailed steps to perfectly design every nook and cranny of your virtual room.
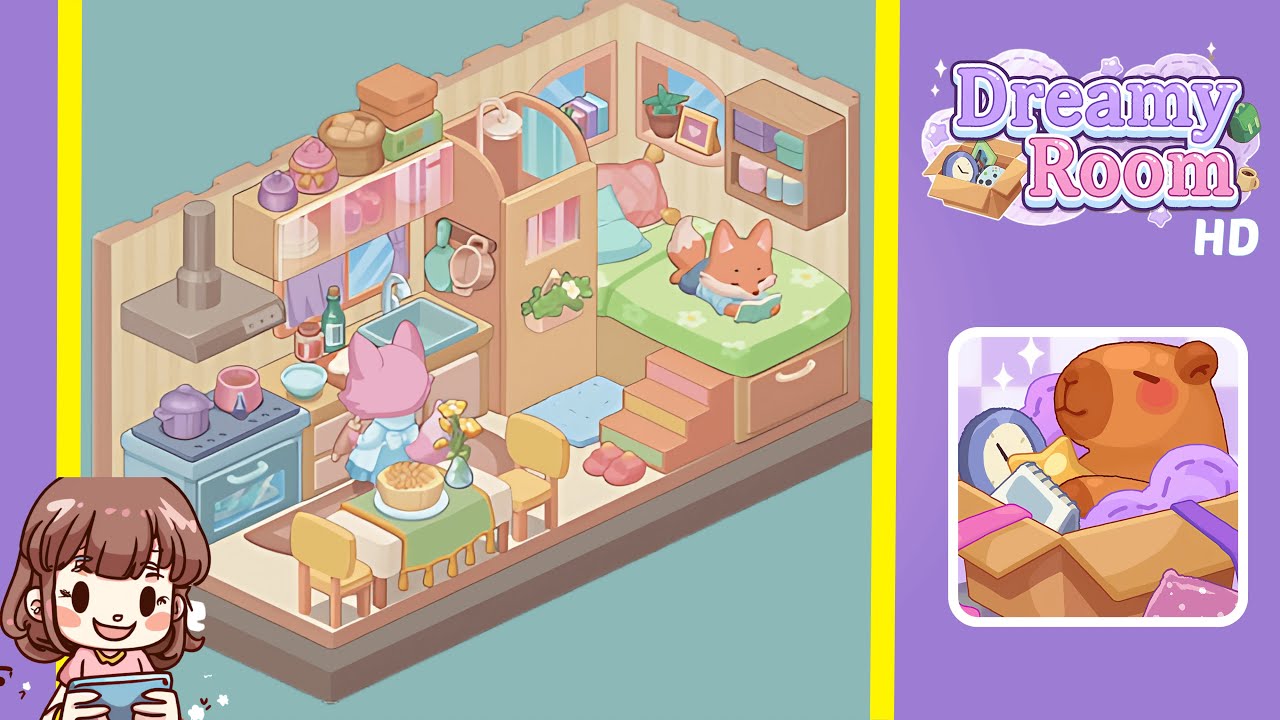
Step-by-Step Guide
- Place the Kitchen Platform: Begin by placing the large beige-and-pink baseboard piece in the bottom-left corner of the room. Ensure that the platform aligns precisely with the back wall and the left wall, leaving no gaps. This initial placement serves as the foundation for all subsequent items.
- Install Kitchen Appliances: Set the pastel-blue stove on the left half of the platform with the oven door facing outward. Position the pale-pink sink cabinet adjacent to the stove, ensuring the faucet faces the room's center and aligns with the kitchen window cutout.
- Add Storage Cabinets and Countertop Items: Attach a long overhead cabinet above the sink. Place decorative jars on top, and small boxes and baskets higher up. On the counter, arrange a rolling pin and mixing bowl.
- Furnish the Dining Area: Center a small rectangular table on the platform and cover it with a white tablecloth and an olive runner. Place a cake and cutlery on the table, and arrange twin yellow chairs opposite each other.
- Set Up the Bedroom Nook: Add a built-in drawer unit with stairs, ensuring the handles face outward. Arrange a floral-patterned mattress and pillows above. Position an orange fox character reading on the mattress.
- Decorate Walls, Windows, and Characters: Install pointed-arch windows and hang a shelf with potted plants between them. Position a floating shelf, a dome lamp, and the pink fox character at the counter for a dynamic scene.
Notes & Precautions
- Alignment Is Key: Enable grid-snapping to avoid misplacements.
- Layer Order Matters: Ensure higher objects are placed after floor items.
- Character Placement: Characters will only stick to flat surfaces.
- Undo Carefully: Plan your actions to avoid errors since the undo function is limited.
Tips & Tricks
- Use Quick-Snap: Toggle snap mode with Shift+Click for micro-adjustments.
- Layer Visibility: Temporarily toggle off hidden layers to place items more easily.
- Edge-guiding: Drag objects to the room’s edge for perfect alignment.
- Save Presets: Save the stove and sink placements as a preset for future use.