Dreamy Room Level 219 Walkthrough
Welcome to the detailed walkthrough for Dreamy Room Level 219. Follow these steps to perfect your design and create a warm, inviting atmosphere in each room.
Step-by-Step Guide
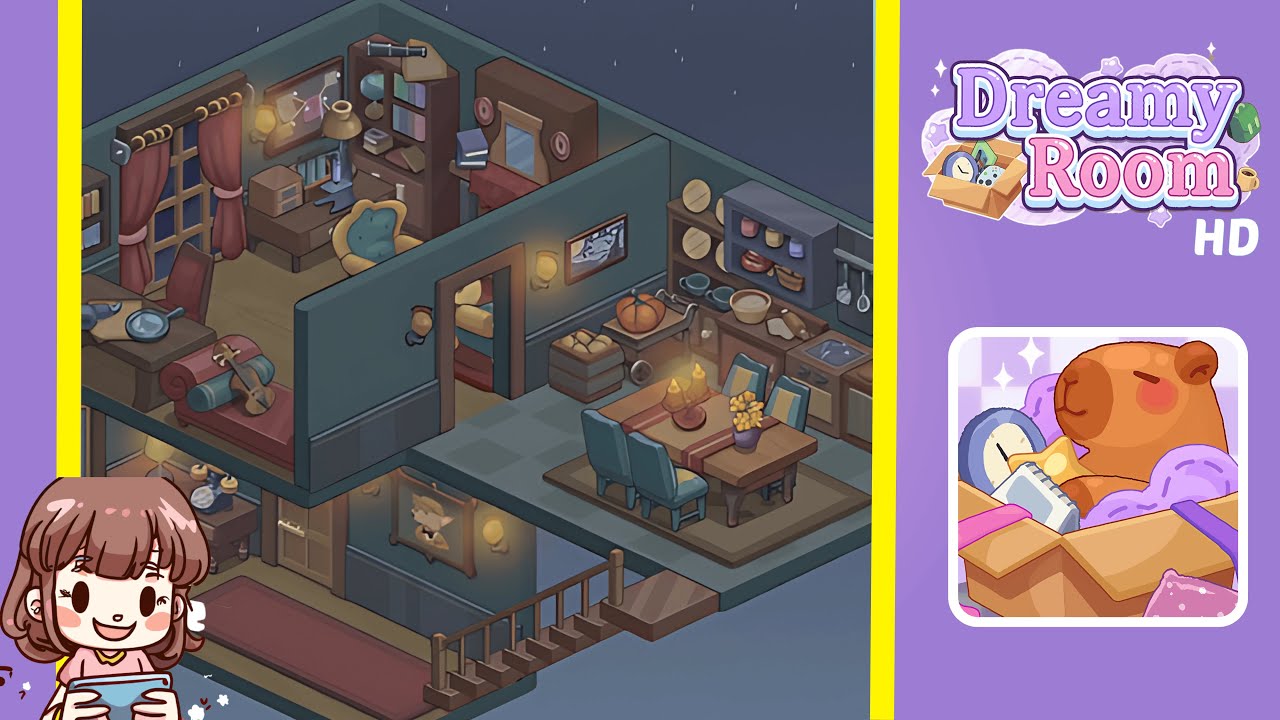
- Place the console table in the entryway. Position it flush against the left interior wall with a 15 cm gap between its left edge and the wall corner. Arrange battery-powered string lights around the legs, add a small brass lamp on the right corner, and place three mini decorative pumpkins and a pair of tapered candles evenly across the front edge.
- Install the double glass-pane doors in the entryway. Hinge each door at the opening on the left wall so they meet flush at the center. Slide a soft blue semicircular doormat under the threshold, ensuring it touches both door bottoms evenly.
- Unroll the red carpet runner from the entry doors to the staircase. Align its left edge 10 cm from the left console table and the right edge with the bottom stair riser. Smooth out wrinkles to maintain visual neatness.
- Install the wooden staircase against the central dividing wall. Position it with the lower riser flush with the end of the red runner, ensuring the top step sits level with the upper floor.
- Place the framed animal portrait under the stairs, 20 cm above the floor. Add a wall sconce to the right of the frame, 15 cm from its edge, to illuminate the artwork.
- Arrange the chaise lounge and violin in the top-left lounge area. Position the chaise with its back cushions against the left interior wall and align the seat cushion 10 cm away from the window sill. Add a teal bolster pillow and place the violin on the seat.
- Position the vanity desk and grooming tools near the window. Drag the desk to sit 5 cm from the window frame and align the grooming tools on the desk surface facing toward the chair.
- Place the corner study desk with a microscope and lamp. Position the desk to hug the back wall. Arrange the vintage microscope, brass desk lamp, and chalkboard artboard above the desk. Add floating globe and books evenly on the shelf above.
- Set up the teal armchair and mirror shelf on the back wall. Center the chair with a 20 cm gap from the corner shelf. Mount the mirror shelf above with pink accent pieces and arrange a small red draped table beneath.
- Stack the produce crates and pumpkins by the interior door. Align the crates with the door’s right trim and top one with a large orange pumpkin, surrounding it with smaller gourds.
- Arrange the dining table, chairs, flowers, and candles in the dining area. Center the table under the ceiling light with adequate clearance for chairs. Place a vase of yellow flowers in the center and flank with a brass candelabra.
- Finish with the kitchenette shelves, hanging utensils, and counter. Install shelves 50 cm above the countertop, arrange jars and plates, hang utensils, and install the sink and lower cabinets below.
Notes & Precautions
- Precision is key: Even a 5 cm misalignment can affect the overall aesthetic. Use the snap-to-grid feature.
- No timers: Enjoy a relaxed, mindful play style without time pressure.
- Layer order matters: Adjust the layer order if items overlap unexpectedly to maintain a clean appearance.
- Lighting checks: Ensure proper illumination on key objects by toggling the light preview.
- Save often: Use the in-game save feature frequently to keep track of arrangements.
Tips & Tricks
- Use mirror symmetry for quick alignment of items like chairs or frames.
- Batch placement: Group similar objects in your inventory to place them efficiently.
- Shadow preview: Use the shadow overlay to determine where wall-mounted items will cast light.
- Grid snapping shortcuts: Utilize keyboard shortcuts for precise object placement.
- Color-block planning: Assign zones for color palettes to decide object placement quickly.