Dreamy Room Level 236 Walkthrough & Guide
Dreamy Room is a tranquil game focused on unpacking memories and arranging objects in serene interiors. In Level 236, you face an empty pastel-trimmed case interior. Your main challenge is determining the correct placement for each item to reveal a storybook loft. This walkthrough guides you step by step.
Step-by-Step Guide
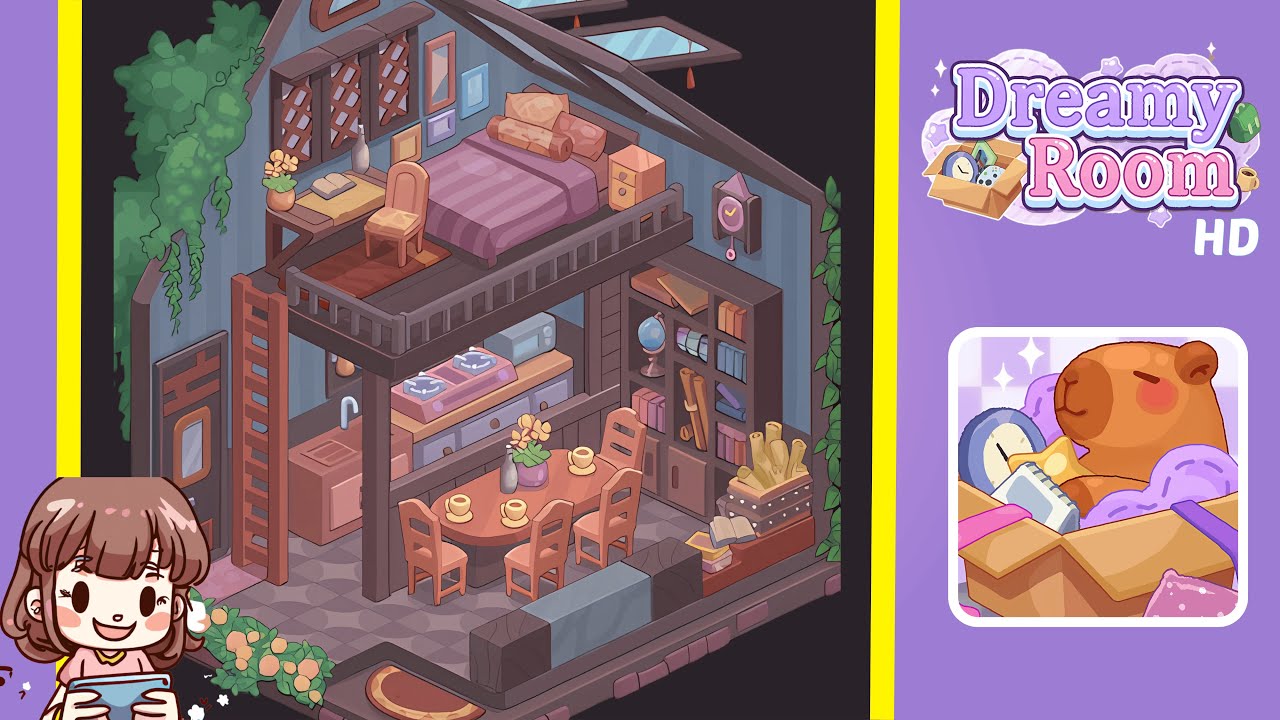
- Place the Ladder and Door Fixtures: Begin with an empty isometric chamber with blue walls and a geometric patterned floor. Place the tall wooden ladder in the lower-left corner, aligning it with the mezzanine support. Position the single-panel door in the entrance notch at the base of the left wall. Attach the skylight windows onto the sloping ceiling above the right side.
- Position the Climbing Vines and Flower Beds: Attach the trailing vine along the top-left inner wall, allowing the leaves to drape down past the mezzanine floor. Place the climbing ivy graphic on the right wall, aligning tendrils to the ceiling. Add a low rose bush cluster outside the base of the staircase at the lower-left corner.
- Assemble the Mezzanine Platform and Railing: Place a vertical support beam on the left side adjacent to the ladder and another on the right side. Snap the wooden mezzanine floor panel onto the beams. Attach decorative railing segments around the mezzanine's edge.
- Place the Bed Frame, Mattress, and Bedding: Position the dark wooden bed frame in the top-right corner of the mezzanine. Place the purple mattress inside the frame, then arrange the bolster pillow, bolsters, and side pillows. Drape the purple quilt over the center of the bed.
- Add the Nightstand, Desk, Chair, Books, and Cosmetics: Slide the nightstand against the right inner wall beside the bed. Position the desk near the far-left section of the mezzanine with the chair facing inward. Place the open book on the desk with an amber glass bottle and floral vase.
- Install the Lattice Window Panels, Picture Frames, and Wall Clock: Attach the lattice panels across the upper-left wall. Arrange colorful picture frames to the right of the lattice windows. Install the small arched window beneath the ceiling slope and place the vintage wall clock beside the nightstand.
- Set Up the Kitchen Counter, Sink, Stove, and Microwave: Snap the sink unit against the left support beam. Position the stove to the right of the sink and place the microwave on the counter.
- Arrange the Dining Table, Chairs, Cups, and Floral Centerpiece: Center the round table beneath the mezzanine overhang. Arrange six chairs around the table and distribute cream-colored coffee cups. Place a purple floral vase at the table's center.
- Place the Bookshelf, Globe, Books, and Scrolls: Anchor the bookshelf against the right interior wall below the mezzanine. Add the globe, assorted books, and rolled scrolls.
- Position the Couch, Decorative Crate, and Accessories: Attach the couch to the lower-right corner. Place the decorative crate with rolled maps nearby and lay a hardcover book on top.
Notes & Precautions
- Emphasize precise placement to avoid misalignment. Use the grid or guide lines to ensure proper alignment. Especially monitor the ladder, mezzanine rails, and couch cushions.
- Watch the layering order to ensure visibility, and verify object hierarchy to prevent mistakes.
- Avoid overusing the "undo" feature to maintain immersion. Preview object fits by rotating slowly.
- Mind overlapping interactive zones, especially among small objects like cups and scrolls.
Tips & Tricks
- Enable "snap-to-center" for circular objects to reduce alignment errors.
- Use "ghost preview" to visualize object overlap and prevent clipping.
- Group bed linens and pillows for easy insertion.
- Utilize the favorites panel to save frequently used items for easier access.
- Take screenshots before major changes for easy reference if positions shift.