Dreamy Room Level 226 Walkthrough
This guide provides step-by-step instructions to complete Dreamy Room Level 226 by arranging furniture and decorations to create a harmonious and inviting room.
Step-by-Step Guide
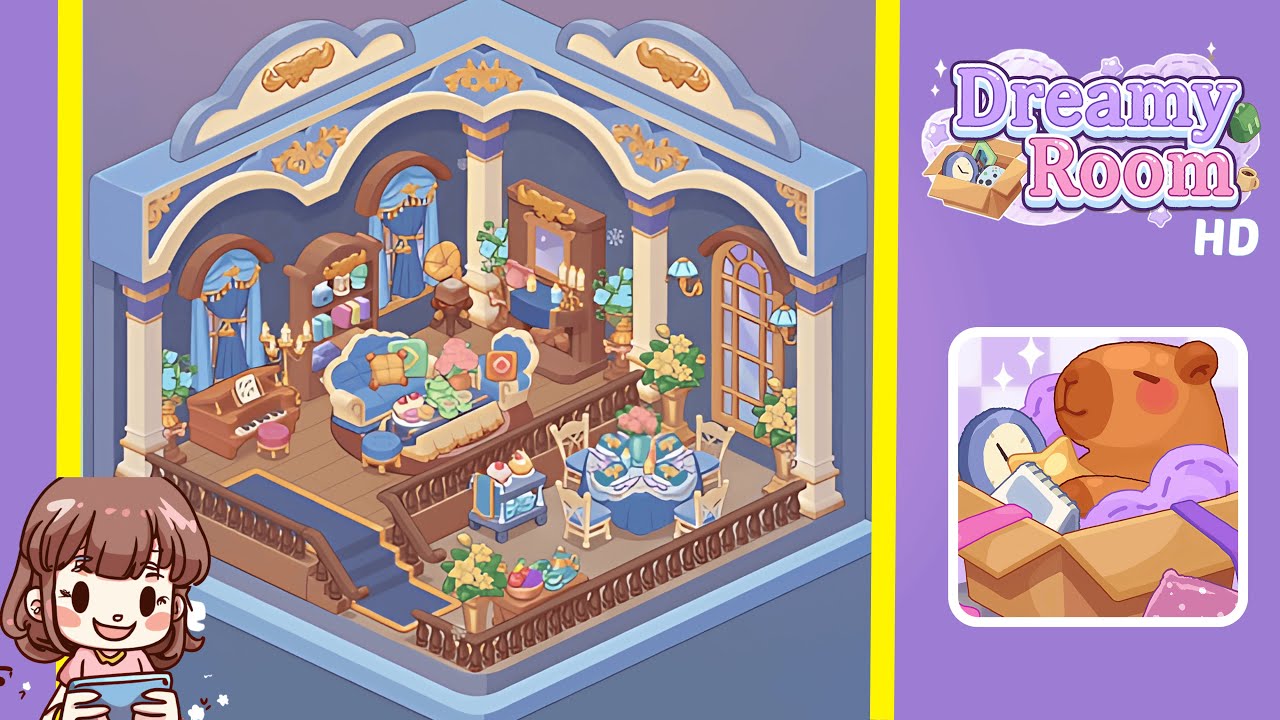
- Place the grand staircase and railing on the left side of the room. Select the staircase from the inventory and drag it to the lower-left corner, aligning with the left wall. Snap the railing segments into place along the top platform edge and down the staircase.
- Add the arched windows and elegant curtains. Install two large arched windows on the rear walls. Attach floor-length blue curtains with gold tassels above each window.
- Place the wooden bookshelf and decorative accents between the windows. Position a tall bookshelf between the windows on the left wall. Load it with pastel-colored books and decorative items like a camera and glass jars.
- Arrange the piano and candelabra in the left corner. Position the antique piano against the left corner wall, beneath the left window. Place a gold candelabra beside the piano, add sheet music, and the pink stool in front of it.
- Position the cozy loveseat and accent pillows on the raised platform. Center the tufted blue loveseat on the raised platform, ensuring its front legs straddle a single parquet square. Add yellow grid-pattern and light green heart-shaped pillows.
- Lay out the tea service, cupcakes, and footstool accessory. Place the tea service tray with teacups and teapot on the loveseat's sideboard tray extension. Arrange pastel cupcakes on the tray and position a round blue footstool in front of the loveseat.
- Install the side table, gramophone, mirror, and console tableau. Place a wooden side table with a gramophone behind the loveseat. Position a mirror and console between the right-side windows, then decorate with a teddy bear, candles, and a vase.
- Arrange the dining table, chairs, and place settings on the balcony area. Position a round dining table on the lower balcony, adding cream-colored chairs, place settings, and decorative napkin roses.
- Set up the serving cart, fruit bowl, and railing teacup vignette. Place a serving cart near the dining table with cupcakes, a teal teacup, and a napkin. Position a fruit bowl and teapot on the railing ledge.
- Add potted plants, wall sconces, and finishing snowflake accents. Position vases of lilies and a hydrangea pot around the room. Add wall sconces near the windows and decorate with snowflake ornaments.
Notes & Precautions
- Ensure proper alignment by watching for the green placement highlight.
- Avoid overlaps by zooming in before dropping items.
- Confirm that accessories snap into place; rotate items if they seem stuck.
- Save progress before making major structural changes to avoid resets.
Tips & Tricks
- Start with large structural pieces to frame the space.
- Use small increments to rotate items and find hidden snap points.
- Group similar items in the inventory for consecutive placement.
- Double-tap item icons to center them in your view.
- Toggle grid overlay for precise placements.