Dreamy Room Level 208 Walkthrough
Welcome to the Dreamy Room Level 208 walkthrough. This guide provides detailed instructions to help you flawlessly arrange the decor and complete this atmospheric space.
Step-by-Step Guide
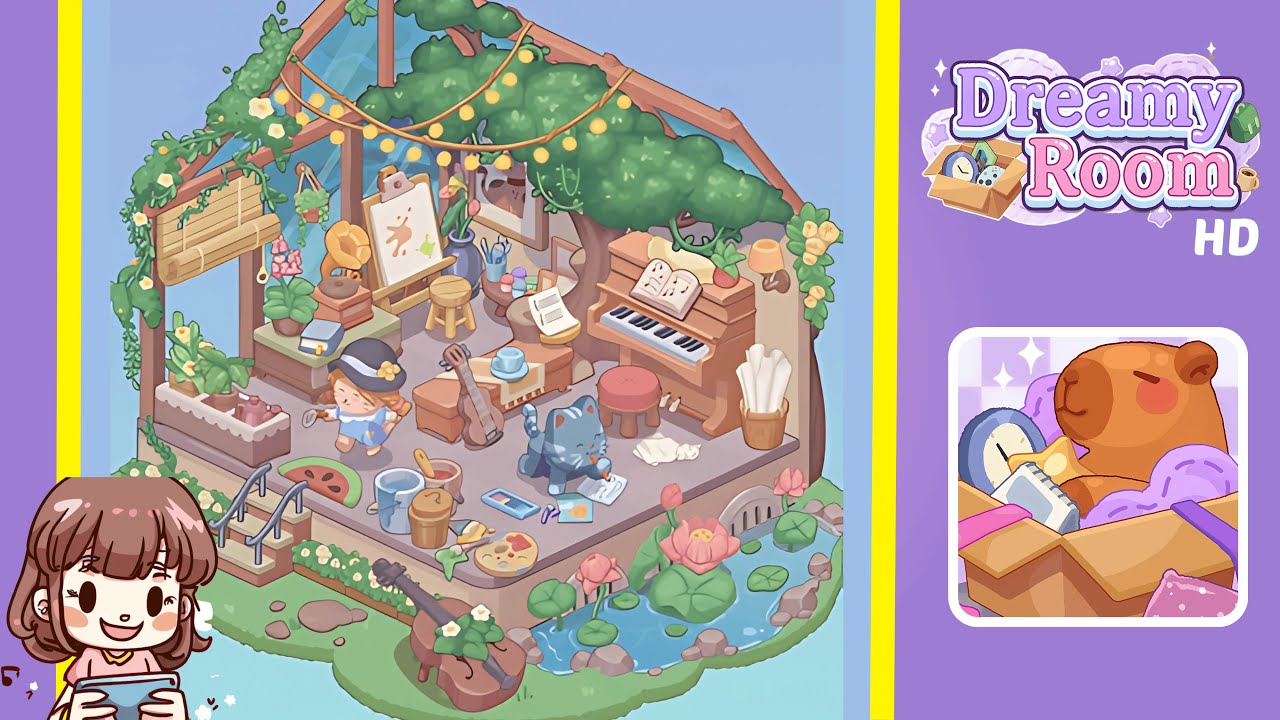
- Place the string lights along the roof beams. Position small yellow bulbs to rest flush against the left and right beams, creating an arc. Ensure symmetry to establish the ambiance and guide further decor placement.
- Attach a lush hanging planter to the upper-left wall beam and roll down a bamboo blind beneath it, covering the top third of the wall. Proper alignment will add organic texture and shade.
- Position a mint-green side table in the left corner, place a pink-flowering potted plant on it, a gramophone, and a stack of books. Adjust for optimal lighting from above without overlapping other decor.
- Center an easel on the back wall, place a canvas on it, and arrange a stool, paint jars, and tools for a balanced painting station.
- Align an upright piano with the back right corner, position a stool at the piano, open sheet music, and mount a wall lamp above. Add a small potted plant on top of the piano for balance.
- Arrange animal characters and accessories on the floor center. The cat should face the painting station, while the girl character stands to the left.
- Move a coffee table near the entrance. Place a blue teacup on it, lean a ukulele against it, and set a watermelon slice nearby.
- Scatter art supplies on the floor, including paint cans, a palette, and rolled papers, creating an artist's playground feel.
- Outside, place stone stairs at the platform's edge, apply a grass border, position a pond, and a cello on the grass, finalizing the scenic transition.
Notes & Precautions
- Monitor object alignment carefully to avoid placement errors. Items should snap into the grid, and overlapping can deactivate the tool.
- Navigate the level with caution, starting with larger structures before layering smaller items. Use zoom controls sparingly.
- Save progress often to prevent losing work in case of a crash.
Tips & Tricks
- Mentally map room quadrants before starting, placing large elements like the tree trunk and piano first to save time.
- Use the transparency slider to place items precisely within overlaps, and utilize color contrast guides to enhance decor arrangement.
- Take advantage of the quick-save feature after major steps for experimentation and recovery.