Dreamy Room Level 156 Walkthrough
Embark on the captivating journey of Dreamy Room Level 156, where meticulous placement and creative arrangement come together within a charming clock-face room. Follow these steps to design a harmonious space that exudes warmth and coziness.
Step-by-Step Guide
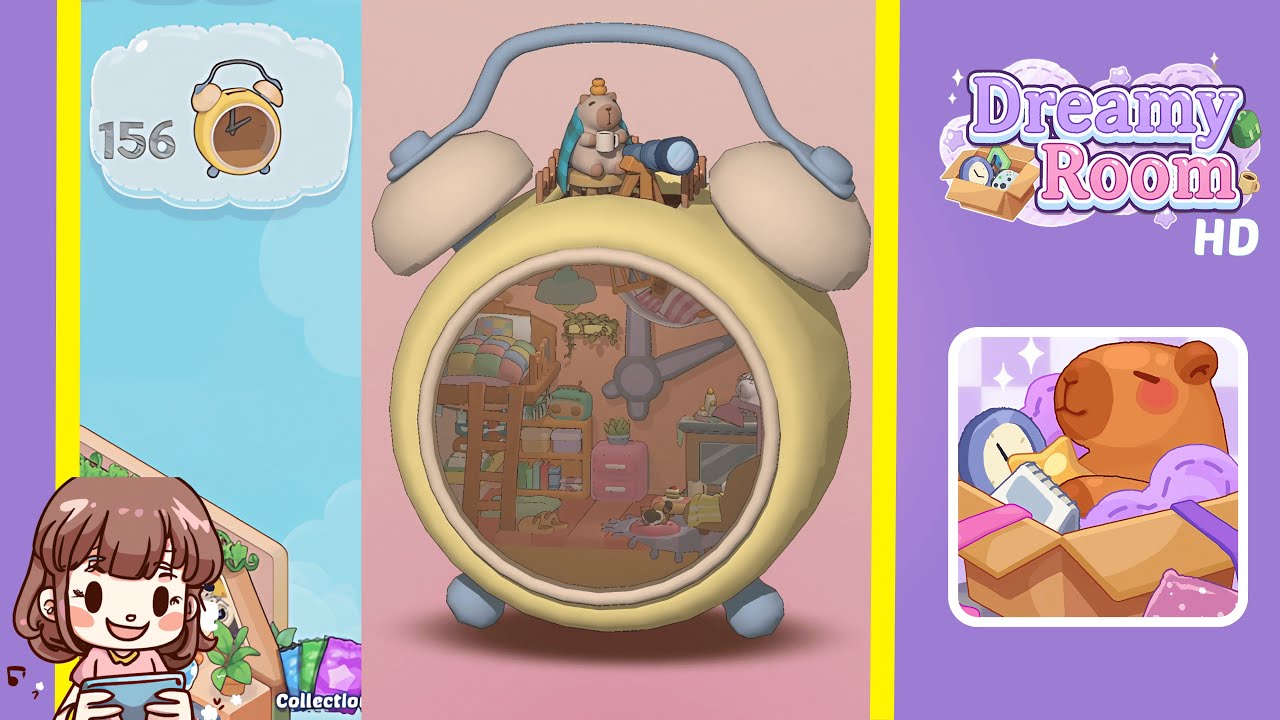
- Place the loft bed and ladder snugly in the left corner, aligning the headboard with the yellow metal wall. Precisely attach the ladder to the loft structure.
- Add the patchwork quilt and pillow to the top bunk, ensuring a natural drape over the sides and centering the pillow against the back wall.
- Hang the trailing ivy plant from the ceiling above the bed, centering it above the ladder to create an arch effect with cascading tendrils.
- Position the wooden bookshelf beside the loft bed, filling it with colorful books, boxes, and a retro radio to enhance visual balance.
- Add the pink two-drawer cabinet next to the bookshelf and place a succulent on top to add a pop of color.
- Set up a wooden desk under the right wall. Decorate with a cake, a cup, and a cat figurine, creating a charming workspace.
- Position the chair in front of the desk, draping a green throw over the backrest to ensure a cozy setup.
- Arrange the round coffee table and pastel stool in the lower right corner. Add mugs and pastries for a delightful corner.
- Place the sleeping dog figurine under the loft bed to complete the room's bottom corner with a heartwarming touch.
- Create the observatory vignette on top of the clock bells using a stump stool, teddy bear, fence, and telescope for a whimsical finale.
Notes & Precautions
- Look for subtle snap-to guides to avoid unnatural overlaps; release when the glow indicator appears.
- Utilize fine rotation adjustments (5–15°) for realistic draping, tilting, and balancing of items.
- Larger furniture might shift adjacent items; gently reselect and correct placement if needed.
- Avoid pushing objects into the curved wall too far; they won't register correctly.
- Misplaced objects can be quickly corrected using the undo button instead of manual adjustments.
Tips & Tricks
- Use the placement grid to reveal hidden alignment lines, especially useful for small decor items.
- Lock in major pieces to prevent accidental moves when positioning nearby items.
- Select and rotate related objects simultaneously for uniformity.
- Adjust camera angles to check balance, and zoom in for fine-tuning details.
- Save your progress before the rooftop vignette to experiment with different telescope angles.