Dreamy Room Level 143 Walkthrough
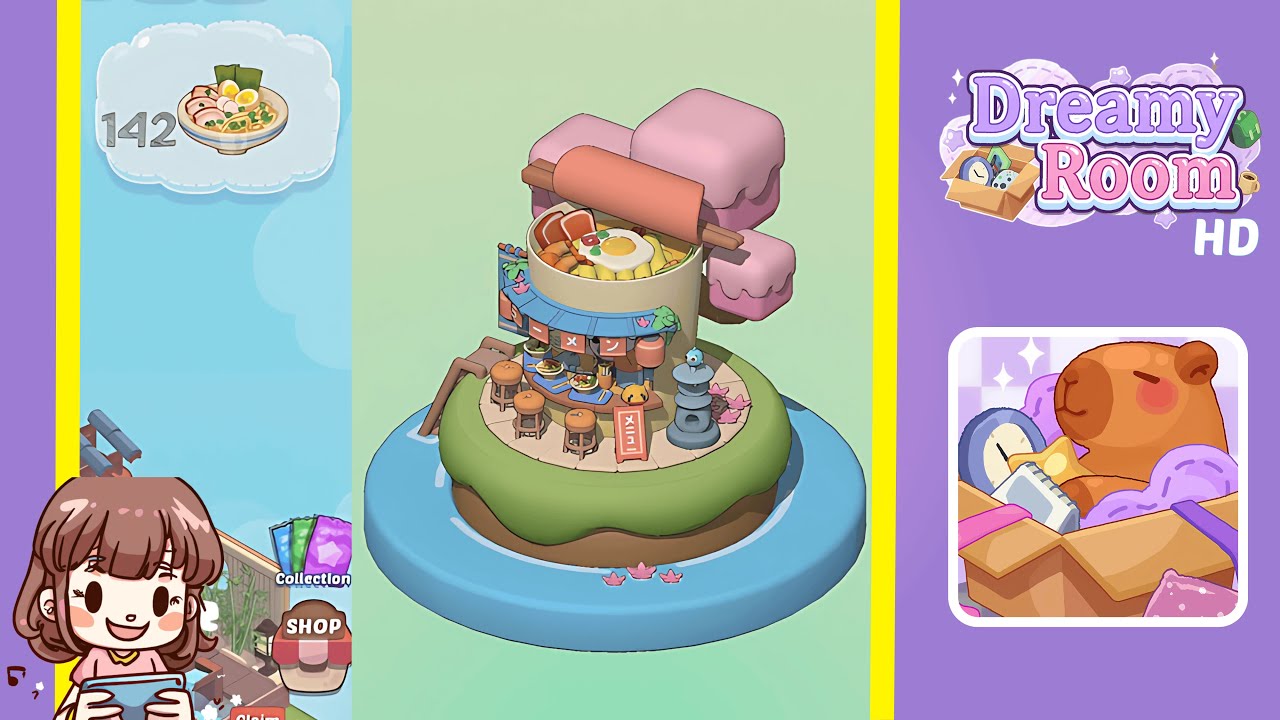
Explore the intricacies of Dreamy Room Level 143 with this detailed guide. Each step is meticulously crafted to assist you in building a stunning floating ramen shop oasis, all while ensuring accuracy and precision in object placement and alignment.
Step-by-Step Guide
- Place the Blue Circular Base in the Center of the Room. Open the inventory and select the "Blue Circular Base" from the "Foundations" tab. Align it precisely with the room's gridlines to serve as the foundation for all subsequent arrangements.
- Add the Grassy Mound and Brown Soil Layer. Access the "Terrain" tab to select the "Green Grass Mound" and position it on the blue base. Rotate accordingly, and then place the "Brown Soil Cylinder" beneath it.
- Position the Wooden Ladder and Tree Trunk with Pink Canopy Blocks. Navigate to the "Furniture" section, drag the "Wooden Ladder" to the left edge of the grass, and align the "Tree Trunk" with pink canopy blocks.
- Place the Cylindrical Ramen Bowl Building and Top Rolling Pin. Locate the "Ramen Bowl Cylinder" in the "Buildings" folder and position it centrally. Add the "Giant Noodle Top" and "Decorative Rolling Pin."
- Add the Blue Awning, Front Counter, and Ramen Bowls. From "Shop Fixtures," select and position the "Blue Awning," "Shop Counter," stools, and "Ramen Bowls" with precision under the awning.
- Attach Lanterns, Vertical Sign, and A-Frame Chalk Sign. Utilize the "Signage" tab for the "Vertical Ramen Sign" and attach pink and red "Hanging Lanterns" and the "A-Frame Chalk Sign."
- Place the Stone Lantern, Cherry Blossom Petals, and Ground Accents. Select the "Stone Lantern," scatter "Cherry Blossom Petals" and tuck in a "Mini Flower Cluster" and "Small Bamboo Shoot" as accents.
- Confirm Alignment, Rotate Camera, and Save Your Completed Scene. Ensure every placement is perfect by confirming object alignment and saving your progress to prevent data loss.
Notes & Precautions
- Grid Snapping Matters: Small misalignments can create larger issues in subsequent steps.
- Overlapping Colliders: Turn off "Snap To Terrain" to adjust height manually if needed.
- Maintain Camera Angle Consistency: Avoid depth misjudgment by keeping a consistent view angle.
- Order of Placement: Follow steps carefully to avoid object overlap or misplacement.
- Saving Often: Frequent saves prevent progress loss from unexpected crashes.
- Avoid Camera Clipping: Rotate carefully to prevent deselecting objects.
- Color Consistency: Ensure color consistency with the hex code #F8BBD0 for pastel pink.
Tips & Tricks
- Use Multi-Select for Symmetry: Duplicate stools uniformly using the "Duplicate" command.
- Quick Copy-and-Paste Method: Preserve spacing and angles by copying existing lanterns.
- Use the Height Adjustment Slider: Easily set grass and soil cylinder heights in property settings.
- Snap-to-Grid Override: Press Alt to make fine adjustments, particularly for delicate positions like the ramen bowl top.
- Layer Locking for Safety: Prevent accidental movement by locking layers of key components.
- Use "Preview Lighting" Mode: Adjust lantern brightness to suit the scene’s ambiance.
- Polarized Camera Angle Shortcut: Achieve perfect front-view alignment by pressing "0" on the numpad.
- Decorative Particle Effects: Activate "Blossom Petal Drift" to enhance the scene's liveliness.
- Backup Your Inventory Layout: Save a "Custom Slot" for easy access to essential items.