Dreamy Room Level 137 Walkthrough
Welcome to the detailed guide for Dreamy Room Level 137. This walkthrough will guide you through the precise placement of objects to construct a functioning and visually appealing fire station.
Step-by-Step Guide
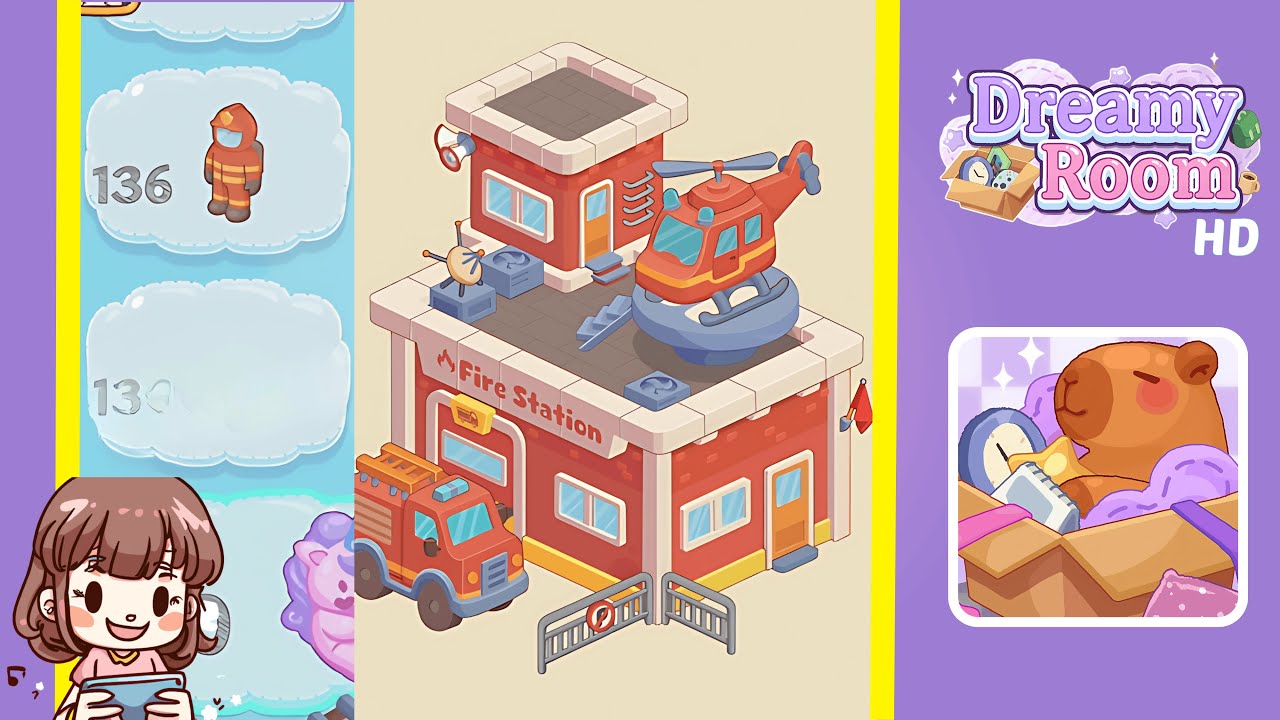
- Place the Fire Station Base in the Center of the Room. Position the main Fire Station base at the room's midpoint, ensuring it is aligned flush against the floor with equal gaps on both sides. The front should face outward, perpendicular to the screen's bottom edge.
- Build the Ground Floor Walls with Windows and Doors. Assemble the ground floor walls using segments with window and door cutouts, aligning them with the base edges. Center the wall with the garage door at the front, and properly position the windows and entrance door.
- Add the "Fire Station" Sign and Icon Above the Garage Door. Place the sign “Fire Station” just above the arched garage door and the small yellow plaque slightly below it, ensuring both elements are centered and aligned.
- Place the Ground Floor Windows and Side Door Accents. Place two windows symmetrically on the front wall and align the right-side entrance door with steps beneath, maintaining perspective and alignment.
- Attach the Red Curved Pipes to the Right Wall Side. Align the pipe assembly on the right-hand wall, ensuring proper shadow and alignment with the bricks.
- Place the Front Fence Gate and Barrier at the Lower Edge. Position the fence gate in front of the Fire Station, with gates open at a slight angle and the “no entry” sign at the center.
- Park the Fire Truck on the Left Front Side of the Building. Position the fire truck at the lower-left quadrant outside the left gate, ensuring realistic scale and perspective.
- Construct the Rooftop Floor and Helipad Base. Apply checkered tiles to the rooftop, covering it entirely, and then place the helipad base on the left section.
- Add the Rooftop Staircase and Ventilation Units. Position the staircase at the right side of the roof and place two ventilation units symmetrically.
- Install the Satellite Dish on the Left Rooftop Corner. Position the satellite dish on the left corner of the roof, aligning its shadow with the checkered pattern.
- Place the Helicopter on the Helipad. Land the helicopter on the helipad, ensuring it is properly centered, with its shadow blending seamlessly.
- Attach the Red Flag to the Right Side of the Building. Place the red flag on the right side, ensuring it aligns correctly without overlapping the windows.
Notes & Precautions
- Maintain precise placement; even a few pixels off can disrupt the scene's alignment.
- Ensure correct rotations and angles to match the objects' perspective on screen.
- Follow the correct layering order to prevent floating or sink effects.
- Avoid overlapping collisions by maintaining necessary gaps between objects.
- Align shadows with the top-left light source for realism.
- Check object order in the menu if items seem hidden or misplaced.
- Save progress frequently to prevent loss from resets or glitches.
Tips & Tricks
- Use grid snapping for aligning items without manual adjustments.
- Double-click the center handle to easily center large objects.
- Utilize shadow indicators for checking correct rotations.
- Lock layers after placement to prevent accidental movements.
- Use preview hotkeys to assess fit before placement to save time.
- Recolor using the eyedropper tool to fix incorrect shades quickly.
- Leverage faint outline guides to confirm correct placements.
- Pre-align similar objects by mirroring or duplicating them for efficiency.
- Quickly reset complex sections for cleanliness, saving time overall.
- Plan from rooftop to ground for better spatial arrangement.