Dreamy Room Level 129 Walkthrough
Welcome to Dreamy Room Level 129, where precision and design take center stage. This walkthrough guides you through each crucial step to craft this charming, pastel-hued market scene.
Step-by-Step Guide
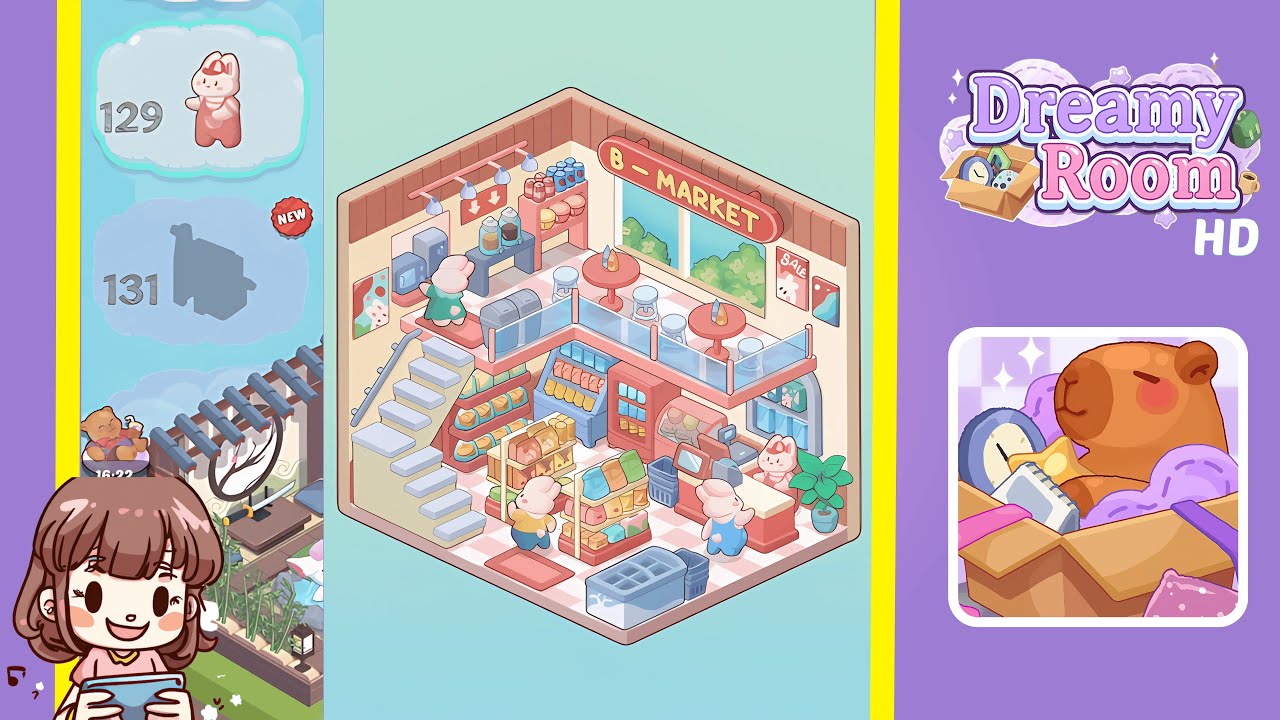
- Lay the checkered floor tile to cover the room's base, ensuring the tiles align with the bottom edges of the walls using snap guides.
- Install pink wall paneling along the bottom third of the walls, clicking each panel securely into place to avoid gaps.
- Add the left staircase, connecting it to the mezzanine. Ensure each tread aligns with the floor and wall paneling at precisely 45 degrees.
- Position the front freezer and shopping baskets at the room's center, aligning them flush with the floor tile's edge without blocking pathways.
- Set up the bread display shelf to the right of the staircase, adjusting it to avoid clipping while keeping loaves visible.
- Install central product racks, rotating them for optimal visibility and ensuring a balanced customer path between them.
- Place the refrigerated display case against the right wall, maintaining aisle width for smooth NPC movement.
- Install the cashier counter with an embedded register at the room's entrance for seamless character interactions.
- Add a potted plant beside the cashier counter, adjusting it for a natural accent and balanced atmosphere.
- Install mezzanine railing and bar tables, ensuring alignment and customer comfort at the café setup.
- Position bar stools aligned to the floor grid and decorate with bottles for visual cohesion in the mezzanine area.
- Configure the coffee station with espresso machines, jars, and accessories, completing the café ambiance.
- Hang signage and decorate the walls, focusing on alignment and finishing with the scenic window backdrop.
Notes & Precautions
- Snapping and Alignment: Misplaced objects can create collisions. Double-check alignments to avoid NPC issues or wall glitches.
- Layer Order: Build from the floor up to prevent objects from slipping behind incorrect layers.
- Rotation Angles: Use 45-degree increments for supports; avoid free rotations unless for stylistic purposes.
- Preview Mode: Test pathing before exiting build mode to ensure unobstructed character movement.
Tips & Tricks
- Modular Grouping: Group assets into folders for batch rotations and uniform spacing.
- Reference Snap Points: Enable the grid overlay for precise alignment.
- Copy and Paste Configuration: Use the duplicate tool to replicate shelf positions instantly.
- Pathing Preview: Use NPC walkthroughs to identify potential blockages.
- Color Cohesion: Stick to the pastel palette for a polished scene.