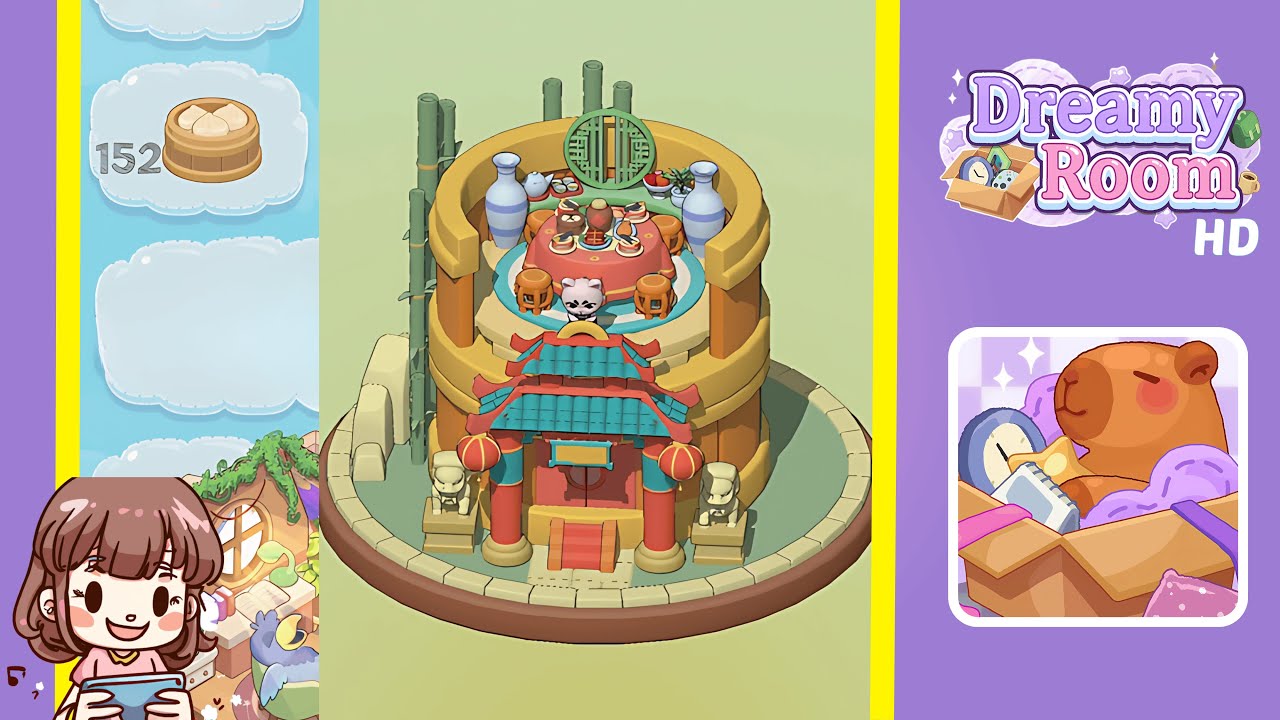
Dreamy Room Level 152 Walkthrough & Guide
Welcome to the comprehensive walkthrough for Dreamy Room Level 152. The primary challenge here is to correctly place each object, transforming an empty space into a serene pagoda courtyard. Follow these ten detailed steps to turn the circular courtyard into a harmonious scene inspired by traditional architecture.
Step-by-Step Guide
- Place the tallest bamboo stalk in the back left corner, aligning it at a slight angle toward the center. Ensure the base is flush with the platform and the tip overlaps the shadow of the adjacent stalk. Keep the distance between trunks about one bamboo diameter apart using the grid overlay for precision.
- Add smooth stone blocks behind the bamboo cluster. Position two large boulders snugly against the inner circle curve, mirroring rock alignment seen in the reference. Ensure no overlaps with bamboo and within the base’s ring. Slightly tilt each for light and shadow effects.
- Configure the golden cylindrical wall section at the center of the platform, aligning its base with the platform’s inner edge. This wall should enclose roughly one-third of the circle. Ensure the wall height matches the reference.
- Install the decorative circular lattice window on the upper wall. Snap the window into the designated slot near the top center of the wall, ensuring the ornamental pattern faces outward.
- Place the red-and-teal entrance gate at the platform's front center axis. Ensure it doesn't collide with the cylindrical wall edges, leaving about half a stone-block’s spacing on each side.
- Add a pair of stone lion statues flanking the gate. Position each on the base platform sides, ensuring they face outward at a slight angle. Align them parallel to the platform’s diameter for symmetry.
- Arrange the round wooden table with a red cloth at the center. Snap its legs into the floor grid and align the tablecloth with the colored floor ring beneath.
- Place six small wooden stools evenly around the table. Ensure each stool is equidistant from its neighbors and faces toward the table’s center for aesthetic balance.
- Set vases, a teapot, and tea cups on either side of the table. Position two tall blue-and-white vases against the inner wall, and arrange the teapot and tea cups on small saucer plates.
- Add decorative items: a fruit bowl and a potted plant near the window. Position both flush on the window sill, with slight rotations suggesting dynamic features.
Notes & Precautions
- Use the grid-based placement system to ensure accurate positioning. Toggle the grid and snap settings if items aren’t snapping correctly.
- Avoid overlapping or intersecting objects as they can cause visual glitches. Double-check from multiple camera angles to prevent clipping or shadow artifacts.
- Focus on perfect placement and remember to save progress frequently to avoid repeating steps after an error.
Tips & Tricks
- Use the game's align and distribute tools to speed up the placement of symmetrical objects.
- Adjust height snaps to position smaller items like the fruit bowl with precision.
- Customize camera hotkeys for quick switches between different views to verify alignment.
- Experiment with minor offsets and subtle rotations for a handcrafted feel.