Dreamy Room Level 170 Walkthrough & Guide
Welcome to the Dreamy Room Level 170 walkthrough. This guide will assist you in creating the perfect cozy sushi bar ambiance by providing a detailed step-by-step approach to achieve precisely this thematic setup.
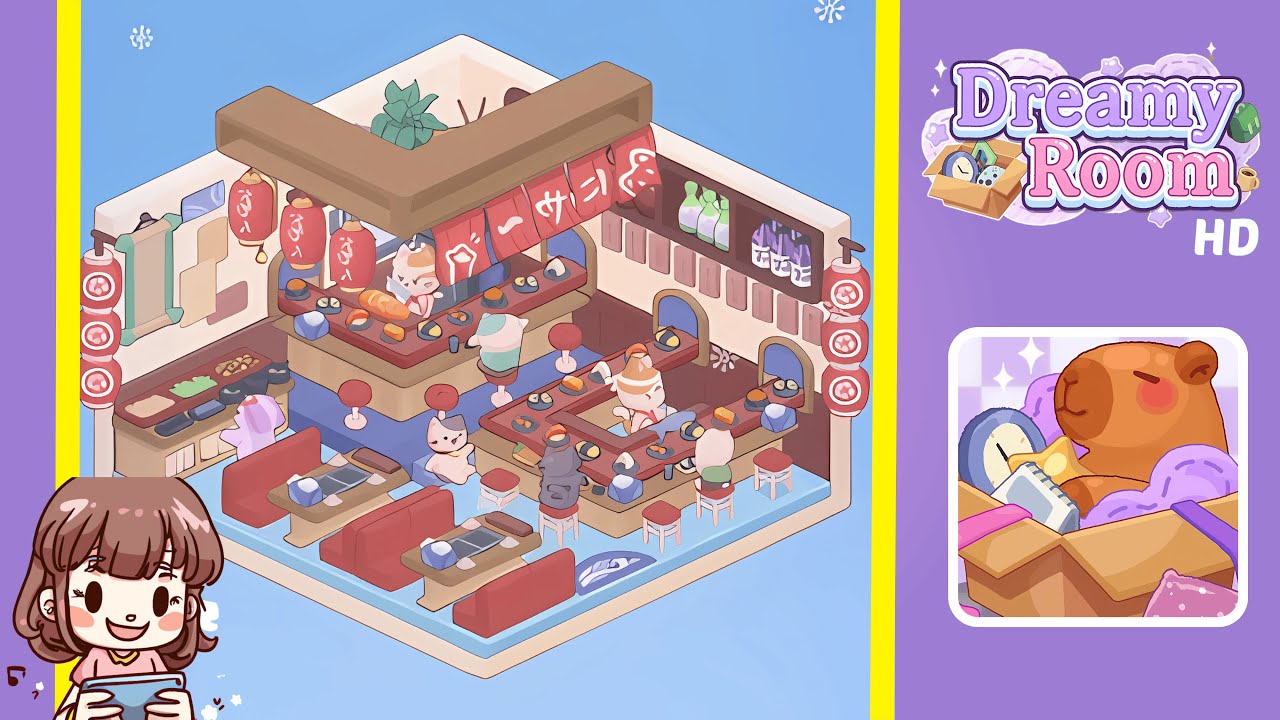
Step-by-Step Guide
- Place the wave-patterned floor tile in the center of the room, aligning the light-blue semicircles so that they extend seamlessly from left to right and the curved arcs point toward the front edge. Ensure the tile is flush with both back walls to form a solid foundation.
- Install the L-shaped sushi bar counter snugly into the back corner junction, ensuring the warm brown base and the reddish-brown countertop form an inner U shape. Attach the wooden canopy beam flush with the top of the beige walls, precisely mirroring the angle of the corners.
- Add bar stools and booth tables. Position the seven red-cushioned bar stools around the sushi bar counter and set the three booth tables with induction cooktops in the bottom-left quadrant, ensuring precise placement for a bustling sushi service atmosphere.
- Hang decorative elements: hang five evenly spaced red cylindrical lanterns under the canopy beam, drape red sushi banners, attach a vertical scroll and paper notes on the left wall, and mount a sake bottle shelf on the right wall. Tuck a potted plant behind the back-left counter section.
- Arrange sushi plates, utensils, and character figures. Stage a variety of sushi plates and accessories, then position two cat sushi chefs and four cat customers to create a lively, interactive scene.
Notes & Precautions
- Grid Snapping: Ensure every object aligns correctly on the invisible grid to prevent misalignment.
- Rotation Lock: Be careful with the rotate tool, as orientation locks upon confirmation.
- Undo Option: Plan placements carefully, especially for large structures, as unlimited undo is not available.
- Item Overlap: Prevent item overlap by following the sequence closely, ensuring snap-points are unblocked.
Tips & Tricks
- Work from Back to Front: Sequence your construction from flooring to décor to maintain clear snap-points.
- Use the Preview Tool: Preview object footprints before placement, especially in tight spaces.
- Save Early, Save Often: Make incremental saves to revert to earlier setups if needed.
- Color-Coding: Familiarize with color palettes to accelerate object selection.