Dreamy Room Level 174 Walkthrough & Guide
Complete Dreamy Room Level 174 by transforming an ordinary space into a charming mini-cinema with precise placements and themed decorations. Follow this detailed guide to perfect every corner of your cinematic haven.
Step-by-Step Guide
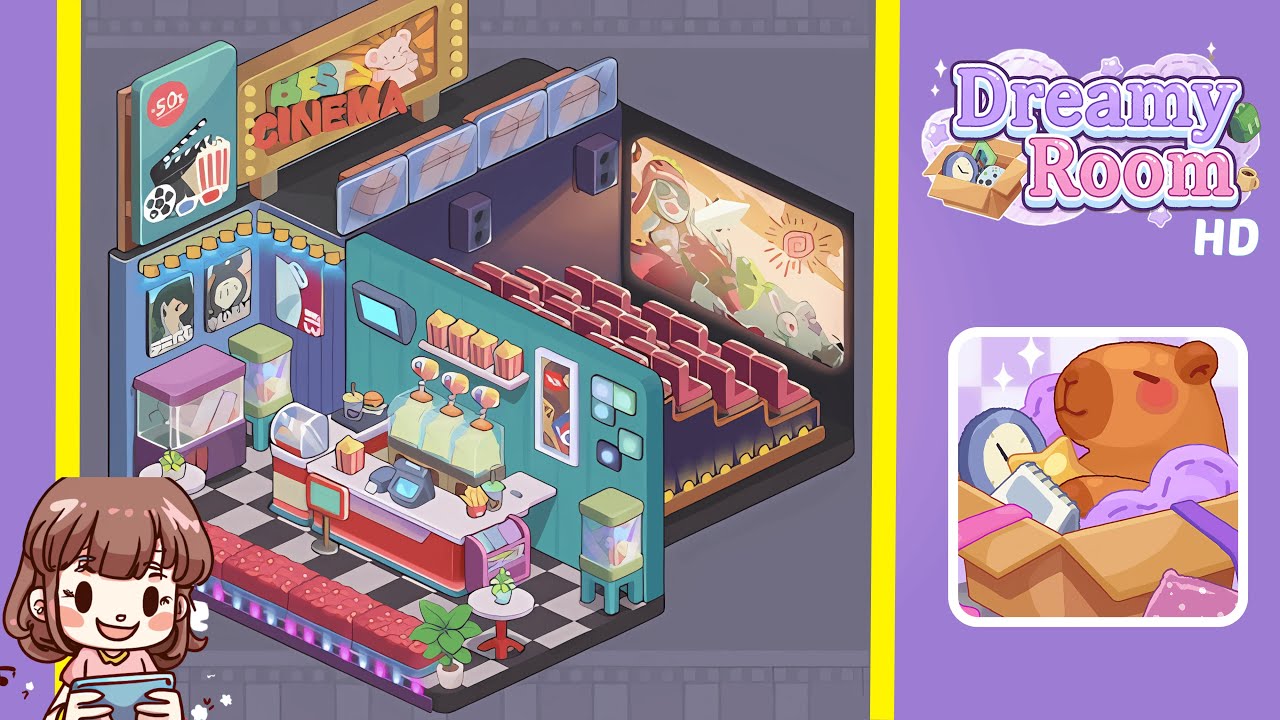
- Place the black-and-white checkered floor tile in the lower-left quadrant. Open your inventory and select the large checkered floor tile. Ensure it sits flush against the left wall edge and bottom boundary with the alternating squares facing upward. Rotate as needed to align with the room’s corner and eliminate any visible gaps. Do not overlap the future concession stand area.
- Place the teal partition wall behind the concession area. Select the tall teal panel from the "Walls" tab and position it immediately along the back edge of the checkered floor. Rotate the panel so its hinge aligns with the left corner. Lock it in place to create a crisp vertical boundary crucial for upcoming decorations.
- Install the dark purple back wall and mount speakers and the big screen. Pick the dark purple wall panel and attach it to the right side of the teal partition. Snap the panel into place, select the widescreen movie display asset, and drag it onto the purple wall. Add two black speaker boxes on each side of the screen, ensuring symmetrical alignment without overlapping the floor.
- Place the raised seating platform and attach the red theater seats. Grab the modular raised platform piece and snap it into the right-center area, flush against the purple back wall. Position three red cushioned theater seats in a straight line at the platform's front edge and add a second row behind, offset by half a seat’s width for a staggered look.
- Position the concession stand counter and the small signboard. Select the red-and-white counter piece and drag it onto the checkered floor, with the cashier’s register facing the room's center. Ensure enough clearance behind the counter. Place the menu signboard on a post to the left of the counter's front corner.
- Install wall decorations: posters, vending signage, and marquee board. Embellish the teal partition with three framed movie posters and add the tall vending machine poster on the partition’s right side. Mount the giant gold marquee sign above the teal wall, making sure the bulbs line up perfectly.
- Place machines and snack accessories: candy crane, gumball machines, mini-fridge, popcorn dispensers, snack trays. Snap the candy crane game into the corner nearest the teal wall and add two pastel gumball machines on either side. Tuck the mini-fridge behind the concession counter, place popcorn dispensers atop the counter, and add snack trays.
- Add seating accessories: LED-lit bench, small tables, and potted plants. Place the LED-lit bench at the front edge of the checkered floor and small round tables at each end. Position a succulently and leafy potted plant on each table for a cozy atmosphere.
Notes & Precautions
- Object Overlap: Overlapping any objects can prevent future snapping. Use the "nudge" tool to adjust placements.
- Rotation Accuracy: Ensure walls and signs are rotated accurately to maintain alignment.
- Snap Grid: Use the grid snap for aligning small decorative items precisely.
- Undo Limit: Be mindful of the 10-action undo cap. Plan moves and save progress often.
Tips & Tricks
- Layering Order: Place large backdrops first, then mid-sized structures, and lastly small décor items.
- Use Angle Lock: Engage this feature when rotating signs and posters for perfect alignment.
- Duplicate Quickly: Use the duplicate shortcut (Ctrl+D) after placing one gumball machine to save time.
- Color Consistency: Use the on-screen swatch tool to ensure cohesive color matching.