Dreamy Room Level 172 Walkthrough & Guide
In Dreamy Room Level 172, create a harmonious room by following precise placement instructions to arrange furniture and decorations. Start with the central base platform, and proceed through carefully aligned steps to achieve the level's serene design.
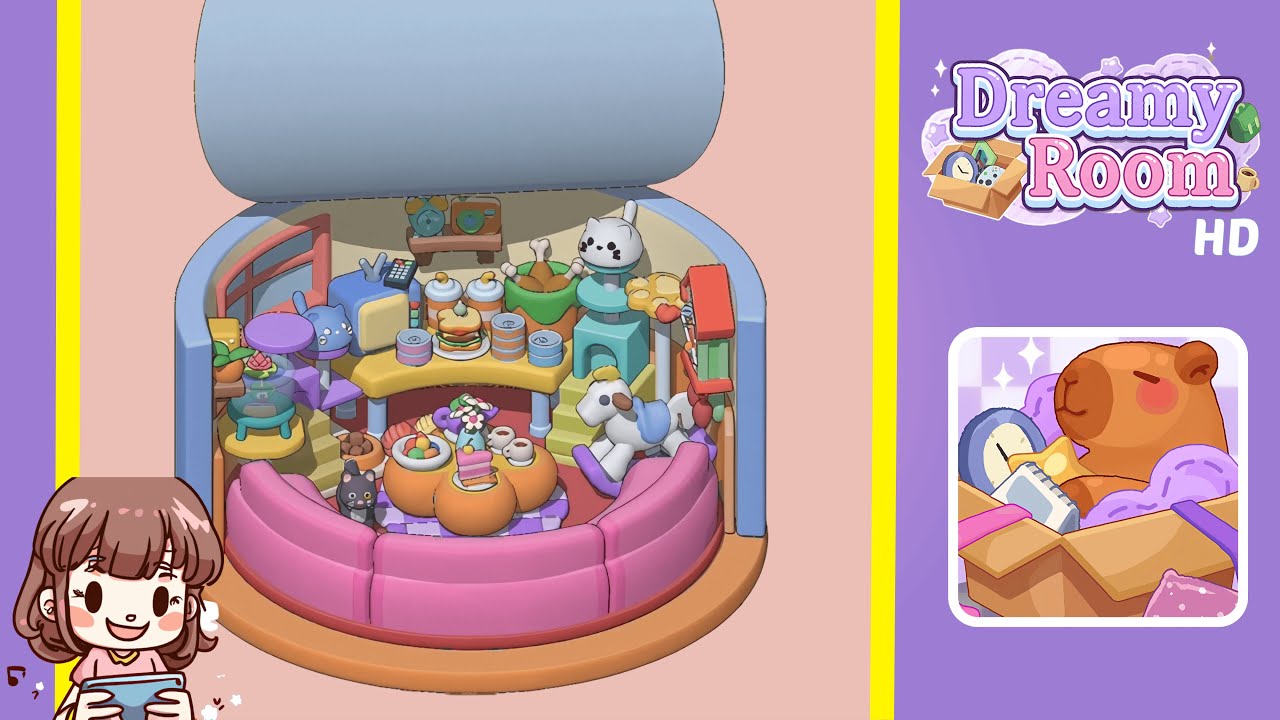
Step-by-Step Guide
- Place the orange base platform at the center of the room's floor grid. This will serve as the foundation for the entire design. Ensure it is perfectly aligned with the room's center marker.
- Attach the two blue side panels to the left and right sides of the orange base at the 9 and 3 o'clock positions, respectively. Insert a transparent midwall segment between them for structural integrity.
- Position the blue lid cover on top of the enclosure, making sure it aligns flush with the inner rim to create a calming overhang.
- Arrange the pink cushioned seating segments around the inner edge of the base. Each piece must seamlessly connect to form a continuous sofa.
- Place the main accent pieces: a white rocking horse on a green platform at 4 o'clock, a cat head sculpture on a pedestal at 2 o'clock, a set of chicken drumsticks, and two pastel baby bottles nearby.
- Position auxiliary collectibles: a brown mini bench at the center back of the yellow platform, with a vintage alarm clock and miniature camera on top. Add a turquoise terrarium and a pink lotus pot on the right inner shelf.
- Add the central pumpkin coffee table in the middle of the seating circle. Ensure its stem points back and its legs straddle the cushion tie-in, then arrange a vase, fruit bowl, and tea cups on it for final decoration.
Notes & Precautions
- Use on-screen grid overlays to guide the alignment of the base, walls, and lid. Wait for a confirm click when placing items.
- Handle transparent midwall sections gently to avoid popping them out unintentionally.
- Utilize edit mode for adjustments to save progress and prevent unnecessary deletions.
- Remember to frequently save your layout to avoid losing progress.
Tips & Tricks
- Use outline mode to preview object placements before finalizing their snap positions to save time.
- Group similar items off-screen to streamline alignment and placement.
- Utilize rotation shortcuts for accurate five-degree adjustments.
- Hold transparent panels until a distinct snap sound is heard to ensure proper alignment.
- Familiarize yourself with save slots to revert to earlier progress if needed.