Dreamy Room Level 246 Walkthrough
Welcome to the guided walkthrough for Dreamy Room Level 246. Follow each step meticulously to create a harmonious and immersive juicery setup.
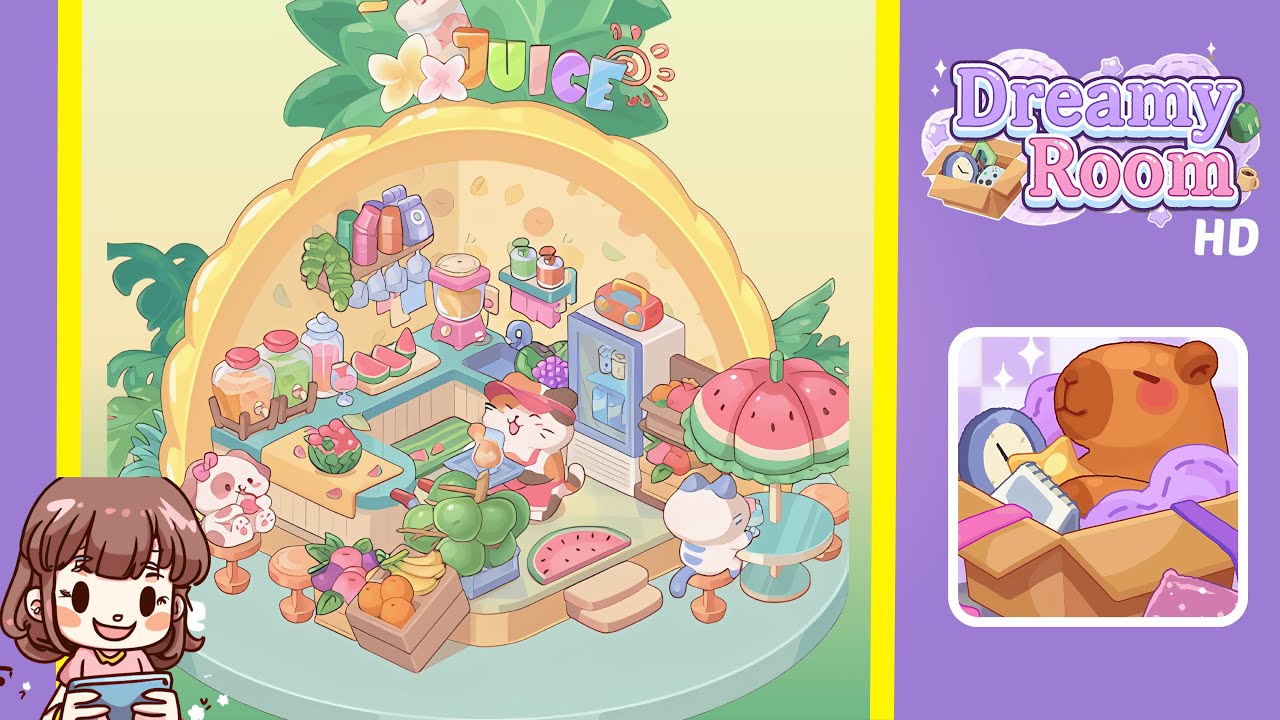
Step-by-Step Guide
- Place the L-shaped counter on the center platform. Ensure it is centered on the checkered floor, with the longer wing following the left panel of the pineapple-shaped dome and the shorter wing extending to the right. Proper alignment here will establish the foundation for subsequent décor.
- Arrange the beverage dispensers and fruit serving station on the left counter area. Position the trio of glass dispensers on the wooden rack with taps facing outward, and align a cutting board with watermelon slices nearby. Complement the setting with a melon bowl and a serving glass with a striped straw.
- Install blending and juicing machines along the back wall. Position the pink blender in the center of the counter's back row, align the juicing machine beside it, slide the sink slightly left of center, and place the pastel mini-fridge with a radio on top into the rightmost alcove.
- Add fruit crates, metal baskets, and greenery around the counter. Place a wooden crate of fruit and a round metal basket of apples at specified positions. To balance, place succulents and leafy plants on the left, ensuring they are near the platform edge.
- Set up seating with an umbrella table on the right floor. Position the watermelon-pattern umbrella and teal round table under it, place bar stools appropriately, and add another stool opposite the umbrella station.
- Strategically place characters to bring the scene to life. Seat a puppy with a pink bow on the left bar stool, a cat barista behind the counter, and a striped feline guest under the umbrella, ensuring their positions align with the floor grid.
Notes & Precautions
- Align placements precisely with the checkered grid and curved dome seam to avoid visual misalignment.
- Be cautious when rotating items to prevent clipping issues with the dome wall or platform edge.
- Confirm heavy items like dispensers rest fully on the platform to avoid floating.
- Use the undo feature to correct any overlapping items.
- Take snapshots of progress to recover from placement errors easily.
Tips & Tricks
- Utilize batch placement for efficiency by selecting multiple items and placing them at once.
- Enable grid snapping to ensure precise object placement.
- Use rotation presets for consistency, especially for angled elements.
- Place larger backdrop items before background foliage to avoid layering issues.
- Regularly switch to free camera view to check for misaligned items.