Dreamy Room Level 259 Walkthrough
Welcome to the comprehensive guide for Dreamy Room Level 259. Follow this walkthrough to strategically place each item and create the perfect seaside scene.
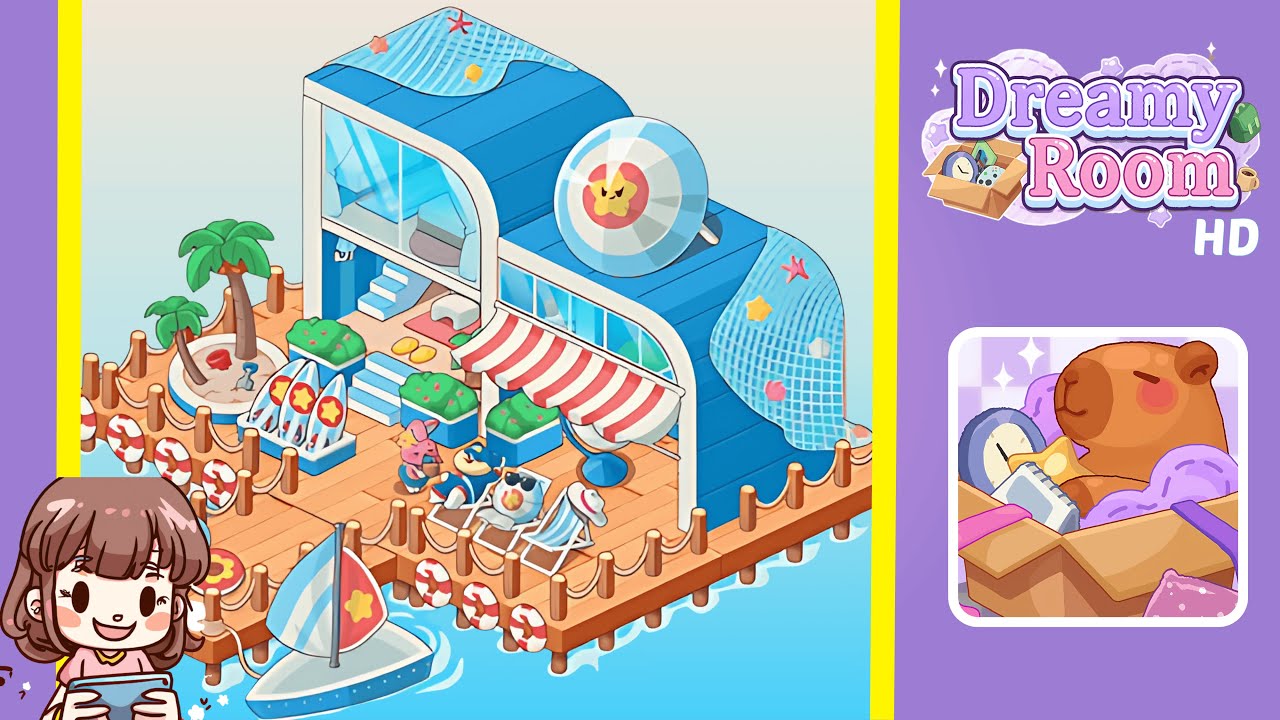
Step-by-Step Guide
- Begin by positioning the large two-story blue-roofed beach house squarely in the middle of the wooden dock. Ensure the curved blue roof faces the water side, and the star emblem decoration is on the roof’s right corner. Both floors must align with the dock planks, leaving equal space on all sides.
- On the left rear side, place the small sandbox area with two palm trees embedded. Ensure the sandbox is circular and contains a red bucket and small shovel. The edge should be flush with the dock’s posts, leaving space for life preserver decorations.
- Position the surfboard rack in front of the palm tree area, close to the central house wall. Ensure the rack holds three white surfboards with red stars and blue outlines, angled for a dynamic look.
- Arrange two reclining beach chairs in front of the house’s right side, angled toward the water. Place characters on the chairs and a pink character nearby with a drink. Ensure the awning extends enough to shade this area.
- Line the dock edges with life preservers attached to posts. Add floating rings, a striped beach ball, and a pool ring on the lower left dock extension. Ensure precise alignment of lifebuoys.
- Place the small sailboat off the front dock’s edge on the lower left side. The sail should display a matching motif, and remember to add water ripples and wave reflections to complete the ambiance.
Notes & Precautions
- Always start with the largest structure (the beach house) before placing smaller decorative elements.
- Ensure dock edges remain clear for safety gear placement; misalignments may require redo of steps.
- The perspective is angled, so objects might appear skewed; match them to reference shadow lines.
- Avoid crowding the leisure area; space is important for a balanced look.
- Water elements must remain outside the dock’s perimeter to avoid placement errors.
Tips & Tricks from Top Player
- Use the dock's plank pattern as a grid to align objects perfectly.
- Place similar-themed items in clusters for a cohesive visual story.
- Start from the back and work your way to the front to avoid obstructing your view.
- If uncertain about placement, hover the object and check shadow alignment before dropping it.
- Maintain color balance to enhance the final aesthetic.