Dreamy Room Level 262 Walkthrough
Welcome to the Dreamy Room Level 262 walkthrough, where you'll transform a simple space into a fully functional and charming miniature hospital. Follow these step-by-step instructions to perfectly arrange each floor with precision and style.
Step-by-Step Guide
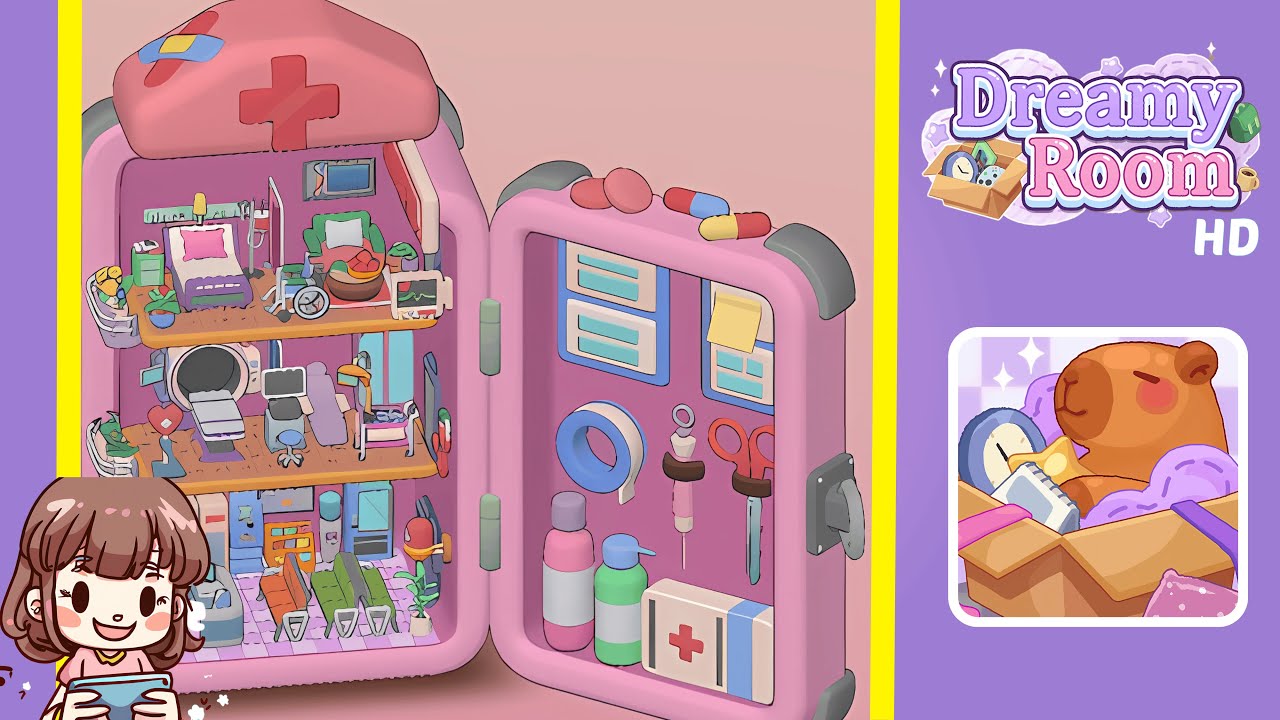
- Place the Reception and Waiting Area on the Bottom Level: Begin with the ground floor by arranging lockers along the left rear wall. To the right, set up a reception desk with a computer monitor. Arrange seating with three rows of orange, green, and gray chairs facing left. Add a potted plant with tall leaves at the lower right corner and place a water dispenser to the left of the chairs against the wall.
- Build the Second Floor Medical Examination Area: On the second floor, situate an MRI-like machine to the left with a potted plant in front. Center the room with a computer desk, swivel chair, and monitor facing right. Place a pink hospital bed next to an IV stand on the left and hang a stethoscope on the far right wall alongside a smaller bed.
- Arrange the Top Floor Patient Rooms: On the third floor, position a bed with pink bedding and a medical drip stand. Add a bedside table with a plant on top. Set a wheelchair next to a table with a fruit basket. Above the door, attach a "HOSPITAL" sign, and on the right wall, mount a heart-rate monitor.
- Decorate the Inside of the Door with Medical Tools: On the right door, position three capsules and two oval pills at the top, followed by medical charts and a sticky note. Add a roll of blue tape and a vertical syringe. Place scissors on the right, with two bottles and a first-aid kit at the bottom.
- Add Final Touches and Cross-Check Placement: Ensure all elements are placed precisely according to the reference. Check alignment of plants, devices, beds, and tools, making adjustments as necessary for accuracy.
Notes & Precautions
- Avoid misplacing small items, especially on the door.
- Layer items correctly, with background elements placed first.
- Pay attention to object color matching.
- Maintain isometric perspective consistency.
- Test fit items before finalizing their placement.
Tips & Tricks
- Work floor-by-floor to maintain the flow and accuracy.
- Group similar items together in your inventory.
- Utilize symmetry for a pleasing design.
- Zoom in for detailed item placement.
- Save progress and recheck alignments before finalizing.