Dreamy Room Level 142 Walkthrough
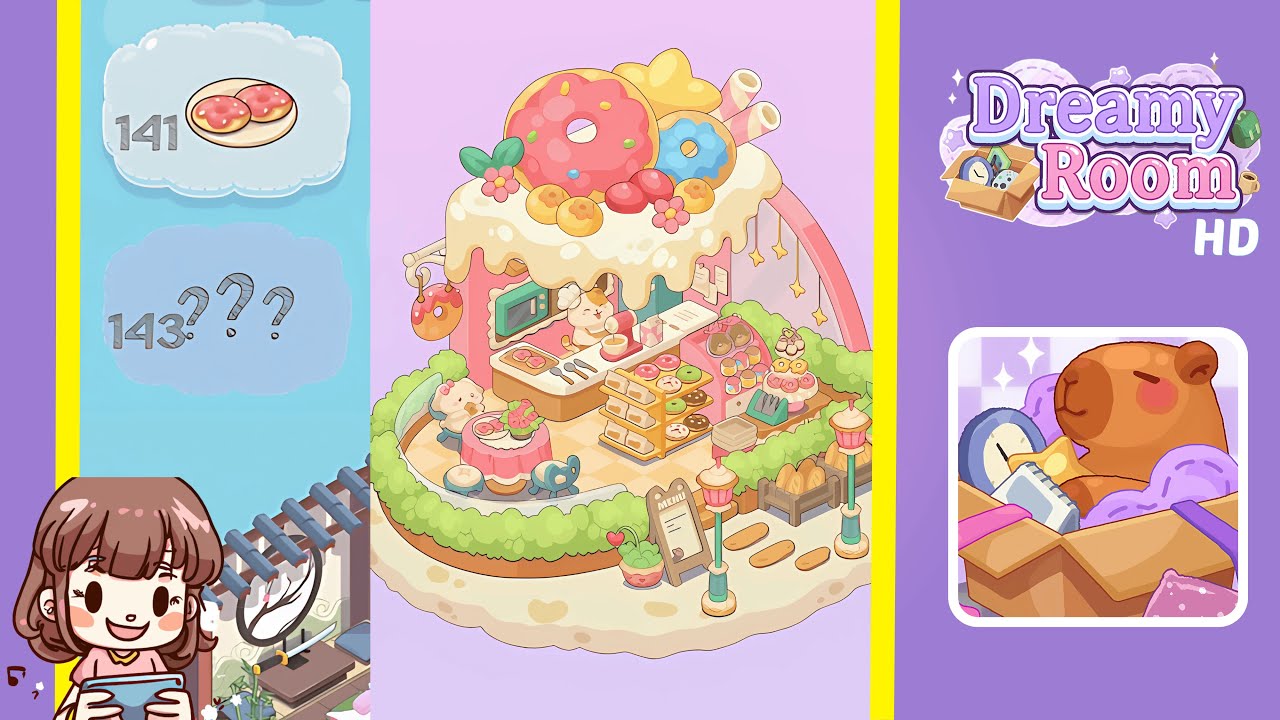
Welcome to the guide for Dreamy Room Level 142, where you'll transform a simple room into a charming donut shop. Follow these steps carefully to ensure everything is aligned perfectly for the final display.
Step-by-Step Guide
- Place the Checkered Floor in the Center. Begin by selecting the checkered floor piece and positioning it in the exact center of the room, aligning it perfectly with the boundaries.
- Place the Pink Walls Around the Edges. Position the pastel pink walls along the back and right edges, forming a seamless right-angle corner and aligning with the checkered floor.
- Place the Window Panel on the Left Wall. Snap the window panel into the slot on the left pink wall, ensuring it's level and inset to give the impression of a real window frame.
- Place the Counter and Espresso Machine in the Center. Set the white countertop two tiles from the back wall, facing forward, and position the red espresso machine to the right, angled towards the center.
- Place the Barista Cat and Seating Area on the Left Side. Position the barista cat on the left side of the counter, then arrange the round table and green chairs to the room's far left.
- Place the Donut Display Rack Near the Counter’s Right Side. Add the donut display rack to the right of the counter and arrange the donuts by flavor on each tier.
- Place Smaller Decor and Wall Items Above the Counter. Affix the microwave and notes to the left wall above the counter and arrange additional items neatly on the counter's left side.
- Place the Dripping Icing Roof and Top-Tier Treats. Install the icing roof above the walls, then add donuts and sweets, adjusting for natural placement.
- Place the Entrance Menu Board and Potted Plant at the Front. Position the menu board at the entrance's front and place the potted plant beside it, ensuring both rest naturally on the ground.
- Add Surrounding Plants, Lampposts, and Bread Crates Along the Edges. Place hedges, lampposts, and bread crates around the room's edges, ensuring proper alignment and spacing.
Notes & Precautions
- Precise alignment is crucial; rushing can lead to misalignments.
- Double-check overlap and grid alignment for large items like floors and walls.
- Curved walls must be pixel-perfect to avoid gaps.
- Misplaced window panels can disrupt wall symmetry.
- Lampposts and display racks cast shadows; misalignment is easily visible.
- Save progress after each major placement to prevent data loss.
Tips & Tricks
- Study the reference image to create a mental map before starting.
- Toggle the grid overlay to aid item alignment.
- Group similar items in your inventory for easier sequential placement.
- Rotate sweet treats on the icing roof slightly for natural nesting.
- If alignment issues occur with walls, use a temporary guide object.