Dreamy Room Level 356 Walkthrough
Transform your scene into a cozy paradise in Dreamy Room Level 356 by carefully arranging all elements as per this guide. Follow these steps to create an enchanting edible world.
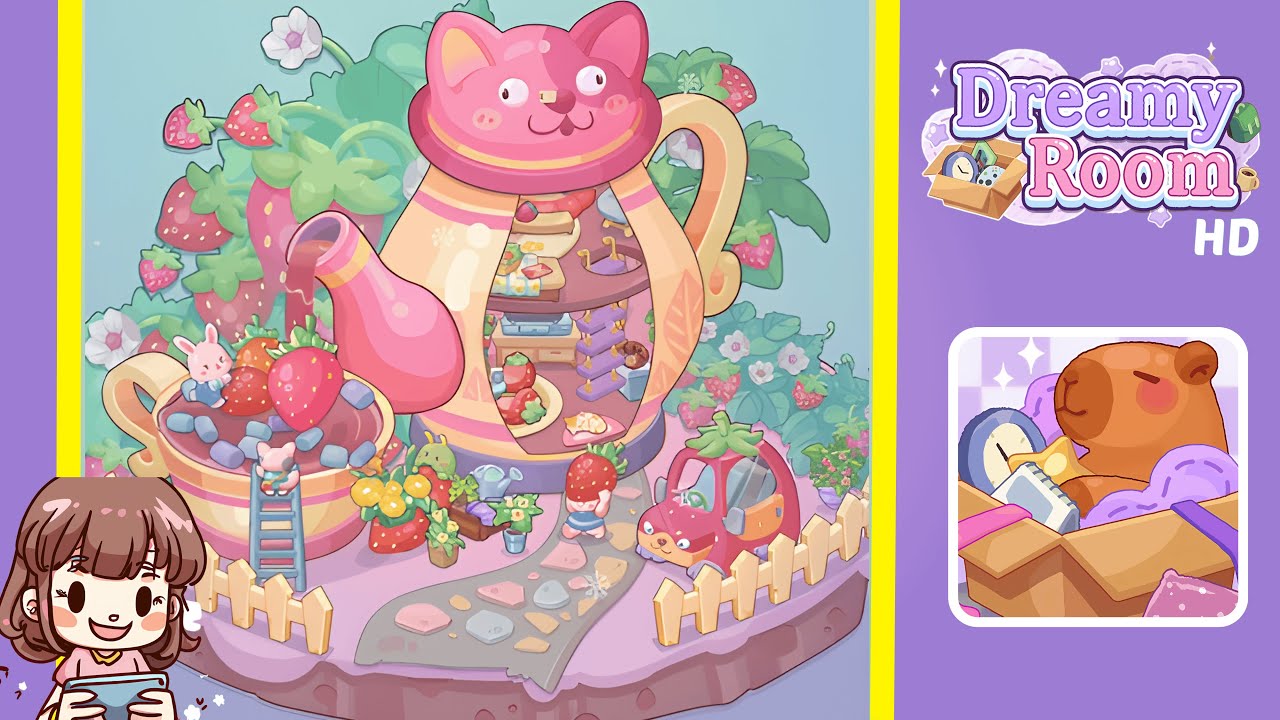
Step-by-Step Guide
- Place the round frosted base platform at the center of the canvas. Ensure its scalloped edge is fully visible and aligned with the canvas center, then lock the platform to prevent movement. Verify that the frosting’s shadow sits towards the bottom edge of the screen.
- Position the large cat-headed teapot slightly behind the foreground path on the platform center-right. Align the spout so it lightly overhangs the rim of the giant striped cup, and adjust as necessary to keep the interior shelves visible.
- Arrange the oversized striped cup in the left-front quadrant of the platform. Lean a small ladder against the cup's left rim, positioning a white bunny at the top rim and another climbing. Add floating elements like blue ice cubes and large strawberries into the cup.
- Plant the strawberry bushes and floral backdrop at the rear of the platform, ensuring foliage frames the teapot while keeping its silhouette distinct. Distribute individual strawberries and a couple of flowering vines appropriately.
- Create a pebble path from the center-front of the platform to the right-front for the strawberry car. Add picket fence pieces and place small planters and a watering can along the edges without interfering with the pathway.
- Position the strawberry-faced car on the right-front edge of the platform. Ensure it aligns with the fence and its shadow is grounded for realism. Arrange short fence posts to frame the scene effectively.
- Arrange shelves and decor, such as suitcases and a sleeping cat cushion, inside the teapot's visible belly. Use clipping masks to keep these items correctly positioned within the teapot’s interior.
- Add final elements like the player character in a strawberry hat, additional potted flowers, decorative stones, and finishing touches to the lighting for ambiance. Lock all grouped elements to prevent disruption.
Notes & Precautions
- Ensure foundation pieces like the platform and pathway are placed before centerpieces to avoid occlusion.
- Clip interior elements to the teapot’s group to prevent items from protruding outside.
- Maintain perspective by scaling stones larger in the foreground and plants smaller in the background.
- Be wary of overlapping visuals; adjust rotations if necessary to reveal interiors correctly.
- Save frequently after significant changes to prevent loss of progress due to misalignment.
Tips & Tricks
- Create groups early for main components like the cup, ladder, bunnies, teapot interior, and car with fence to preserve layout when tweaking.
- Use temporary transparent guides to outline paths and fences for balanced placement.
- Work from large shapes outward to smaller elements to keep the scene cohesive.
- Apply subtle rotation to uncover interior details without visual overlap.
- Match colors to the reference for consistency and accurate replication.