Dreamy Room Level 131 Walkthrough
Welcome to the complete walkthrough for Dreamy Room Level 131. This guide outlines every step to take in Dreamy Room Level 131 to decorate the tranquil living space and achieve the beautifully detailed scene. Dreamy Room Level 131 draws you into mindful decoration without timers or pressure; the game's main challenge is determining the correct placement for each object, so follow each instruction carefully to ensure precision in your final design. This walkthrough integrates all the precise locations and placements required to transform the empty room into the fully decorated Dreamy Room Level 131.
Step-by-Step Guide
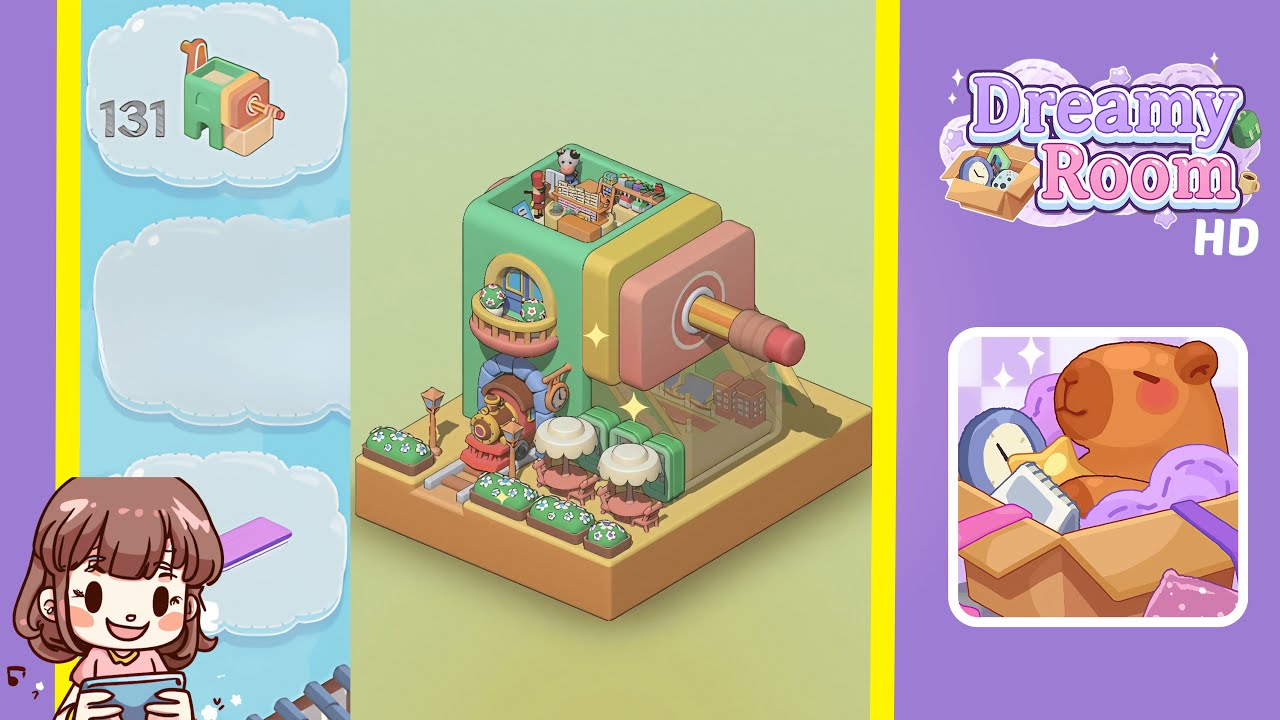
- Place the pastel yellow base platform in the center of your workspace. Ensure it lies flat without any wobble to set a stable stage for every other decorative piece.
- Place the pastel green room shell onto the base platform. Align the shell's legs with the base platform's recesses for a secure fit and structural integrity.
- Place the pastel yellow accent frame around the front opening. Ensure the frame is perfectly level to maintain clean lines for future modules.
- Place the pastel pink front panel in the accent frame opening. Slide it smoothly and ensure it clicks into place for a stable construction.
- Insert the pencil lever into the circular hole on the front panel. Check that it is perpendicular to the panel to avoid interference with other elements.
- Attach the balcony module to the front-left niche and place the twin topiary pots. Ensure the balcony clicks into place above the yellow accent frame.
- Install the arch entrance and the train engine centerpiece into the front opening. Align the arch's details and confirm the train rolls smoothly.
- Arrange the lampposts and flowerbeds symmetrically around the front entrance to enhance visual harmony.
- Set up the café seating area with tables, chairs, and umbrellas on the right side. Ensure each piece is placed for a cohesive look.
- Attach the transparent sliding door and arrange the interior living room diorama. Align each piece for a cozy scene inside the room.
- Place the cow figurine, toy soldier, calendar rack, paint jars, and succulents on the top shelf. Position these elements for a balanced vignette.
Notes & Precautions
- Stable Foundation: Double-check your base and shell seating before moving on.
- Avoid Forcing Pieces: Verify surrounding components are flush before retrying.
- Symmetry Matters: Use subtle measurements to ensure alignment.
- Handle Clear Parts with Care: Slide gently to avoid scratches.
- Mind the Pencil Lever: Avoid over-rotating to maintain sliding door track integrity.
Tips & Tricks
- Pre-Sort All Pieces: Organize by color and type for efficient placements.
- Use a Flat Surface: Prevent unwanted tilts by working on a level surface.
- Light Source Alignment: Position lamps to ensure clear part visibility.
- Dry-Fit Before Click: Gently check fit before committing to placement.
- Rotate the Workspace: View from different angles to catch misalignments.