Dreamy Room Level 146 Walkthrough
Embark on a delightful journey in Dreamy Room Level 146, where your task is to transform an empty wooden expanse into a vibrant and cozy sanctuary. Follow this detailed guide to ensure every element is perfectly placed and aligned, paving the way for a harmonious and welcoming environment.
Step-by-Step Guide
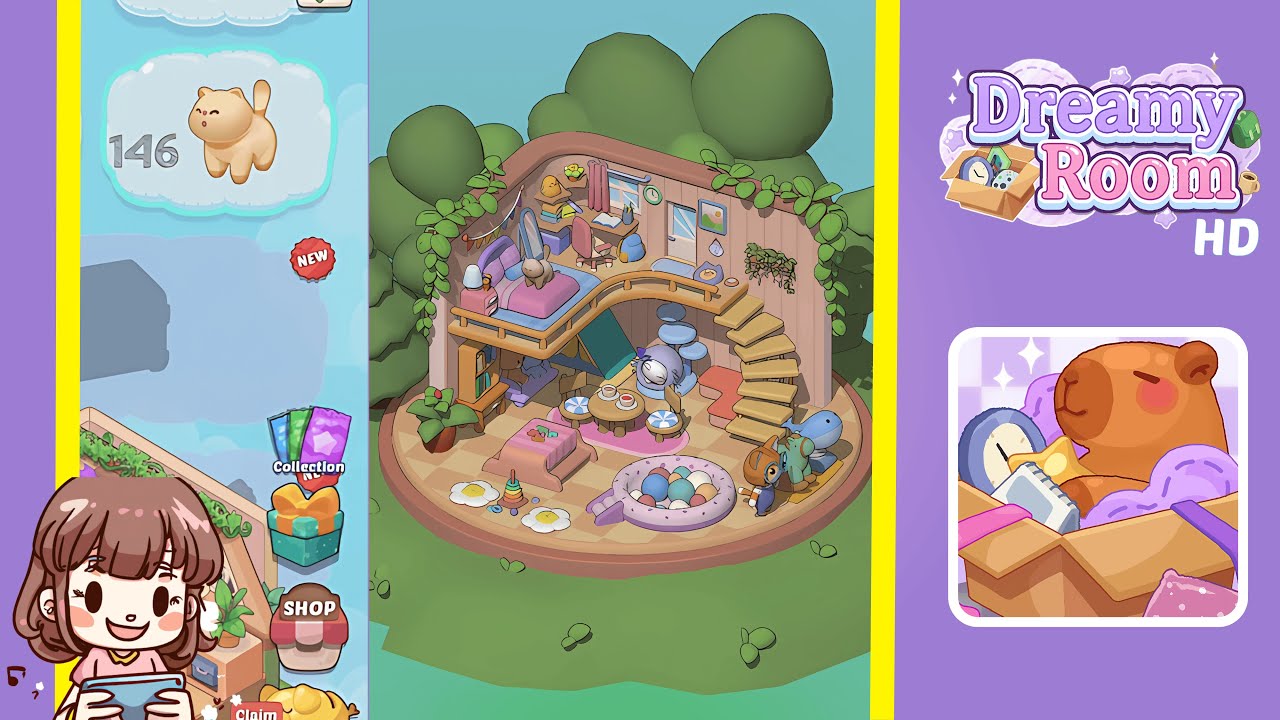
- Begin by placing climbing vines on the back wall. Select the long vine asset, align it along the top ledge of the curved back wall, and mirror the placement for symmetry. Ensure that the vines drape naturally without clipping through the wooden panels.
- Install the upper loft railing and bed. Place the pale lavender bed frame on the upper platform only after positioning the curved railing to avoid collision errors. Ensure the mattress aligns snugly with the railing for a balanced look.
- Add the bedside table, lamp, and bunny plush. Position a small bedside table beside the bed, followed by a lamp on its edge. Arrange an adorable plush bunny atop the bed.
- Set up the loft desk area with the desk, chair, books, and plant. Snap the wooden desk against the back wall, place a swivel chair underneath, and decorate with an open book and pencil cup. Anchor the small potted plant above the desk.
- Hang the window and curtain, then place the door mat. Install the arched window on the right wall, attach drapery above it, and lay the door mat to complete the entrance.
- Affix wall decorations: clock, landscape painting, and cat planter. Place the clock above the desk, the painting to the left of the window, and the planter on the top right corner of the wall.
- Build the spiral staircase connecting lower and upper floors. Arrange individual wooden stair steps in a spiral pattern, ensuring the correct spacing for proper registration.
- Arrange the under-stairs reading nook with a bookshelf, tent, and lavender cushion. Position the bookshelf, place the play tent against the wall, and add the cushion with a bunny inside the tent.
- Position the round table, stools, and tea cups at the center. Arrange the table and stools around it, then add tea cups for a balanced look.
- Lay floor mats, stacking toy, and petite pink bench. Position the daisy mats, arrange the stacking toy, and center the bench behind the mats.
- Set up the ball pit filled with colorful spheres. Align the pit on the lower floor, scatter balls inside, and ensure they settle naturally.
- Place the character figurines: cat with glasses and green dinosaur. Position the cat by the ball pit and the dinosaur next to it, confirming proper alignment.
Notes & Precautions
- Ensure each asset fully snaps into place to avoid blocking future placements.
- Be mindful of collision boundaries, particularly with the staircase, vines, or shelving.
- Avoid overcrowding to maintain aesthetic balance and prevent overlap penalties.
- Orbit the camera periodically to check for clipping issues.
- If an item doesn't register, retry from a different angle, especially on curved rails.
Tips & Tricks
- Use slow, deliberate drags for precise alignment.
- Orbit before confirming placements to catch potential issues.
- Lock placements as soon as you get confirmation feedback.
- Group similar actions to streamline workflow.
- Save often or create checkpoints after major sections.