Dreamy Room Level 160 Walkthrough
Welcome to the Dreamy Room Level 160 walkthrough. In this level, you'll transform an empty isometric space into a cozy, multi-layered dream house that evokes life's tender moments. You're invited to place each decorative item in just the right spot to recreate a perfect sanctuary without any timers or pressure. The main challenge is figuring out the correct order and precise alignment for every piece, from the top-floor bedroom down to the lush garden retreat. Let's dive into the step-by-step guide for Dreamy Room Level 160.
Step-by-Step Guide
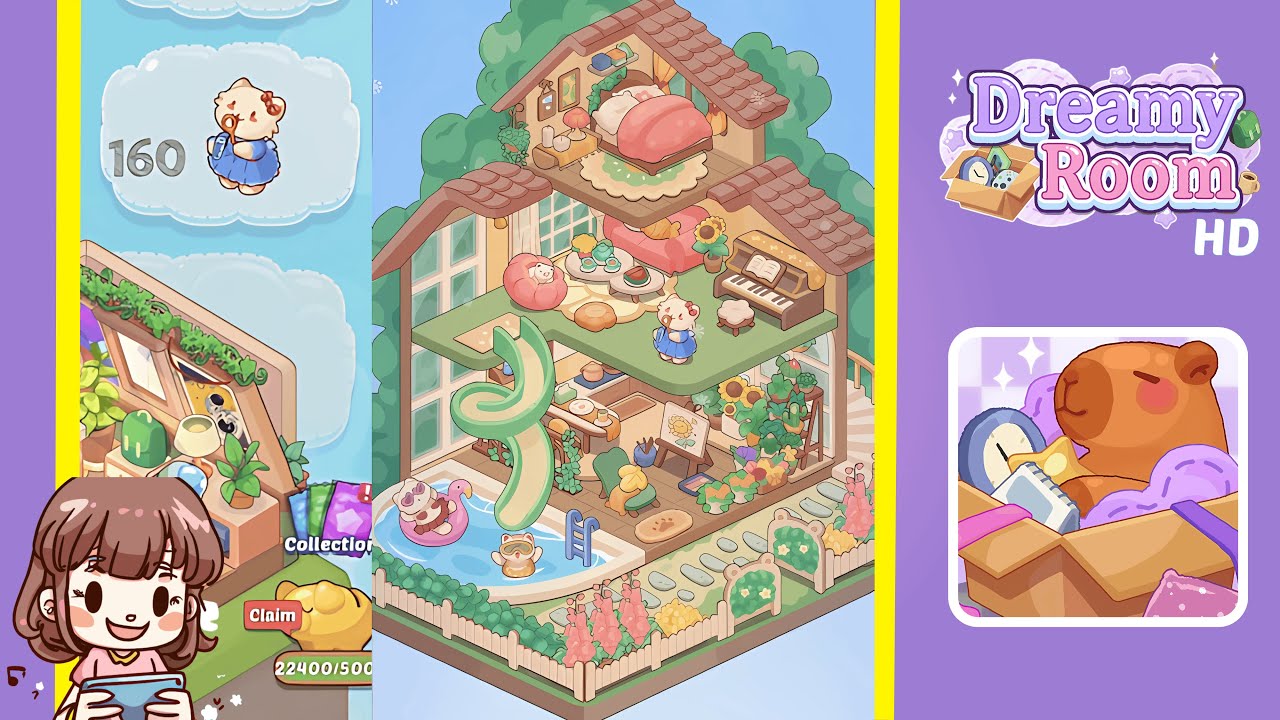
- Prepare the Top-Floor Bedroom: Start by focusing on the top-floor bedroom. Position the wooden bed frame against the center of the back wall, slightly left of the roof’s peak. Arrange the pink duvet and floral pillow on the bed to align perfectly with the frame edges. Center the scalloped-edge rug beneath the bed, ensuring it matches the floor grid.
- Place the Nightstand and Accent Pieces: Add the bedside decor by selecting the small wooden nightstand with its yellow cloth drape, placing it to the left of the bed. Carefully align two delicate white items - a tall cylindrical candle and a smaller decorative box - on the nightstand. Add the pink mushroom-shaped lamp on the front-right corner of the nightstand.
- Hang Wall Art, Planter, Shelf, and Curtains: Focus on the back wall accents by hanging twin picture frames — one oval portrait and one rectangular green-leaf print — side by side above the nightstand. Install the hanging planter left of the frames and yellow drapery panels on the right-side windows, using red sashes.
- Arrange the Cozy Seating and Tea Table: Transition to the middle floor by adding seating and a tea station. Place the plush pink round armchair mid-floor. Position the white circular coffee table in front, adding a pastel green teapot, matching cups, and a watermelon-slice plate. Finally, include an orange flower-shaped floor cushion beneath the table.
- Set Up the Sofa, Fish Pillow, and Sunflower: Continue decorating with a red upholstered sofa against the right wall. Attach an orange fish-shaped pillow to the center of the sofa, and set a sunflower in a terracotta pot on the floor to the left of the sofa.
- Position the Piano and Stool: Add musical charm by placing the upright piano in the right corner. Align the brown piano against the rightmost wall, slightly overlapping the yellow star-patterned cloth with the windowsill. Place the small round piano stool in front of the piano keys.
- Install the Kitchen Counter and Cookware: Add the lower middle floor kitchen elements by placing the main countertop unit against the back wall. Align the sink to the left and the stovetop to the right. Add a cooking pot and a frying pan with an egg on the burners.
- Create the Art Corner: Setup the painting area by placing a wooden easel adjacent to the right window. Mount a vibrant sunflower canvas onto it, position a paintbrush holder to the left, and place an open palette tray in front.
- Add the Green Armchair and Throw: Personalize the studio space with a plush green armchair near the kitchen area. Drape a soft yellow throw over the chair's top left arm. Place a small paw-print rug in front of the chair.
- Install the Curved Slide: Enhance connectivity by adding a green S-shaped slide to the middle floor's left edge. Ensure the slide curves downward, aligning the bottom exit above the pool's center.
- Position the Pool, Ladder, and Floats: Create the pool area by adding the kidney-shaped pool tile piece below the slide exit. Position a small ladder on the pool's right side, a pink flamingo float on the left, and a bear figure with yellow goggles near the ladder.
- Landscape the Garden and Path: Complete the level by arranging garden details and a stone walkway. Place white picket fence panels along the room edges, add floral decorative arch panels, plant shrubs and colorful flowers, and lay gray stepping stones in a path through the garden.
Notes & Precautions
- Always double-check each piece’s grid placement to avoid misalignment.
- Beware of the game’s drag-and-drop mechanics which might auto-snap items and disrupt your layout.
- Thin decorative elements may clip through walls, so use zoom to ensure perfect alignment.
- Bundling too many objects can lead to overlapping and placement issues; proceed carefully.
- Some actions cannot be undone; consider manual saves if the feature is available.
- Ensure proper layering for transparent items and adjust rotations for overlaps.
- Use full-room mode previews after each floor is complete to catch issues across levels.
Tips & Tricks
- Plan your layout before placing items for smoother gameplay.
- Clear nonessential inventory items to easily locate key objects.
- Group related decorative assets in your menu for quicker access.
- Use preview mode to see interactions between shadows and existing pieces.
- Leverage the copy-paste feature for items like fence panels to save time.
- If alignment is challenging, enable the grid overlay in settings for guidance.
- Take breaks to maintain focus as the level demands a keen eye for detail.