Dreamy Room Level 173 Walkthrough
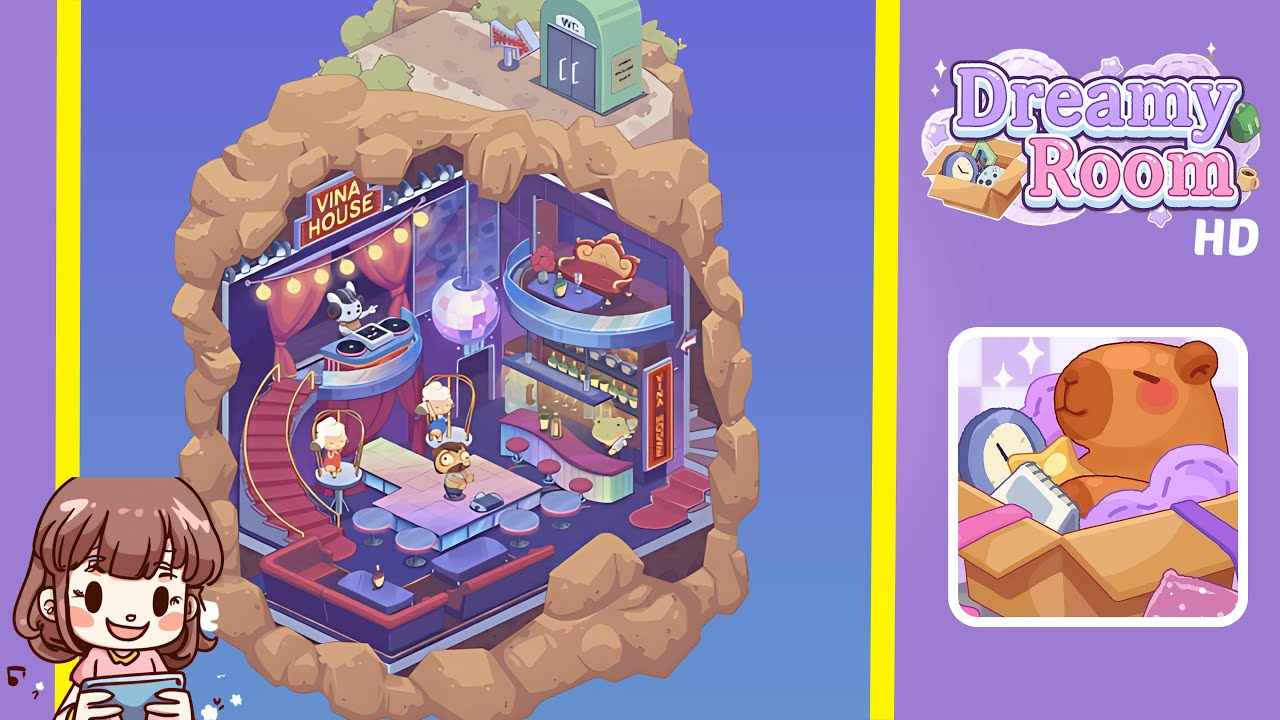
Welcome to Dreamy Room Level 173, where you'll transform a simple space into a thriving Vina House Bar. Follow this step-by-step guide to ensure every element is perfectly positioned for an immersive experience.
Step-by-Step Guide
- Place the "VINA HOUSE" Neon Sign in the upper-left corner of the room. Align the base flush with the top corner seam, ensuring the letters are horizontal.
- Hang the string lights along the rocky arch. Start at the leftmost peg above the neon sign and follow the arch contour, adjusting until the lights hang uniformly.
- Install the DJ booth platform on the left stage area. Align it with the floor's support pillars until the alignment indicator turns green.
- Position the DJ table and rabbit performer on the booth platform. Ensure the table is flush with the front edge and correctly position the rabbit character behind it.
- Hang the disco ball at the center of the ceiling. Adjust its position until the placement grid glows green, indicating it is perfectly aligned.
- Lay the curved catwalk walkway, starting from the DJ platform and connecting it to the bar area, following pre-laid floor rails.
- Assemble the central dance floor by fitting corner pieces into the lounge area cavity. Align with the tile pattern, rotating pieces if needed.
- Attach hanging swing chairs to the ceiling loops above the stage, ensuring they snap securely into place on either side of the DJ booth.
- Position dancing characters on the floor by placing sheep avatars on swing chairs and the moose-like creature at the center in front of the DJ platform.
- Assemble the bar counter and install the vertical "VINA HOUSE" sign on the right side, ensuring proper placement to trigger the neon flicker test.
- Arrange bottles, glasses, and stools at the bar, carefully positioning each item on indicated pads and shelves to prompt the bartender's greeting.
- Place the frog bartender in the small alcove beside the bottom shelf, ensuring correct alignment for her serving animations to activate.
- Install the mezzanine balcony and lounge set above the bar, positioning the golden sofa, table, flower vase, and wine glass correctly for a spotlight effect.
- Arrange the bottom-left lounge sofa and coffee table, aligning them with tile seams, and place a decorative bottle on the table's center panel.
- Place the exterior portable WC and arrow sign on the rocky plateau outside the main room, ensuring proper positioning for the immersive environment.
Notes & Precautions
- Precision Matters: Ensure every object snaps into its highlighted grid to activate animations. Misalignments can cause objects to clip or remain static.
- Order of Placement: Follow steps sequentially to prevent clipping issues. For example, place the neon sign before hanging lights.
- Rotation and Orientation: Pay attention to the correct rotation of floor pieces and rail segments. A red shadow indicates an incorrect orientation.
- Snap Indicators: Green halos indicate correct placement, while red halos suggest adjustments are needed. Utilize these visual cues effectively.
- No Timer Pressure: Feel free to pause, zoom in, and fine-tune each piece as needed, since there is no time limit.
Tips & Tricks
- Use the Zoom Feature: Take advantage of the zoom function to ensure perfect alignment, especially for DJ booth rails and mezzanine brackets.
- Toggle Grid View: Enable the placement grid to see subtle outlines and prevent misplacements.
- Batch Accessory Placement: Use "fast place" mode for accessories like bottles and vases to speed up the process after major structures are set.
- Leverage Undo: Utilize the undo button if an object fails to snap, providing a quick reset option.
- Preview Animations: Use the preview play button to confirm that all objects are moving as intended once placed.
- Save Frequently: Regularly save progress to prevent accidental resets, especially after completing major sections.