Dreamy Room Level 193 Walkthrough & Guide
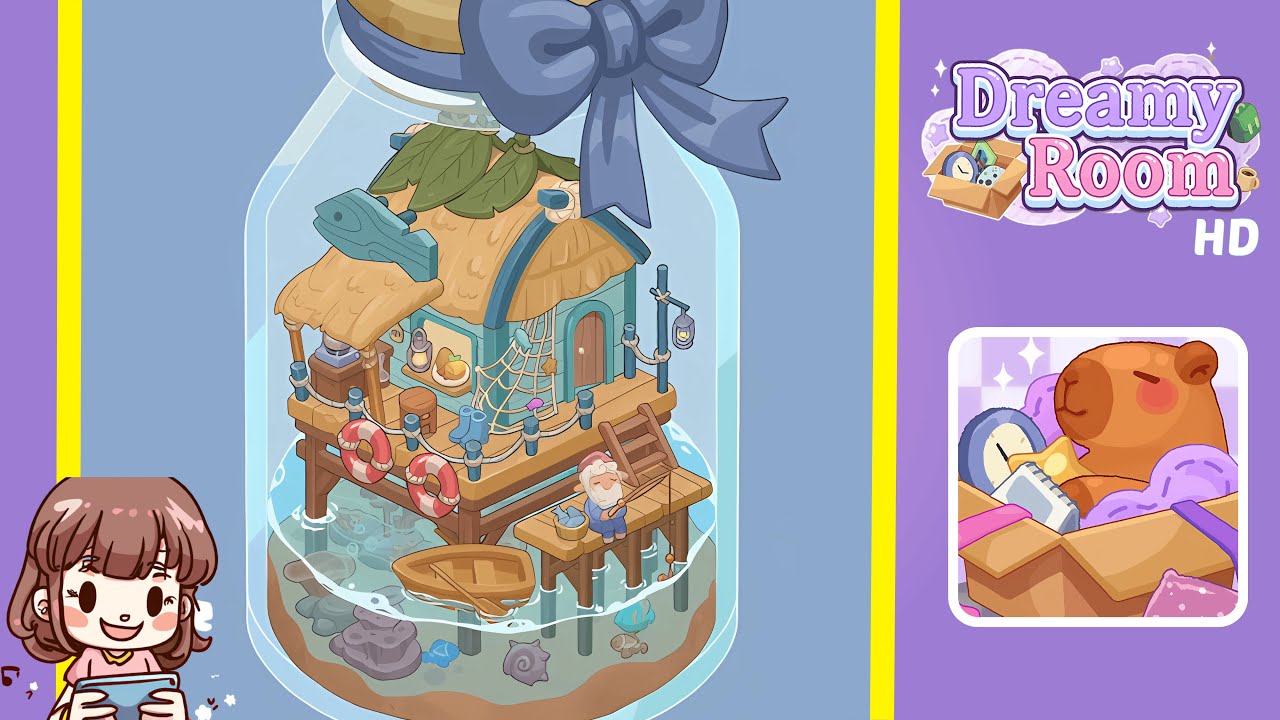
Dreamy Room Level 193 is an enchanting experience in the Dreamy Room series, transporting you to a serene coastal hideaway within a glass jar. Every decorative element, from the straw-thatched roof to the colorful sea creatures beneath the pier, must be placed with thought and precision to capture the tranquil seaside vibe. The core challenge is to discern the perfect spot for each object, ensuring balance and harmony without any on-screen guides. This step-by-step guide will lead you through transforming the blank scene into the fully realized nautical retreat you see here, based on the official Dreamy Room instructions.
Step-by-Step Guide
- Attach the two straw-thatched roof panels atop the seafoam-green back walls that form the room’s corner. Align these panels correctly by dragging the left roof piece so its wooden support beam locks neatly against the crease between the wall panels, then rotate the right panel until the ridges of straw mirror the left side perfectly.
- Once the straw roof sits flush, place the large palm leaf clusters above the center seam. Fan them out diagonally, with tips extending just beyond the jar’s glass curve to suggest a natural overhang. Carefully drag the left leaf bunch first, anchoring it at the peak of the roof, then layer the right set slightly underneath to create depth.
- Construct the main house facade by placing the turquoise side walls and door panel. Slide the right wall segment into the back-right quadrant of the platform, then position the left wall on the opposite side. Add the arched wooden door on the right face and affix the fish-shaped wooden sign above the small porch area.
- Frame your house with nautical rope railings. Select the four teal posts and anchor them at each corner of the wooden platform, then drape the thick rope segments between the posts. Attach the two red-and-white lifebuoys to the front-left and back-left posts.
- Transform the left porch into a cozy refreshment nook. Place the small wooden crate under the overhang and the barrel slightly behind. Add the vintage coffee grinder atop the crate and the fruit plate beside it. Finally, hang the lantern from the beam above.
- Extend the scene to the right with a side table and fisherman. Drag the small wooden bench off the platform’s right edge. Place the bearded fisherman figurine on the bench, angling his fishing rod over the water, and add the bucket of fish next to him.
- Slide the small rowboat into the water on the front-right, rotating it so its bow points inward toward the pier. Scatter the underwater coral, shells, and rocks across the sandy bottom, and add the brightly colored fish and snail shell.
- Finish with an elegant bow around the jar’s neck. Wrap the wide blue ribbon around the glass rim, ensuring the seam sits at the back-center for a polished look. Position the knot just above the jar's lid, with the tails cascading down the side.
Notes & Precautions
- Precision is paramount; align edges pixel by pixel as there are no snap grids.
- Layering order matters; add background elements first and use the layer menu to lock critical objects.
- Avoid clipping; ensure boats and posts dip only slightly into the water.
- Lighting tweaks; subtle shifts in object angle change shadow direction, so test placements under jar's built-in light controls.
Tips & Tricks
- Use keyboard nudges for single-pixel movements, offering more control than mouse drags.
- Preview frequently using the jar’s 3D rotation view to catch misalignments early.
- Group similar items for recurring placements, like lifebuoys or lanterns, for perfect symmetry.
- Save and compare snapshots to ensure each step improves your composition.