Dreamy Room Level 338 Walkthrough & Guide
Welcome to the Dreamy Room Level 338. Follow this guide to meticulously set up the room's structure and exhibits to create an inviting and cohesive museum space.
Step-by-Step Guide
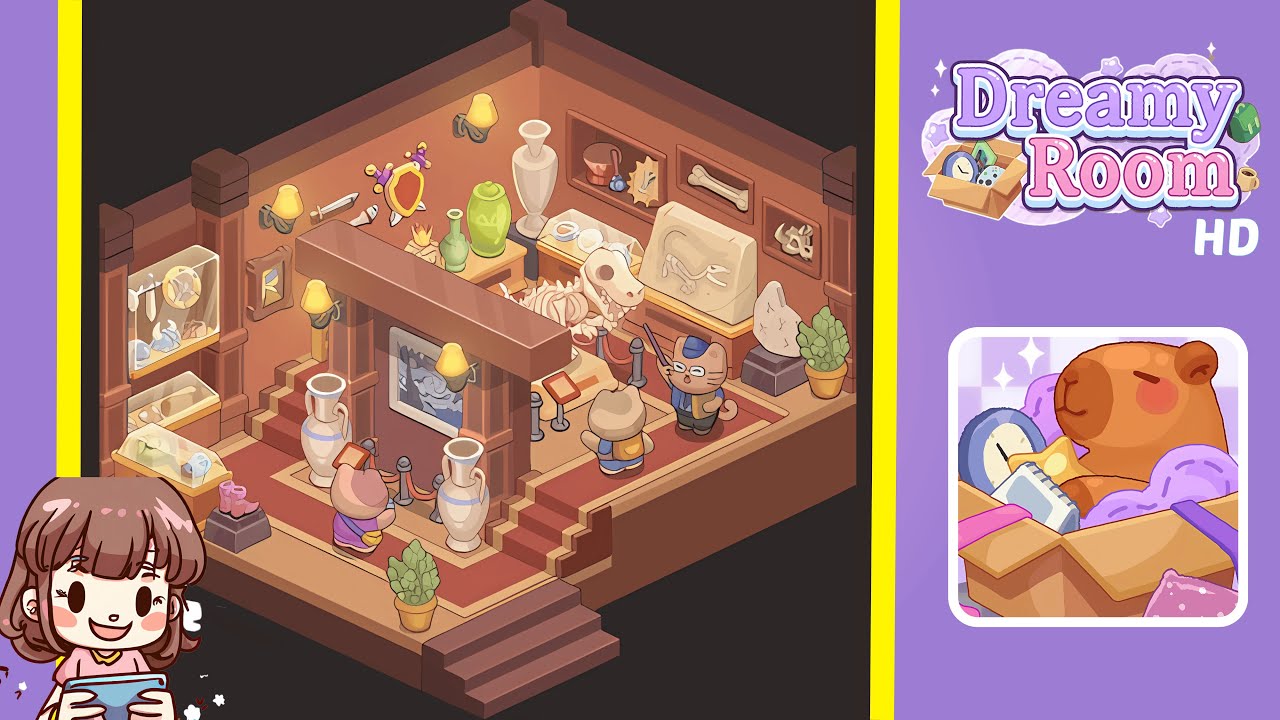
- Start by placing the corner pillars and the stepped floor. Position the two-tiered platform in the front-left, aligning the higher platform along the back-right wall. Snap four pillars into the corners: two on the left wall and two on the right.
- Add the front ascending stairs at the center-front edge and lay a red carpet runner up both tiers. Position the central divider perpendicular to the back wall creating two bays. The divider should house a framed painting and support two amphora vases.
- Place the twin amphora vases symmetrically in front of the central divider and attach rope stanchions as barriers. Center the framed painting between the vases. Ensure a small plaque stand is visible for visitor interaction.
- For the left gallery, install a tall glass wall display for jewelry and artifacts. Place a lower display case and set a trinket pedestal nearby. Attach wall sconces to highlight exhibits.
- In the right gallery, arrange ceramic vases and place a dinosaur skeleton on the platform. Set a carved fossil slab nearby and add shelves displaying smaller bones. Maintain clear visitor paths.
- Finally, add characters, plants, plaque stands, and complete the lighting. Position visitors and the curator cat strategically for interaction. Finish with wall sconces and artifacts on the central divider's shelf.
Notes & Precautions
- Precision is crucial; small offsets can disrupt compositions or block paths.
- Follow the correct order: start with floor and platform pieces, followed by pillars, divider, and carpet.
- Ensure the skeleton and vases don't overlap visitor paths or stanchions.
- Balance lighting to avoid uneven shadows.
- Save progress often as you arrange items to preserve your work.
Tips & Tricks
- Use grid snap to quickly align items like vases and paintings.
- Place large anchor items first, then add smaller pieces for flexibility.
- Adjust items in small increments for precision in the room's subtle aesthetic.