Dreamy Room Level 354 Walkthrough & Guide
Follow this walkthrough to successfully navigate Dreamy Room Level 354, ensuring each element is placed with precision to achieve the perfect match.
Step-by-Step Guide
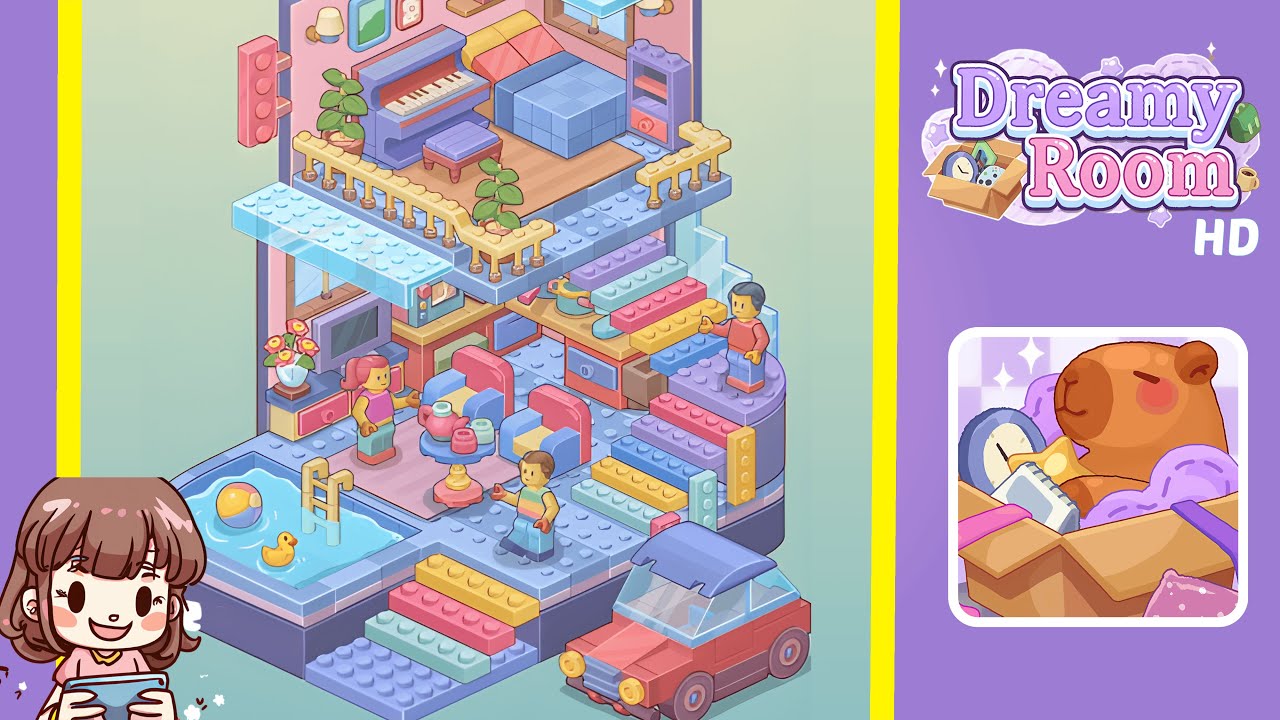
- Place the base plates, pool, and front car on the lower platform. Start by laying the large L-shaped base plate and rounded front plate: the L-shape should cover the back and right side while the rounded plate forms the front-left curve. Place the small rounded pool tile in the leftmost front corner with the tiny ladder, a beach ball, and a yellow rubber duck inside. Position the pastel blue 2x4 stud plate extending the front and a small ramp of pastel bricks as steps to the living area. Park the small red car on the right front edge of the platform, nose outwards, ensuring the windshield (translucent) and roof (purple) align with the rounded corner. Verify exact placement as positioning is crucial in this level.
- Arrange the downstairs seating area, tea table, and TV shelf. Set the living carpeted area one stud back from the pool. Place two rounded single seats (pink and blue) facing the small circular tea table, adding a stack of colorful teacups (three small round pieces) on the table. Center the small square rug under the table between the chairs. Mount the low console shelf holding the TV screen tile on the left wall, with a vase of pink flowers on the left end. Place a small microwave-like box above this shelf. Add the TV cabinet's drawer pieces and a small drawer tile for a built-in look. Stand the pink-haired minifigure between the TV and tea area, facing the table.
- Build the staircase and side shelving on the right. Construct a multi-colored staircase along the right edge by stacking pastel plates in ascending mint, pink, yellow, and blue bricks to form steps to the upper floor. Attach a curved purple landing at the top where the male minifigure stands. Against the right inner wall, secure the tall purple shelving unit with an open cubby containing a rolled towel or small cylinder. Place a small toy duck or accessory under the shelf in the cubby view.
- Position the café seating, counter, and kitchenette behind the stairs. On the central lower platform, place two-tone booth pieces facing the tea table, with a low square table between them topped with a cake stand. Fit a narrow counter against the back wall beneath the terrace with small drawer tiles and a slot for the tiny TV/microwave. Add a counter shelf unit at the rear center for a colorful xylophone-like toy and decorative pieces. Place the brown-haired minifigure on the open floor near the tea table, holding a small round tile as a cup.
- Build the balcony/terrace and railing, then add plants and piano upstairs. Place the wooden plank floor tile centered on the back-left of the L-shape above the lower living area. Install the gold-colored railing along the terrace front with small column posts and a potted plant on each end. Place the blue upright piano against the back wall on the terrace, with a small piano stool in front. Position the low double bed with a yellow headboard and pink pillows flush against the wall to the right of the piano. Add a purple vertical shelf beside the bed with a small round speaker inside.
- Install the translucent roof, wall lights, wall frames, and finishing accessories. Cap with a sloped translucent roof piece over the terrace and a smaller awning over the lower front-left. Affix two wall sconces above the piano and by the window. Add framed picture tiles between and beside them. Attach a vertical pink control-panel brick to the outside left wall. Place stereo/shelf elements, tiny books, and bedside accessories in niches: a small book tile beside the piano, a rolled towel on the purple shelf, and a tiny plant behind the roof panel. Finally, position the last minifigure at the top of the stairs and a micro accessory on the living room counter.
Notes & Precautions
- This walkthrough requires precise stud placements. Align each object squarely to the target studs as misalignments will affect matching. Dreamy Room Level 354 is sensitive to even minor offsets.
- Place translucent roof pieces by lifting and lowering into position to avoid misalignment and prevent knocking small accessories loose. These high-priority visuals must be precise to avoid obvious errors.
- Group like colors while building stairs and step plates as incorrect color order will fail visual similarity checks.
- Save progress often to avoid reconstruction, especially for the terrace and piano which can be time-consuming to rebuild.
Tips & Tricks
- Work from the floor up to lock down the base plate, pool, and car first, then layer upper floors. This method prevents misplacement of studs.
- Use the image preview frequently to catch small offsets before they compound. This will help maintain alignment accuracy.
- Memorize anchor objects like the pool ladder, piano stool, and roof as fixing these helps other elements naturally snap into place.
- Temporarily remove adjacent accessories during tight placements to minimize bumping pieces from their studs.
- Follow the specific color order on stairs and platforms closely as Dreamy Room Level 354 judges color sequence as part of the score.