Dreamy Room Level 351 Walkthrough
Welcome to the Dreamy Room Level 351 walkthrough. Follow these steps to perfectly set up the scene and achieve the desired visual outcome.
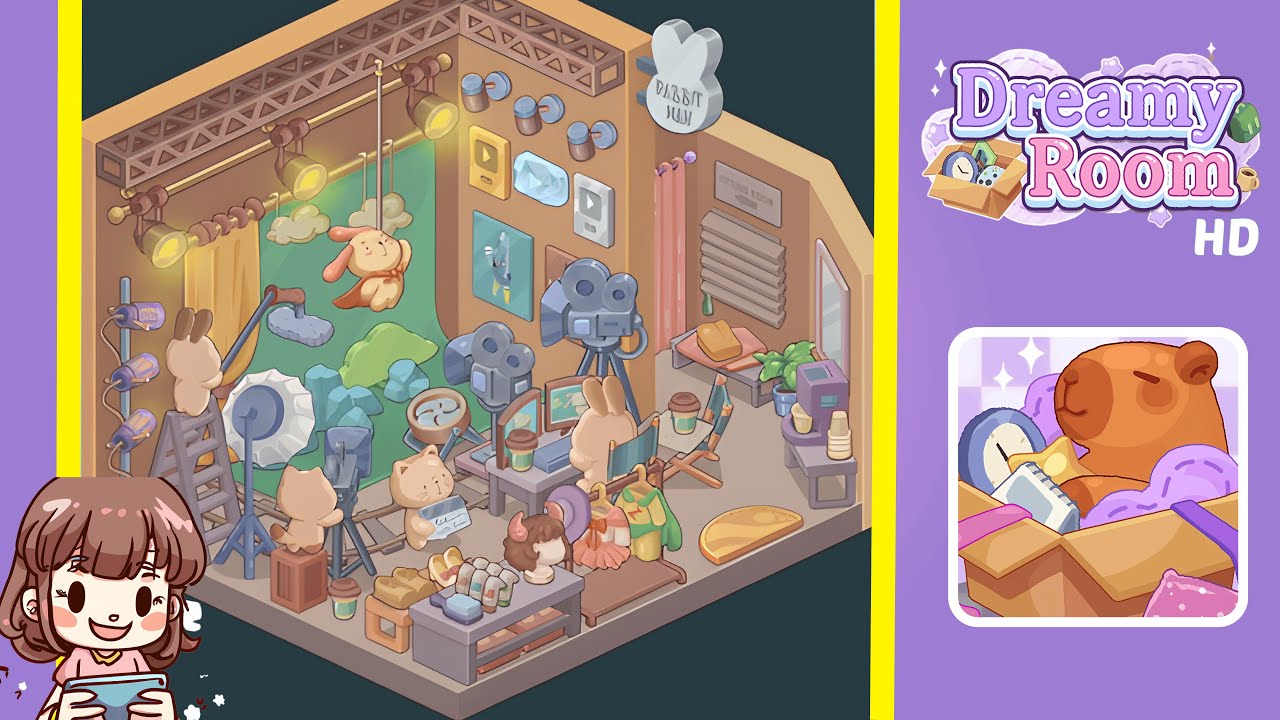
Step-by-Step Guide
- Place the large pale-gray stage floor platform in the center of the room. Ensure it aligns with the room corners and front wall, as this foundational piece is crucial for the later placement of items like camera tracks and display counters.
- Position the green scenic backdrop with clouds and a hanging rabbit prop against the rear center wall, slightly in front of the tall center partition. Ensure the backdrop and the rabbit prop are perfectly aligned to maintain balance.
- Install the decorative truss along the top inner edge of the back wall and hang three stage spotlights—two left and one centered over the backdrop—adjusted to highlight the stage with warm yellow cones.
- On the left side, place the tall ladder, boom microphone, studio fan, and blue rock cluster props carefully to create a realistic production setup without interfering with the spotlight beams.
- In the center-right, arrange three vintage film cameras on tripods, a director’s desk with monitors, and coffee cups. Ensure the cameras' sightlines remain unobstructed.
- At the front center, arrange the display counter, mannequin head, shoes, soaps, a small cardboard crate, and a green takeaway cup in an organized fashion to avoid blocking camera rails.
- On the right side, place the clothing rack, fitting-room area, mirror, and “Rabbit Man” sign, ensuring proper readability from the front view without obstruction from the curtain.
- Finally, populate the right-back wall with play button plaques, small round wall lights, and framed poster art, ensuring items are hung at precise heights for optimum visibility.
Notes & Precautions
- Placement order matters. Always place the floor platform and backdrop first to prevent overlap and snapping conflicts.
- Layering and depth are critical for correct lighting and shadows. Use the front/back controls to nudge items correctly.
- Avoid crowding; maintain small gaps to prevent auto-stacking errors.
- Use rotation sparingly to maintain alignment and shadow accuracy. Temporarily remove items to resolve snapping issues if necessary.
Tips & Tricks
- Work in slices by setting up left, center, and right sections separately to reduce rework.
- Utilize micro-nudges for precise alignment of plaques and cups.
- Save often to capture stages and revert if necessary.
- Use a visual checklist to place large, medium, then small objects in order.
- Mirror the image by adjusting your view to help align vertical spacing for plaques and lights correctly.