Dreamy Room Level 352 Walkthrough
Welcome to the walkthrough for Dreamy Room Level 352. This guide will help you assemble the cozy diorama within a pastel backpack efficiently and accurately.
Step-by-Step Guide
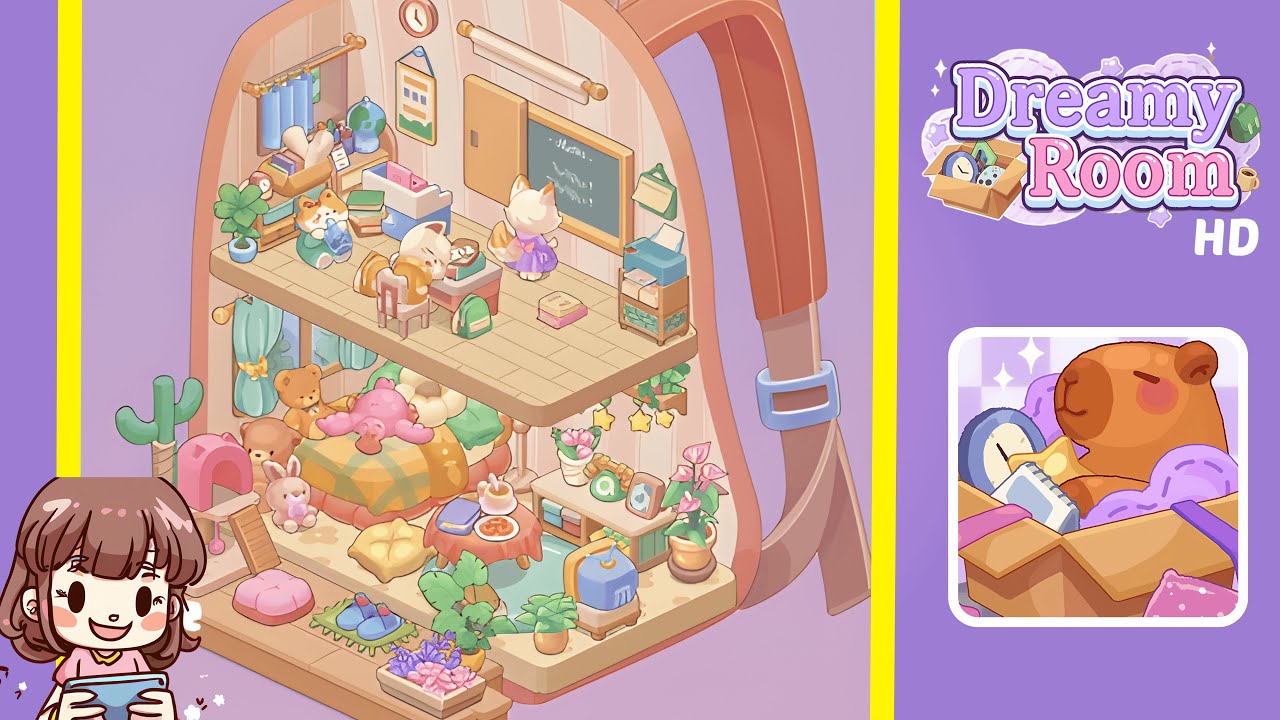
- Place the mattress base at the bottom center of the backpack's interior. Ensure it aligns with the front edge to maintain the visibility of the carved step and platform. Adjust the position slightly if necessary to prevent overlaps later with other items.
- Position the round checked bed slightly to the back-left of the mattress base. Add the pink octopus plush on top, then arrange three teddy bears behind it. Leave space between the bed and left wall for the cat tree and cactus.
- Set the tall cat tree at the front-left edge, the green cactus beside it, and place the bunny plush with a small ramp leading to the pink arch. Ensure no overlaps with the bed cushion occur, and fine-tune placements to avoid future clipping issues.
- Place the low round table right of center on the lower level, equip it with a tea set, and position the tiny slippers on the front mat. Add wall art, cushions, a planter box of succulents, and leafy plants for foreground anchoring.
- Set the low shelving unit on the lower right, top it with a framed photo and calendar. Place the blue retro TV to the right, ensuring visibility of both TV and shelf contents.
- Build the upper platform aligned with the backpack's midline, supported by two poles. Confirm it sits level without clipping the lower level, allowing for classroom furniture placement.
- Arrange classroom furniture on the upper platform: the desk, chair, teacher, and chalkboard. Position details accurately for a cohesive upper level scene.
- Add finishing touches: star garland, wall art, pillows, and desk accessories. Ensure visual alignment matches reference images, making adjustments as necessary.
Notes & Precautions
- Begin with base placements (mattress, platform) to avoid item clipping issues.
- Utilize rotation and nudge tools for precise orientation.
- Save progress after major placements to revert if errors occur.
- Regularly check camera angles to ensure items are centered and aligned.
- Pay close attention to placing small props; verify their correct orientation.
Tips & Tricks
- Place large furniture first, followed by medium, then small items.
- Use temporary placeholders for spot reservation while arranging.
- Apply symmetry for alignment; introduce minor asymmetries for realism.
- Take screenshots after each stage to compare and restore if needed.
- Be patient with micro-adjustments, as small rotations can significantly impact scene composition.