Dreamy Room Level 350 Walkthrough
Welcome to the Dreamy Room Level 350 walkthrough. Follow this guide to complete this intricately designed isometric level with precision and finesse.
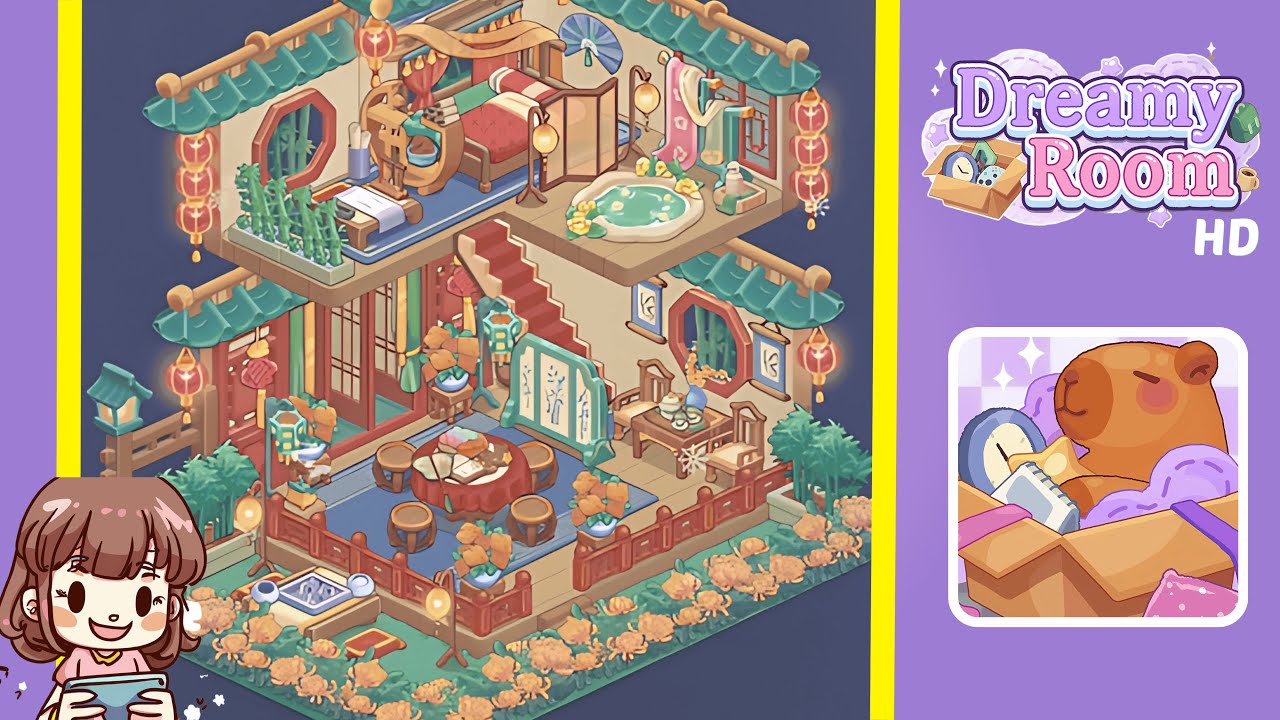
Step-by-Step Guide
- Place the wooden platform and grass base snugly into the back-left corner of the room, aligning the wooden planks with the grass fringe.
- Add the carved red railing around the lower terrace perimeter, ensuring even spacing for the fence posts and alignment with the lantern posts.
- Position the round dining table in the lower terrace's center, ensuring seating symmetry with stools and the folding screen behind.
- Create a cozy teahouse corner with a small table, tea set, framed scrolls, and potted plants for balance and aesthetics.
- Construct the red staircase to the upper floor, ensuring the railing and posts align for a coherent visual connection.
- Arrange the upper bedroom with a canopy bed, bedside table, and decorative instruments for a harmonious upper-left room.
- Set the upper-right bathing pond, towel rack, fan, and decorative vases to maintain an orderly visual from all angles.
- Finish with roof tiles, teal eaves, hanging lanterns, and perimeter flowers, completing with final small details like a doormat and stone basin.
Notes & Precautions
- Save your layout after each major step to prevent misalignment issues.
- Be cautious with isometric snapping, ensuring exact anchor points.
- Avoid excessive rotation of large objects to prevent clipping.
- Lock background tiles first for correct rendering of decorative items.
- Disable shadows temporarily if performance slows during arrangement.
- The central challenge is precise object placement—be patient.
Tips & Tricks
- Place large structural elements first for simpler alignment of smaller props.
- Use the alignment grid and zoom for micro-adjustments of small items.
- Clone identical items to maintain consistency in orientation and spacing.
- Utilize a placeholder object for complex props like the folding screen.
- For screenshots, use a slight overhead isometric angle and disable interfaces.