Dreamy Room Magic Castle Level 1 Walkthrough
Welcome to the walkthrough for Dreamy Room Magic Castle Level 1. Follow this guide to expertly assemble the dreamy castle’s elements and complete the level successfully.
Step-by-Step Guide
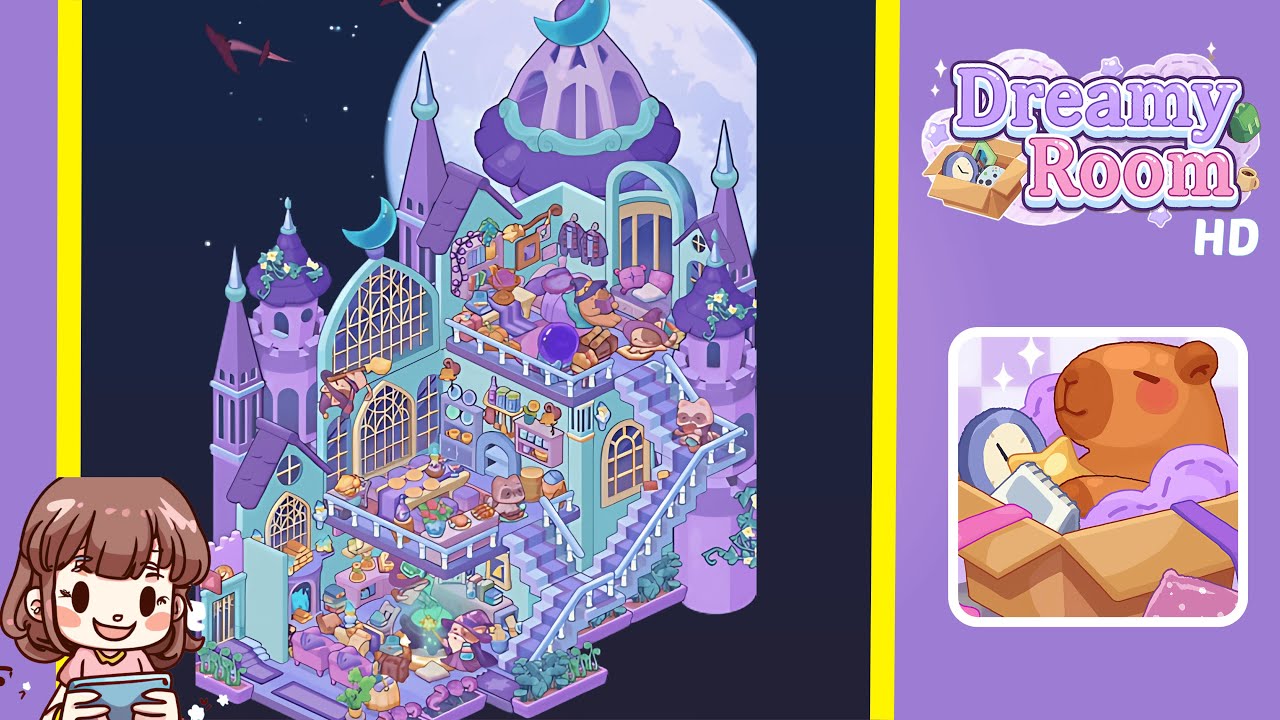
- Place the castle shell against the starry sky. Begin by placing the mint-teal wall shell onto the lilac striped floor as shown by the empty layout. Set the backdrop to the deep space sky with scattered stars and a large moon at the top-right corner. Ensure the floor's beveled front lip remains visible.
- Place rooftops, domes, and crescent moons. Crown the castle with a purple onion dome at the top summit and a glowing crescent hanging from it. Add tall needle-like spires with mint caps, a squat turret with a floral wreath, and a smaller turquoise crescent above the main façade.
- Install windows: grand lattice and side arches. Place a cathedral-style arched window with gold lattice on the left façade, spanning two floors. Add matching arched windows on the right stair tower and a dormer with a diamond pane near the right top nook.
- Build staircases and balcony rails. Snap a pale-mint stair set to the right edge and mirror a shorter stair run inside. Wrap balcony edges with matching rails and ensure proper spacing of newel posts.
- Furnish the ground-floor potion lab. Arrange a plush lavender sofa, bubbling cauldron, potion shelves, and a small doorway under the stairs. Include witches casting spells and reading.
- Create the bakery-kitchen on the mid balcony. Position an arched stone oven, shelves with jars and plates, a wooden table with pastries, and add critter apprentices in action.
- Set the upper study with wardrobe and trophies. Arrange a carved wardrobe rail, a stout table with a crystal ball, and balance the area with a stool while maintaining a clear walkway.
- Arrange the sleepy bedroom nook on the top right. Create a cozy nook with plush cushions, a sleeping figure, and a small turret with a plant, ensuring the scene remains open.
- Add airborne magic and exterior towers. Position a witch on a broom in flight, dragon silhouettes in the sky, and spired towers along the edges to frame the scene.
- Finish with rail decorations, lights, and clutter. Enhance the scene with bread, mushroom-lamps, books, herbs, and ensure all details are precisely placed for completion.
Notes & Precautions
- Always place windows and railings before small props to ensure correct placement of items.
- Keep staircase edges clear with a half-tile of clearance for characters to avoid overlaps.
- Avoid centering the big crescent perfectly to prevent incorrect shadowing of the dormer.
- If the crystal ball won’t center, remove nearby food first and then reattach it.
- Avoid placing plants on stair treads; keep them along the base border only.
Tips & Tricks
- Follow the sequence: rooflines → windows → stairs → large furniture → props to avoid rework.
- Use color grouping to naturally lead the eye across the level.
- Mirror towers for symmetry, but break it with the flying witch for an aesthetic bonus.
- Nudge items by half-steps to precisely position flower trays and other elements.
- Temporarily hide characters to reveal anchor points for cleaner placement.