Dreamy Room Level 139 Walkthrough & Guide
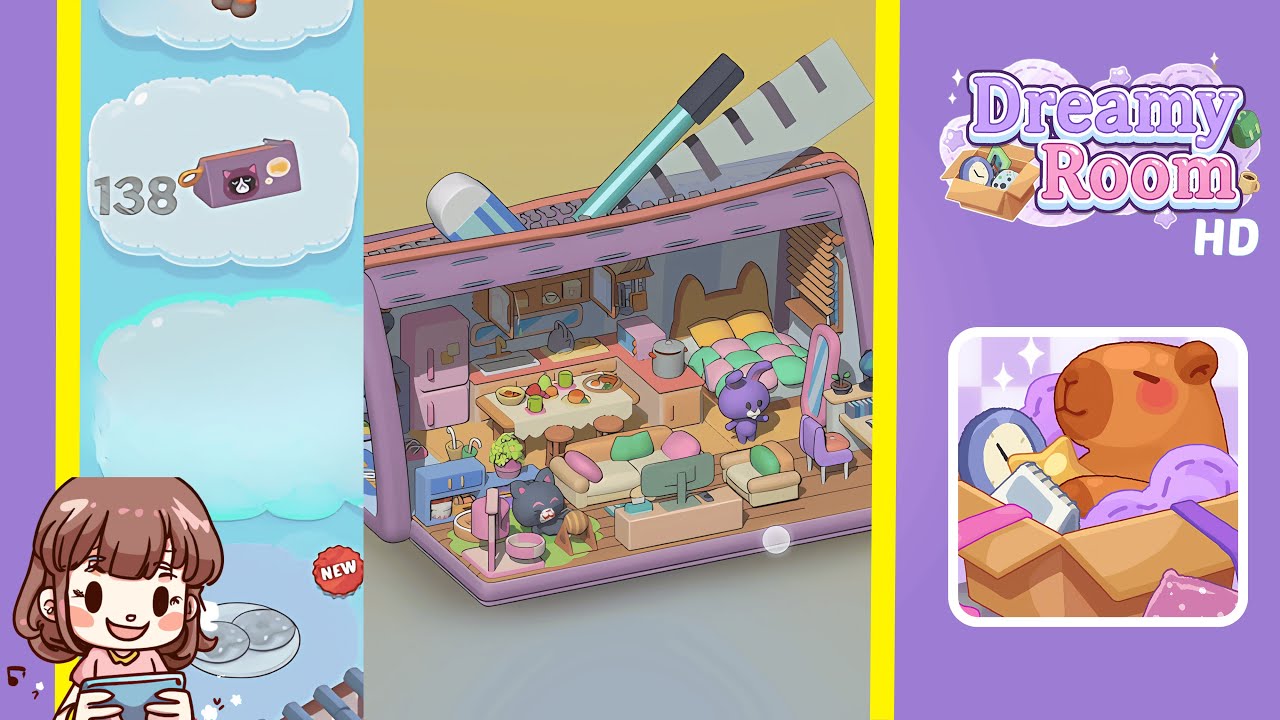
This comprehensive walkthrough for Dreamy Room Level 139 will guide you through transforming the empty pencil-case-shaped room into the fully decorated space shown in the completed image. By following each step carefully, consulting the "Notes and Precautions," and making use of the "Tips and Tricks from top player," you'll master the main challenge of Dreamy Room Level 139—determining the correct placement for every object. Throughout this guide, you'll see how each piece of furniture, décor item, and accent contributes to the cozy, cohesive atmosphere of Dreamy Room Level 139.
Step-by-Step Guide
- Place the Shoe Rack Against the Left Wall in Dreamy Room Level 139. Position the shoe rack against the left interior wall. Ensure helmets face outward and shoes are neatly lined. Align the rack's feet so it sits level on the purple base.
- Place the Welcome Mat on the Floor Beneath the Shoe Rack. Center the blue "WELCOME" mat beneath the shoe rack. Ensure parallel alignment with the purple base's front and back borders.
- Position the Pink Refrigerator Beside the Shoe Rack. Slide the fridge directly to the right of the shoe rack, ensuring a small gap and the back parallel to the wall.
- Add the Small Blue Cabinet with Plant Next to the Refrigerator. Position the cabinet flush against the fridge, ensuring the potted plant's leaves don't touch the fridge.
- Position the Black Cat Figure on the Green Rug. Lay the circular green rug in front of the blue cabinet and place the cat figure on it. Align carefully for a playful presentation.
- Set the TV Stand and Monitor in Front of the Couch Area. Position the TV stand in front of where the couch will be. Ensure the monitor faces towards the couch area.
- Arrange the L-Shaped Sofa in the Front-Center Area. Place the L-shaped sofa behind the TV stand, ensuring proper spacing and orientation.
- Place the Oval Pink Mirror and Purple Bunny Plush by the Right Wall. Align the pink mirror against the right wall and position the bunny plush nearby.
- Assemble the Bed and Kitchen Counter on the Back Wall. Align the bed centered on the back wall. Position the left-side kitchen counter adjacent to the bed.
- Add the Dining Table, Stools, Wall Cabinets, and Accessories. Center the dining table between the kitchen island and room corner. Distribute chairs and accessories evenly.
Notes & Precautions
- Precision in Placement: Misalignments can lead to overlaps. Double-check edges.
- Layer Order: Follow the specified order for items placement.
- Wall vs Floor Surfaces: Attach specific items to vertical surfaces only.
- Avoid Overlaps: Maintain small gaps during alignment.
- Iconic External Objects Are Static: Focus on moving interior items only.
- Check Orientation: Ensure items face the correct direction upon placement.
Tips & Tricks
- Use Snap Guides for precise alignment.
- Group Similar Pieces to organize placement.
- Apply the "Cedar Rule" for tricky placements.
- Pre-Visualize Zones for efficient space management.
- Leverage the Undo Button for prompt corrections.
- Rotate with Precision to avoid overshoot.
- Watch for Ghost Overlaps to correct minor misalignments.
- Check from Multiple Angles for comprehensive arrangement verification.