Dreamy Room Level 301 Walkthrough
Embark on your journey in Dreamy Room Level 301 by meticulously assembling a futuristic, cozy pod interior with precision. Follow the steps carefully to ensure proper alignment and balance in the room's arrangements.
Step-by-Step Guide
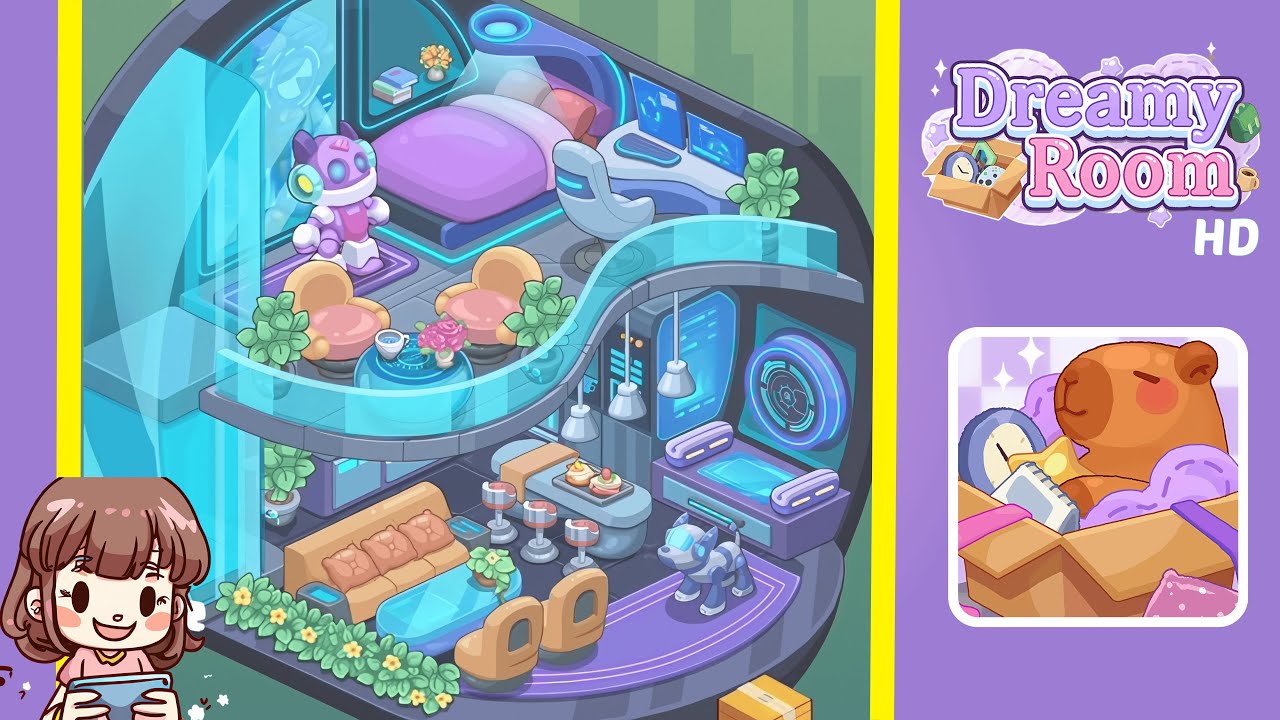
- Begin by establishing the structural base: position the curved semicircular back wall and tiled floor platform. Align the back wall with the pod’s circular interior rim and center the diamond-pattern floor tiles to align with the pod’s front edge.
- In the upper sleeping area, place the low purple bed platform against the curved back wall slightly off-center to the left. Layer it with a lavender mattress, a darker purple duvet, and two pillows — white centered, red tucked on the right. Above, install the small built-in shelf with books and a vase to the left and right, respectively.
- Add the curved workstation and place it in the upper-right corner, against the curved wall. Mount two slim blue holographic monitors on top, one forward, the other angled right. Position a white swivel chair in front, a compact cyan keyboard between the monitors, and a small plant to the desk’s far right.
- Install the curved transparent balcony railing along the left front to the center. Behind it, position two peach-orange lounge chairs with a translucent hex-patterned coffee table between them. Place a cup and pink roses on the table, and add plants beside the seating area.
- Position the purple toy robot on the upper left platform just forward of the holographic window, ensuring the display shows correctly and the robot is oriented towards the room center.
- Assemble the lower living area with a tan/orange sofa against the inner left wall, a centered glass coffee table in front, and two beige chairs across from the sofa. Arrange a plant on the coffee table and a planter along the front edge.
- Place the curved breakfast bar behind the coffee table, arrange three bar stools in front, and set dessert plates on a tray on the bar surface. Add server racks and control panels against the center-right wall and align pendant lights above the bar.
- On the lower-right platform, install the circular holographic panel on the right wall, place a low purple bench in front with a mechanical dog facing inward on the floor strip.
- Scatter remaining plants: one near the sofa, one near the server rack, and two small pots near the desk and balcony corners. Finalize with a glowing orb near the front-right rim and adjust cyan edge lights to match the scene's highlights.
Notes & Precautions
- Precision is key: exact placement affects scoring. Utilize grid snapping and align objects with adjacent tiles or wall curves.
- Maintain layer order: arrange large structural elements first, then medium furniture, and finally small decorations to prevent accidental overlaps.
- Ensure the balcony railing is in front of the lounge chairs for correct reflections and overlays.
- Set holographic panels to semi-transparent to avoid blocking decorative details.
- If performing extensive glowing effects impacts performance, disable ambient bloom as needed during placement.
Tips & Tricks
- Use a central tile intersection as a reference point, reducing alignment errors.
- For symmetrical objects, utilize duplication and mirroring for precise placement.
- Temporarily hide elements for easier deep object positioning; reenable to verify sightlines.
- Create a checklist for small items to ensure all elements are placed before finalizing.
- Maintain incremental saves to revert groups for specific adjustments.