Dreamy Room Level 297 Walkthrough
Embark on a detailed journey through Dreamy Room Level 297, where precision in decorating a two-story cottage is crucial. Follow this guide to create a charming, well-organized space over a sparkling stream.
Step-by-Step Guide
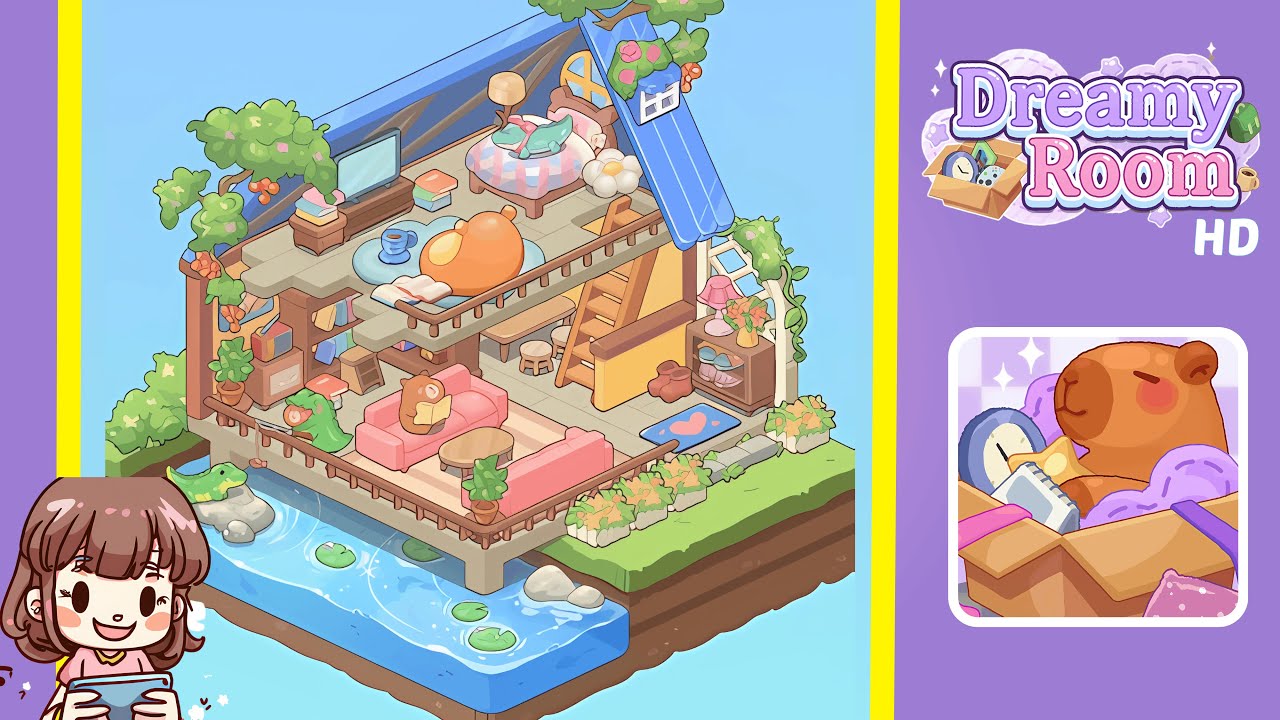
- Place the base floor tiles and support pillars on the platform. Center the rectangular tile floor so its long edge faces the player, positioning it slightly right of the grassy ledge for correct alignment. Add sturdy legs: a front leg beneath the near-left quadrant and a rear leg under the back-right corner.
- Place the water features and river stones. Position the flowing water tile directly under the deck's front edge. Add lily pads near the front-right, midstream under the deck's left side, and closer to the rear under the corner. Position a smooth stone cluster at the water's right edge for stable prop placement.
- Place the wooden railing, balcony potted plants, and stair openings. Install the wooden railing pieces around the platform, leaving a gap on the right for the interior entrance. Add potted plants at the front-left and front-right corner posts. Cut a stairwell opening for the ladder.
- Place the lower-level living set: pink sofa, round table, book, and plants. Position the two-seat pink sofa facing uphill, center it on the lower deck, and place the coffee table directly in front, slightly overlapping the sofa legs. Arrange a small plant at the sofa's front-right.
- Place the shelf unit, shoe cabinet, and entry mat on the right interior. Fit the shelving unit against the right wall with a centered pink lamp. Arrange slippers on the floor, slightly toward the player. Set a blue welcome mat beside the shelf and a plant pot on the mat's corner.
- Place the ladder, upper floor planks, and rail for the mezzanine. Install the ladder under the stairwell opening. Put the upper walkway planks to form a balcony, attaching a stool and bookshelf under the mezzanine.
- Place upper furnishings: round bed, small TV stand, beanbag, lamp, and books. Tuck the pastel bed into the upper-right corner, centered with a crocodile plush. Set the TV stand with books on the upper-left, a beanbag on the balcony center, and other props around without overlapping the railing.
- Place roof elements, trees, vines, flower boxes, and the croc toy on the rock. Install the blue roof on the upper-right, attach a flower window box, and drape vines. Place miniature trees on the roof’s spine, and position the crocodile toy on a water rock facing the deck.
Notes & Precautions
- Precision matters: slight misplacements can disrupt game recognition.
- Layer order is important: follow steps to prevent visual conflicts.
- Use small nudges to resolve collisions and ensure correct snapping.
- Save often to prevent losing progress during misplacement corrections.
Tips & Tricks
- Start from structural anchors like the floor and support pillars.
- Group similar props to simplify troubleshooting and improve organization.
- Watch for snap hints in the game to ensure correct item placement.
- Use symmetry for achieving collectible rewards based on arrangement.
- Prioritize patience over speed for thoughtful, precise placement.