Dreamy Room Level 289 Walkthrough & Guide
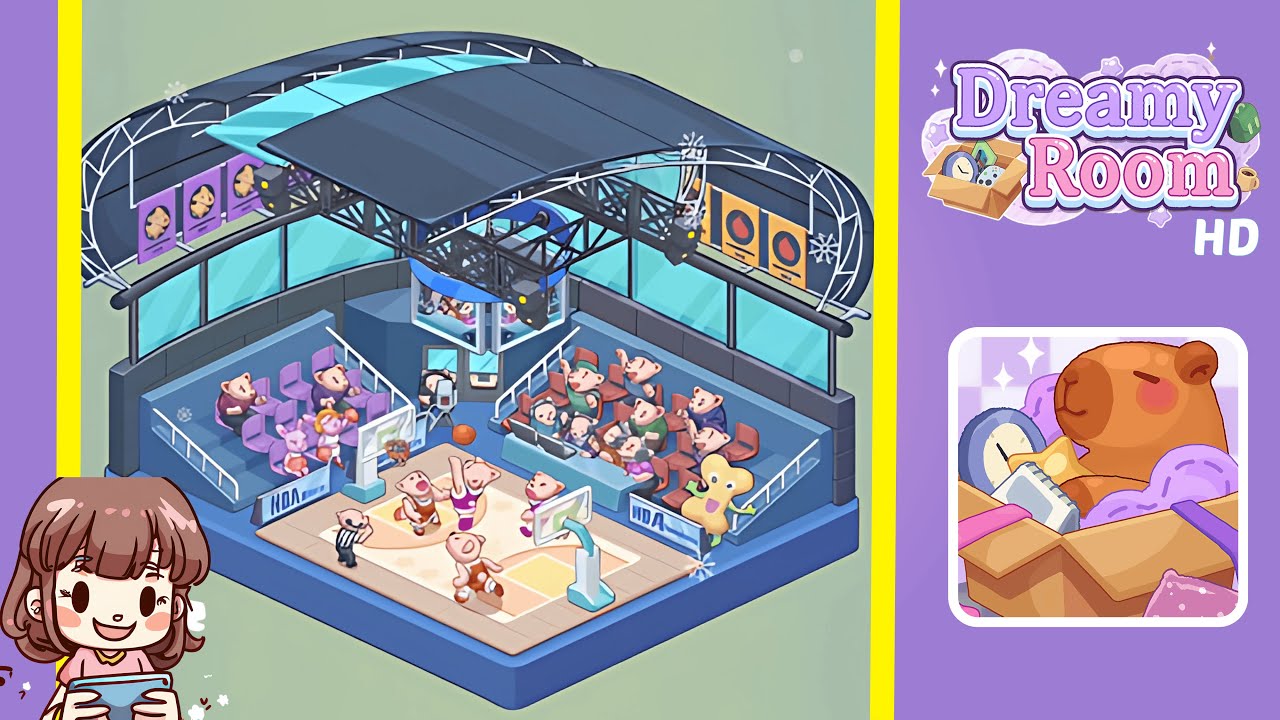
Embark on an intricate setup journey in Dreamy Room Level 289. Your task is to assemble a basketball arena with precision, leveraging spatial awareness and visual cues to perfect the isometric view.
Step-by-Step Guide
- Place the blue base platform centrally in the room. Ensure it doesn't touch any wall edges, with rounded corners facing forward-left and forward-right while aligning with the reference image.
- Position the basketball court and hoops on the center of the platform. Align the court with a slight inset from the front edge, placing hoops in their respective quadrants, and ensure markings are perfectly placed with character alignment near baselines.
- Arrange player characters, camera, and basketball props on and around the court. Position players, camera, and additional props ensuring no overlaps, maintaining visibility of key objects like the scoreboard.
- Build the spectator stands, railings, and seating groups on both sides of the court. Position seats, spectators, and mascot precisely along with railings and small advertising boards.
- Install the overhead truss, roof panels, lights, and hanging video screen. Accurately align trusses and lights while maintaining a visual alignment with roof panels and the video screen.
- Complete with windows, banners, side walls, snowflake decals, and other finishing touches. Hang banners, place snowflake decals, and adjust final objects to align with reference shadows and view.
Notes & Precautions
- Object placement must align with x, y, and depth axes for correct perspective.
- Lock objects if available to avoid accidental displacements during adjustments.
- Prevent overlaps with rigid objects to ensure level completion is not hindered.
- Monitor scale sensitivity of elements like hoop height and screen size.
- Save checkpoints frequently to speed up recovery from any misplacement.
Tips & Tricks
- Begin with the base, then move onto the court and structures to optimize anchor alignment.
- Use small nudges for prop adjustments; it improves response effectiveness.
- Align shadows by rotating roof panels as a quick fix for perspective adjustments.
- Group placements of similar items like banners and lights to avoid mix-ups.
- Utilize a reference overlay to identify misplacements through silhouette comparisons.