Dreamy Room Level 291 Walkthrough
Welcome to the Dreamy Room Level 291 walkthrough. This guide will take you through each step to achieve a perfectly crafted scene in this intricate puzzle level.
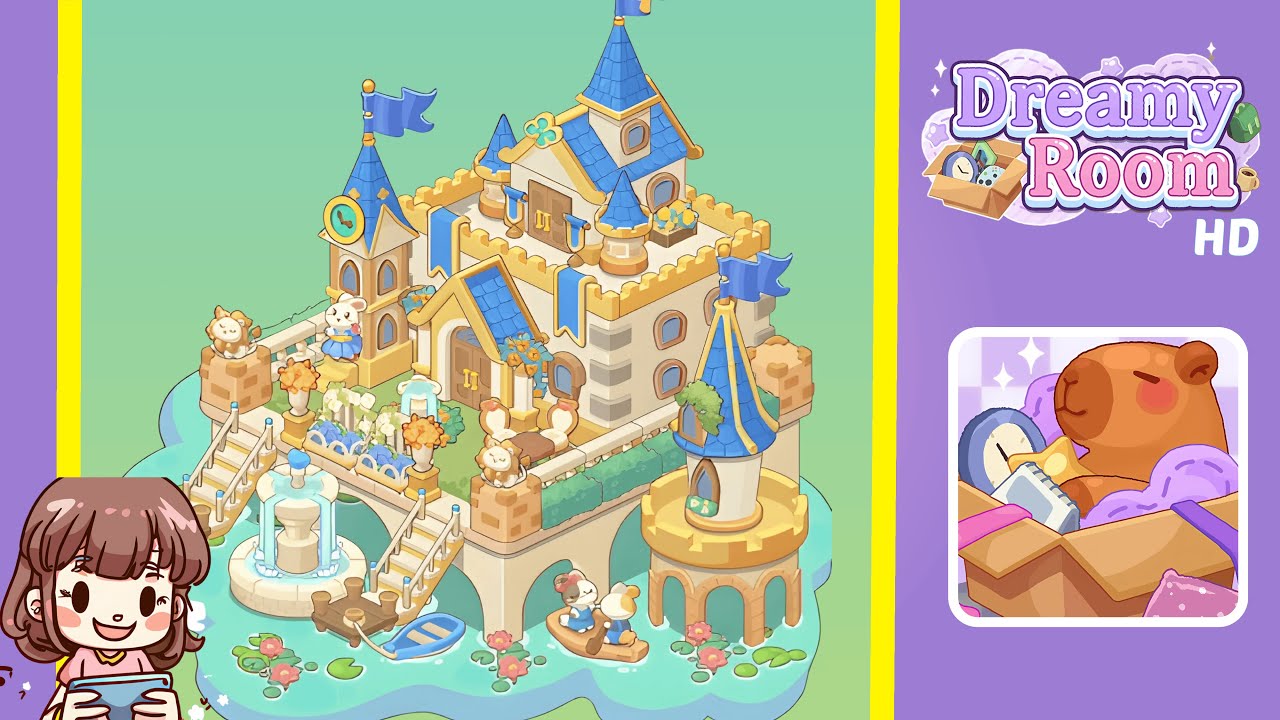
Step-by-Step Guide
- Place the main castle block on the raised platform (center-right). Start with the large beige castle block with crenellated walls and double wooden doors, ensuring its base aligns with the tiled platform edge so the walkway matches the platform's border. Rotate as needed to have its back wall facing the top-left corner, while the front doors face the lower-left water area. Ensure surrounding grass is visible as a one-tile border.
- Add towers, turrets, and flags (top and right). Attach smaller blue-roof turrets accordingly: one on the castle's left rear, a large conical tower at the right corner, and a small clock-tower element on the left front. Place the tall flagpole on the highest peak, aligning its orientation so that all placements meet the game's specific snap requirements.
- Construct the staircase, bridge, and fountain plaza (front-left). Position a two-flight staircase on the front-left edge, ensuring alignment with both the platform and the fountain tile. Add the circular two-tier fountain and arrange docks and a rowboat for a cohesive composition.
- Place decorative planters, hedges, and statues around the castle parapet. Use symmetry to place terracotta lion statues, planters, and a hedge border. Ensure lion statues are on corner pedestals, a blue flower planter is in front of the left doorway, and benches are placed accordingly.
- Add micro-props on the water and platform base: lily pads, boats, and stepping posts. Carefully position lily pads, boats, and stepping posts while ensuring the platform's arches remain visible and unobstructed.
- Place final accents: small flower pots, clock face, and character figures. Finish with clock face placement and arrange flower boxes, character figures, and decorative elements while checking against the game’s criteria for possible errors.
Notes & Precautions
- Avoid forcing pieces into place to prevent snapping issues—approach from different angles or rotate.
- Always place large architectural pieces before smaller ones as the grid anchors around them.
- Save often or use undo between moves to avoid mismatches.
- Be mindful of collision detection for props overhanging the edge or grass, which can cause validation failures.
- Leverage symmetry in placement to satisfy decorative checks.
Tips & Tricks
- Start snapping with the castle and one tower to establish stable points.
- Use the “preview” toggle to match silhouette outlines as a check point.
- If small props don’t snap, adjust neighboring items slightly since placement can be sequence-specific.
- Save progress after successful snaps to ease recovery from errors.
- For stuck situations, remove small accents and rebuild to solve intricate snap sequences.