Dreamy Room Level 334 Walkthrough & Guide
Welcome to the Dreamy Room Level 334 walkthrough. Follow this structured guide to complete this cozy, duplex-style level within a pink monitor. Achieve perfection by carefully arranging every piece as described.
Step-by-Step Guide
- Place the two-floor monitor room and left staircase. Start by transforming the hollow monitor shell into a two-floor room. Snap the dark grey checkered floor to the base, then add the curved glass balcony railing along the upper floor’s front edge. Anchor the pastel staircase with its blue, yellow, blue steps, and a pink side casing on the far left wall. Set a small doorway with pink vertical slats under the staircase's first landing.
- Place the lounge window, sofa zone, and left plants. Fit the rectangular window with light-blue panes on the upper left wall, aligning its bottom sill with the sofa backrest height. Position a tall potted plant to the sofa's left near the stair landing. Center the pink three-seat sofa against the back wall, place the round icy-blue coffee table with a frosty drink in front, and position two yellow ottomans appropriately.
- Place wall décor above the sofa. Decorate the wall from left to right above the sofa: set the retro pink-grey boombox on a short shelf, hang the round golden disc to its right, mount a narrow black shelf with three pink trophies, and fix the framed blue game controllers display to the far right.
- Place the dual-seat gamer desk, monitors, speakers, and neon sign. Set the white corner gamer desk against the upper right wall, parallel to the balcony. Place two curved monitors on the desk, position a black tower speaker at each desk end, and add two purple gaming chairs. Seat the bear character on the left and the pink bunny on the right. Center the neon cyan gamepad sign above the desk.
- Place the ground-floor pool table, cueing character, and floor plants. Center the teal pool table slightly left of mid-room on the lower floor. Scatter billiard balls, and place the focusing player with cue angled towards the right corner pocket. Add a potted plant at the staircase base and another near the room's right edge.
- Place the curved bar counter, three stools, and back-bar machines. Assemble the lower right area by anchoring the curved powder-blue bar counter correctly. Position three yellow bar stools, mount the coffee machine and sink behind, and add two small turquoise frames on the right wall.
- Place the glass balcony and upstairs traffic details. Ensure the transparent glass guardrail along the balcony is aligned. Add two small mint handles on the walkway and align the second yellow ottoman with the balcony’s inner arc.
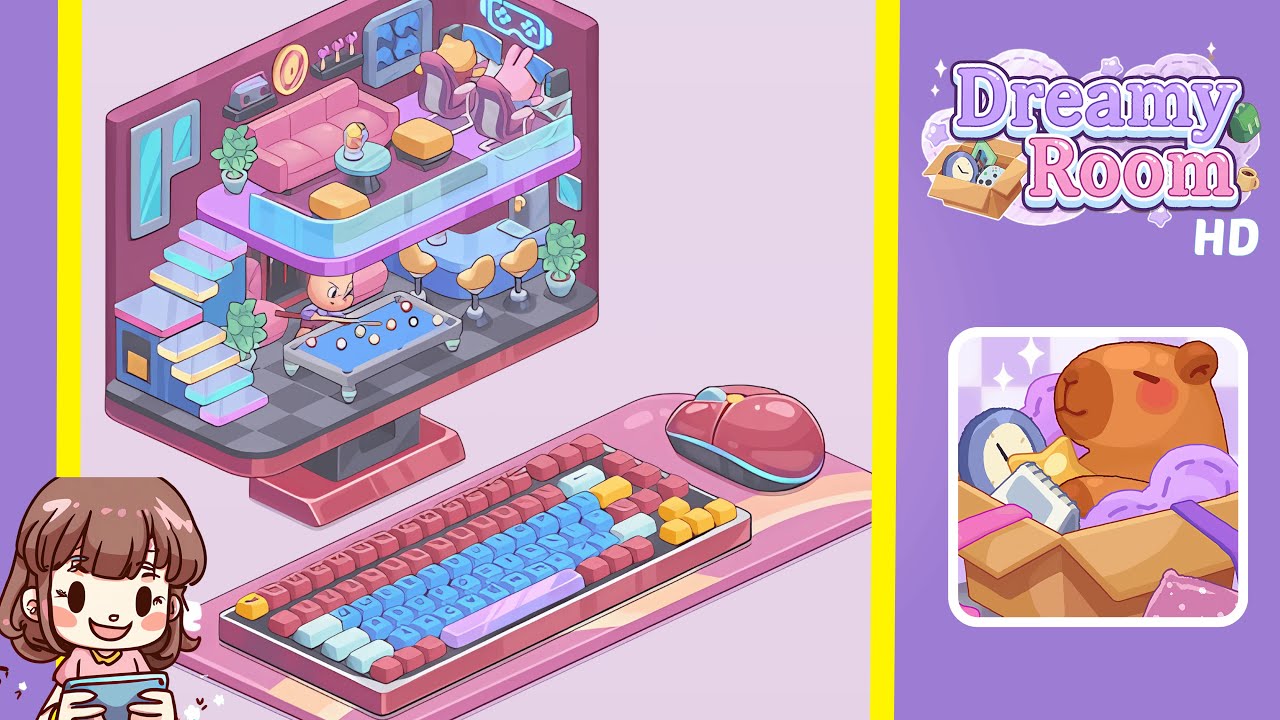
- Confirm the desktop setting. Keep the wide pink mousepad under the monitor, place the mechanical keyboard with its distinctive colors on the left, and position the rounded pink mouse on the right.
Notes & Precautions
- Objects often snap only when neighboring pieces are already placed. For example, the neon sign requires the desk touching the right wall to lock.
- Follow the left-to-right order for the sofa's wall décor to maintain spacing.
- Ensure the pool table's front-right leg is above the monitor pedestal to avoid collision with the bar.
- Check that the staircase and bar counter are anchored if a potted plant refuses to place.
- Approach with a mindset of slow, mindful arrangement as speed is not the objective.
Tips & Tricks
- Start from the structure outward: lay floors, staircase, and the balcony first.
- Use color mirrors, such as yellow ottomans and stools, to guide alignment.
- If stuck with the glass railing, zoom in and align it with the sofa arm and gamer desk edge.
- For speed runs, place the wall frames last; they're mainly for alignment checks and do not unlock other pieces.
- Slightly rotating the camera can help identify correct placements through subtle shadow overlaps.