Dreamy Room Level 283 Walkthrough
Welcome to the Dreamy Room Level 283 walkthrough. Follow these steps to create a perfect isometric boutique scene on a giant smartphone.
Step-by-Step Guide
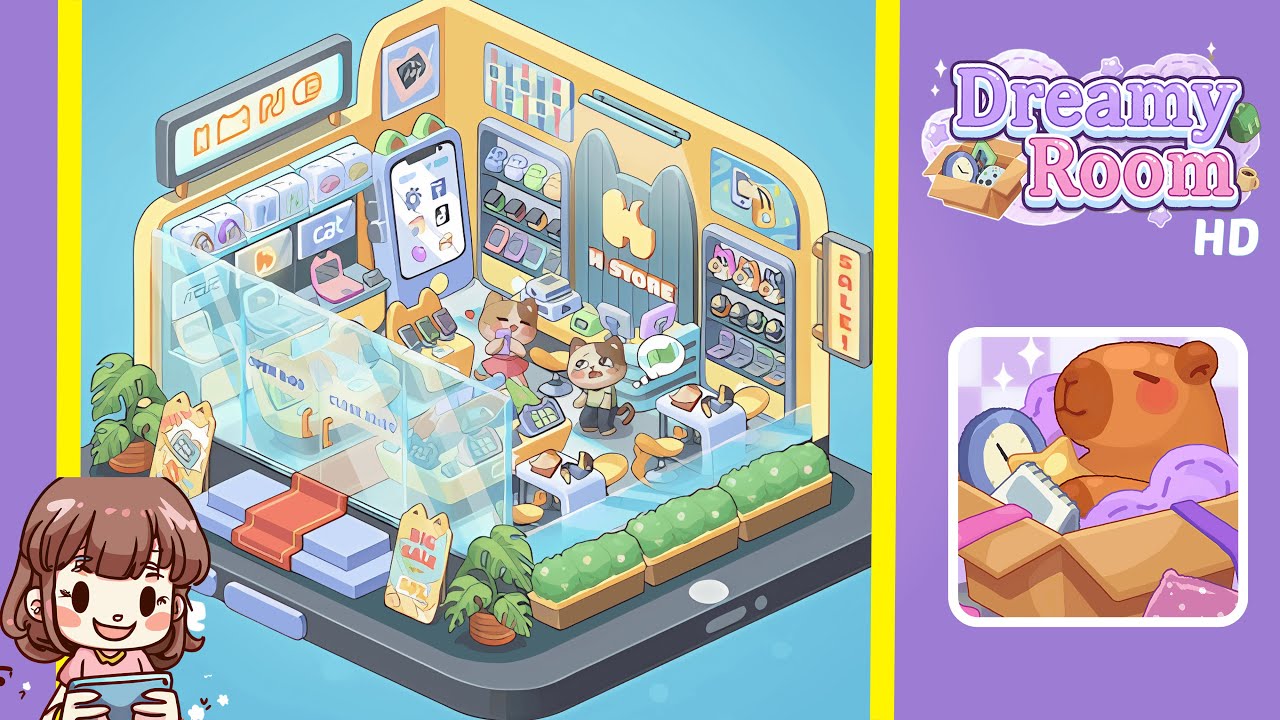
- Place the smartphone base platform centered on the floor. Ensure perfect alignment as future objects will snap to the phone edge.
- Position the raised dark gray platform centrally atop the smartphone base, ensuring it aligns with back walls and leaves a narrow rim displaying the phone's screen.
- Attach the curved yellow back walls to the platform's rear edge, ensuring the seam centers properly for accurate alignment of doorways and shelving.
- Build the glass storefront across the platform's front and install the red-carpet steps. Align the panels for a neat entrance appearance.
- Place two sandwich-board sale signs and potted monstera plants at the entrance corners, ensuring they face outward and do not interfere with the glass doors.
- Line the phone’s right edge with planter boxes and shrubs for a balanced look along the storefront’s right side.
- Install the left interior display wall and a phone-shaped advertisement to serve as a focal point inside the store's left area.
- Set up the checkout counters, stools, and POS tablets in the front-right interior, keeping them close to the glass without overlapping.
- Populate the shelves with watches, accessories, boxed items, and place a SALE sign for attractive merchandise displays.
- Finish with the H STORE portal, mascot figures, and small props like phones, heart tokens, and mini-laptops, ensuring they face outward and add life to the scene.
Notes & Precautions
- Precision is key; slight misalignments can cause visual clipping. Use grid snap for accurate placement.
- Maintain clearance between door hinges and signs to ensure functional door animation.
- Adjust any overlapping objects to maintain scene order and visibility from the default view.
- Save frequently to avoid losing progress if adjustments are needed.
Tips & Tricks
- Adopt a zoned approach to efficiently place major components without repositioning errors.
- Use duplication for consistent spacing of repeated elements like planters or boxed items.
- Utilize mirroring for symmetry in shelf arrangement when possible.
- Rotate small props to ensure visibility and legibility from the entrance view.
- Keep commonly used props handy for quick reuse in future levels.