Dreamy Room Level 285 Walkthrough
Welcome to the Dreamy Room Level 285 walkthrough. This guide will assist you in strategically placing items within the room to create a balanced and harmonious scene. Follow each step precisely to replicate the finished room look.
Step-by-Step Guide
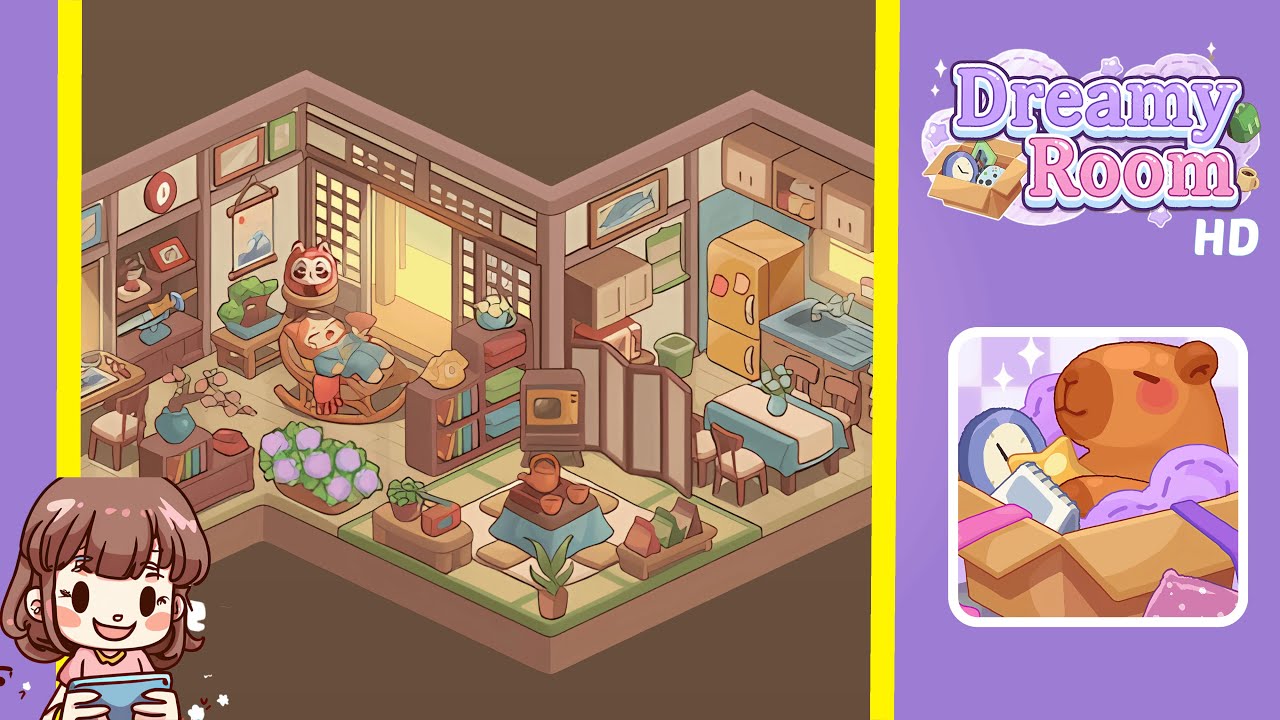
- Place the large square tatami patch in the center-right recessed area of the floor to serve as the room's visual anchor. Ensure the green-bordered tatami aligns with the wooden floor tiles for perfect alignment. Fill the remaining floor with matching pale wooden panels on the left and right. This defines the zones: study on the left, tea area in the center, and kitchen on the right.
- Place the low square tea table at the center of the tatami. Arrange two floor cushions on opposite sides and place the bronze kettle and cups on the table. Situate the small red radio near a corner and a potted plant at the tatami's front. Add folded mats and books beside the table, ensuring everything remains within tatami boundaries.
- To the left of the doorway, position a wooden rocking chair with its back slightly towards the entrance. Add a sleeping figure holding a hand fan. Above, place a lucky cat on a small pedestal and add a tall bookshelf filled with books and a shell on top.
- In the left study nook, place a wooden desk against the left wall with a chair in front. Position the artboard on the desk and survey painting tools and a vase with branches on its corner. Mount framed prints and a clock above the desk. Arrange a shelf with a cat figurine, bowl, and bonsai.
- Set the vintage television at the front-center slightly to the right of the doorway on the tatami edge. Add a folding screen behind it, a low bookshelf filled with volumes and a teapot to the TV's left. Arrange potted succulents and hydrangeas in front for a layered effect.
- In the kitchen corner, place the yellow fridge against the back wall with wall cabinets above. Position the sink and backsplash, then add the stove, pans, and dining table with a vase. Finish with small details like a calendar, fish print, spice jars, magnets, and a trash bin.
Notes & Precautions
- Precise placement is crucial; overlap of objects may result in incorrect placement. Adjust using the game's controls for perfect alignment.
- Move larger pieces of furniture first, save, then adjust smaller items.
- Pay attention to layering; ensure taller objects are behind shorter ones to recreate depth.
- Turn off snapping for fine adjustments. Use patience, as there is no timer.
Tips & Tricks
- Start with major items like the tatami and fridge to minimize rework.
- Switch between using grid snap for initial placements and no snap for adjustments.
- Frequently save layouts of major zones to easily revert if needed.
- Use zoom and rotate camera for precise placement of small props.