Dreamy Room Level 282 Walkthrough & Guide
Welcome to the Dreamy Room Level 282 walkthrough. This guide will help you create a stunning gaming room, paying attention to key placement details and thematic touches that make this level unique.
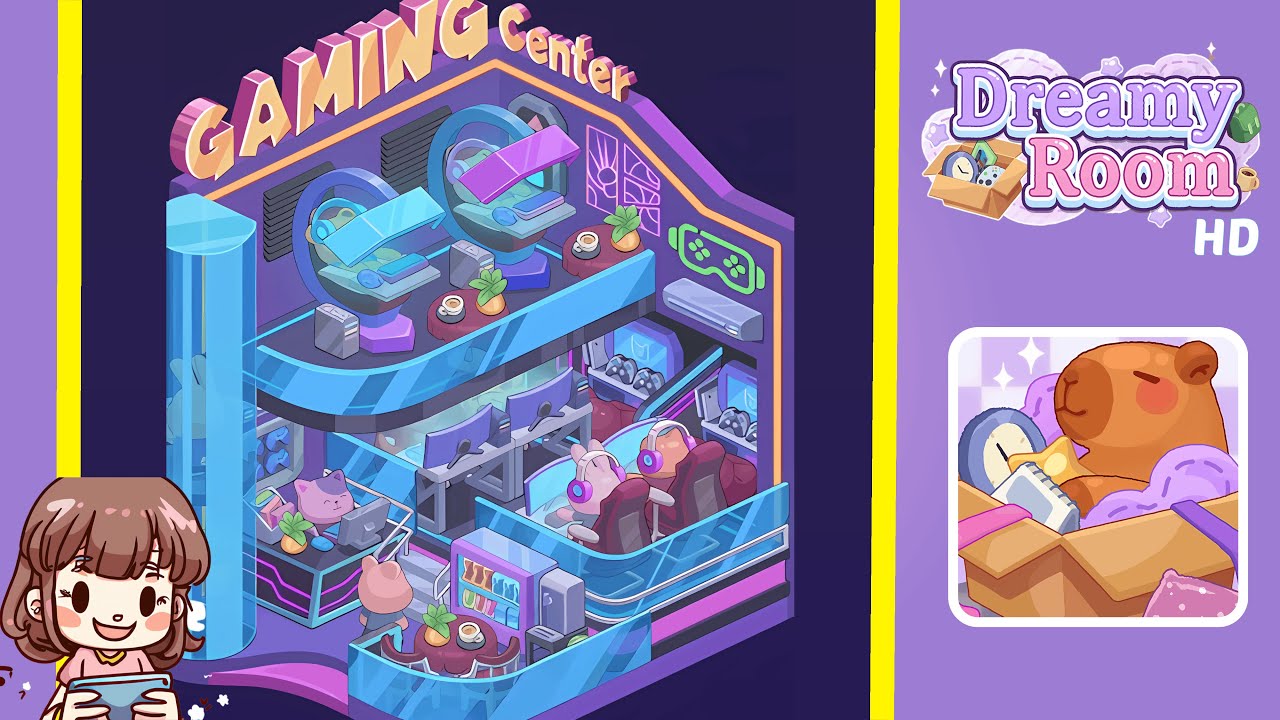
Step-by-Step Guide
- Place the large "GAMING Center" sign on the back-top wall. Position it where the upper wall meets the roof line, centered horizontally, with a slight forward angle. Ensure the yellow-orange trim aligns with the neon border for visual balance.
- Place the two circular upper gaming pods on the top platform. Position them with curved canopies tilted forward, ensuring they face inward, and add small round side tables in front of each pod.
- Install the neon trim and decorative wall elements on the back and right walls. Start from the top-left corner and include the game-controller icon and rectangular window-frame neon panel on the right wall.
- Build the upper balcony glass railing and platform furniture. Position the transparent blue-tinted glass railing and add two small round red tables, placing accessory boxes between pods and railing.
- Place the middle-row desks with monitors, chairs, and consoles. Ensure the monitors are even and slightly angled, adding small power boxes between stations.
- Set the lower-right big red gaming chairs with bunny-head headsets. Place them behind a curved glass wall with a small gap and ensure they are elevated slightly for visibility.
- Add the reception/cash desk with cat-faced monitor near the entrance. Ensure it connects visually with surrounding elements and includes accessory items without hiding the cat monitor.
- Place the vending machine, snack table, and two small cafe tables in the lower front area. Ensure the vending machine doors are visible and colorful.
- Install the cylindrical glass elevator and the curved entrance platform on the far left front edge. Ensure transparency shows faint silhouettes and correct placement for balance.
- Scatter small decorative items like plants, cups, controller shelves, AC unit, and LED accents. Ensure they maintain the level's aesthetic and do not dominate surfaces.
Notes & Precautions
- Pay attention to layering, transparency, and scale to avoid flattening the scene.
- Ensure glass railings overlay lower objects but sit behind upper pods.
- Avoid overcrowding the cafe tables or reception desk to maintain aesthetic balance.
- Nudge heavy objects in small increments to maintain careful alignment.
- Double-check the correct positioning of signature details like the red gaming chairs and bunny headsets.
Tips & Tricks
- Top players recommend a layered approach: place large anchors first, followed by medium structures and finishing with props.
- Use grid-snapping for the sign and pods for better alignment.
- Duplicate and mirror props for consistent scale across the level.
- Rotate neon trim in tiny angles for better centering.
- Apply soft drop-shadows for a pastel mood.
- Temporarily hide glass panels to check for underlying placement issues.