Dreamy Room Level 296 Walkthrough
Welcome to Dreamy Room Level 296! This guide will lead you through the steps to build a cozy and enchanting room, from foundational elements to intricate details, ensuring a harmonious and functional space.
Step-by-Step Guide
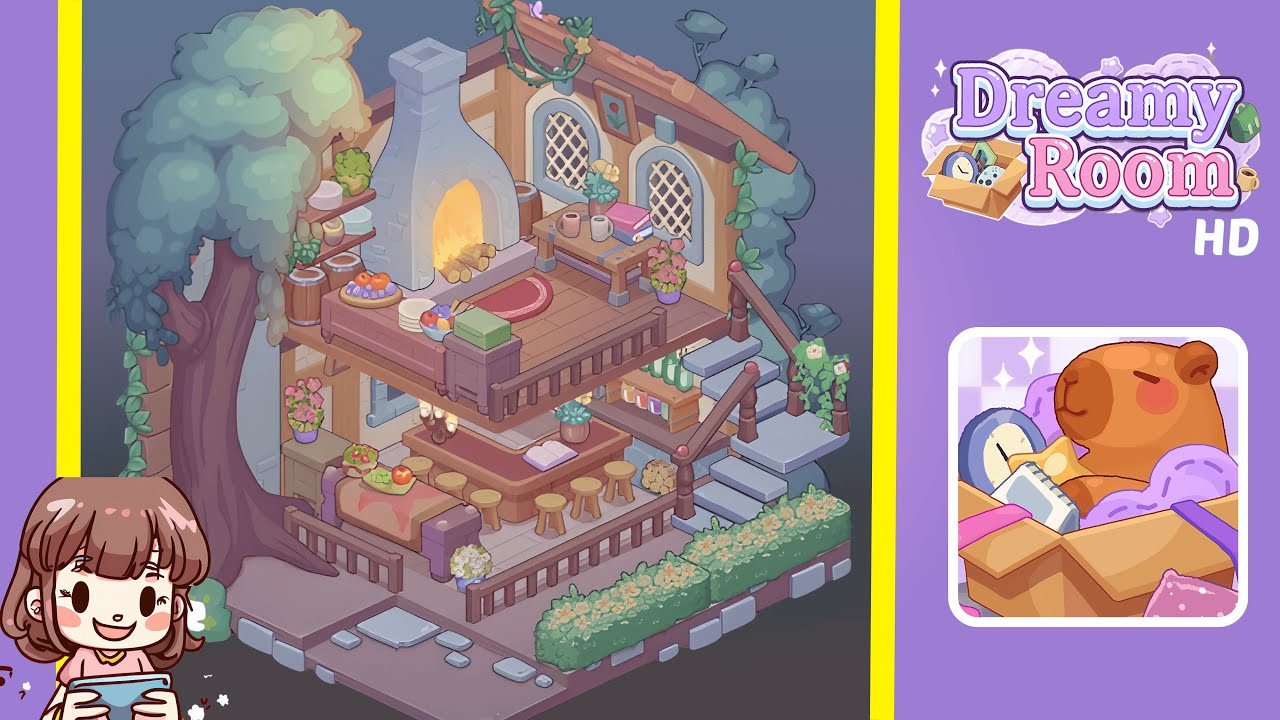
- Place the open glowing box at the front-left entrance platform. Begin by positioning the small, golden glowing open box on the lower platform at the front-left edge. This box serves as a visual anchor and the narrative starter—ensure it sits flush with the platform's lip to allow the warm glow to spill onto the nearest step. Slightly nudge it forward to accommodate stepping stones and a hedge in the adjacent front-right space. Keep the box proportional to the platform and use a snap grid for precise alignment if available.
- Position the tree and left exterior greenery to anchor the scene. Place a tall leafy tree outside the left wall, its trunk slightly overlapping the lower left corner. Align the foliage so the canopy stretches over the two-level interior, subtly tilting it to drape naturally over the roofline. Add a small green bush at the tree’s base and a trailing vine that climbs partially up the wall. Ensure leaves do not obscure windows, creating a balanced composition that guides the eye to the hearth area.
- Lay the tiled floor, install the back walls and archway, and add the hedge with stepping stones. Lay down light rectangular floor tiles on the raised interior platform, aligning them with the room’s perspective. Position the two inner walls: one with wooden beams and one with an arched doorway motif. Along the front-right exterior, place a low hedge parallel to the steps and add three stepping stones in front of it.
- Build the stone staircase, railings, and the right-side planter areas. Construct the stone staircase ascending from the lower right toward the upper deck, each step offset and slightly inset. Install three wooden post caps with pink knobs and attach a wooden railing between them. Position two planter clusters—one potted vine climbing the outer wall and one flowering cluster hanging from the railing’s side—to avoid blocking the steps.
- Place the fireplace, upper platform items, barrels, and shelfware. Center the stone fireplace against the back wall on the upper deck, ensuring its chimney rises past the roofline. Inside the hearth, place burning logs and flames with stacked logs beneath. Position small barrels, a wooden shelf with plates and potted succulents, and a long table with a cutting board and platter. Ensure proper alignment for depth.
- Add the dining counter, stools, decorative plants, arched windows, books, and finishing trimmings. Set the downstairs dining counter with stools tucked beneath, a bench with a fruit tray on top to the left, and potted flowers on the railing corners. Install arched windows on the back wall with a framed painting above them, and hang a trailing vine with blossoms. Place decorative pots and a small bundle of firewood appropriately.
Notes & Precautions
- Ensure precise placement. Use snap-to-grid or nudge controls to avoid gaps between tiles, wall bases, and platforms.
- Check layering order. Items like rails, counters, and stools must layer correctly to maintain depth and avoid flattening the scene.
- Maintain scale and proportion. Consistent object sizes contribute to immersion.
- Adjust light and shadows accurately. Ensure glows illuminate above mantles and not other objects.
- Utilize undo and checkpoints. Save progress before major changes to revert easily if needed.
Tips & Tricks
- Divide the level into zones to avoid placement conflicts.
- Use micro-nudges for precise alignments.
- Mirror and rotate elements sparingly to maintain perspective.
- Color match using the palette preview to maintain consistency.
- Test layering by temporarily hiding items to verify stacking order.
- Utilize a visual checklist to ensure nothing is missed.