Dreamy Room Level 315 Walkthrough
Welcome to the Dreamy Room Level 315 walkthrough. This guide will lead you through constructing a charming western diorama with detailed object placements and scene composition.
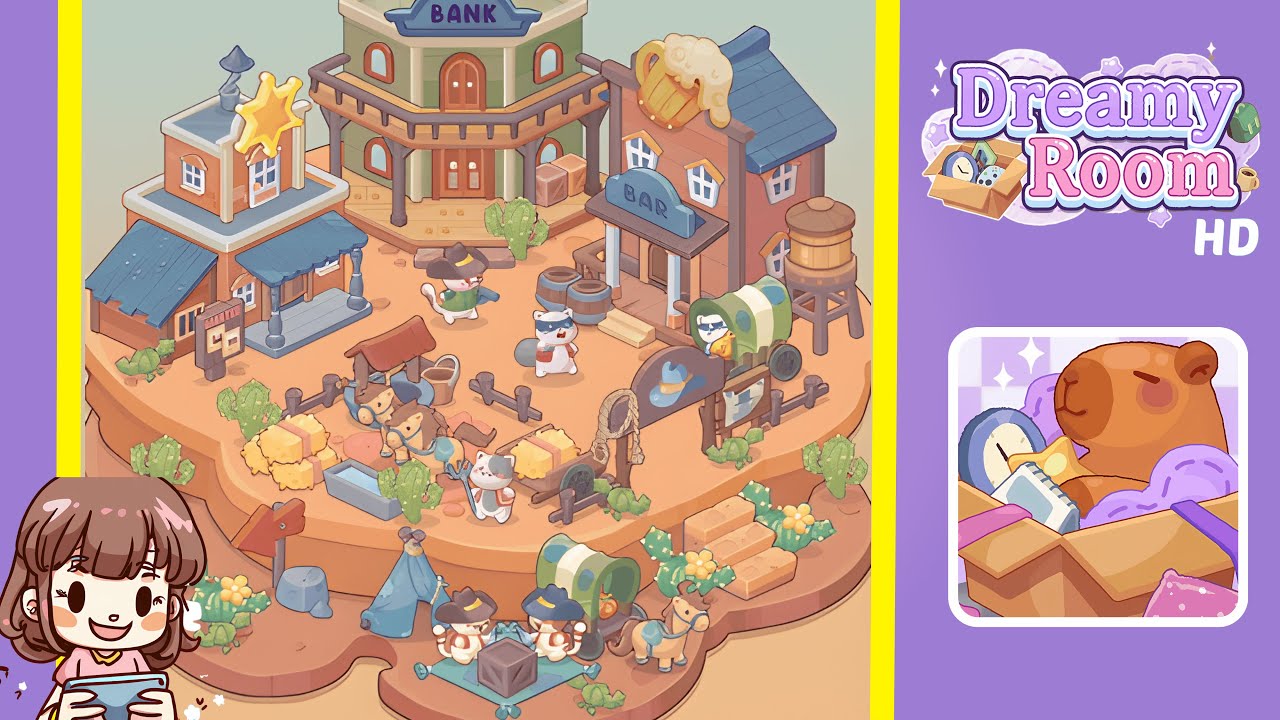
Step-by-Step Guide
- Place the large green two-story Bank at the top-center of the plateau. Ensure it's centered with the double doors facing forward. Align its shadow to fall directly behind the building.
- Position the Bar building on the right mid-tier, ensuring its porch overhang does not overlap with the Bank’s balcony. Add associated props like barrels and a wagon as described.
- Set the Sheriff’s Office on the left mid-tier, with the Wanted Board slightly left of it. Make sure the golden star and other props are properly positioned.
- Create the central corral area with half-fenced pens, horses, a well, a trough, hay bales, and farmhand cats. Ensure the corral leads the viewer’s eye naturally across the scene.
- Populate the foreground lower tier with a blue tent, picnic rug, cowboy-hat cats, and other encampment props. Ensure alignment and spacing around the central crate.
- Scatter cacti, rocks, and small props around the edges, ensuring they're asymmetrically placed for a natural look. Distribute props evenly for a balanced composition.
- Add character figures, including a sheriff cat, bandit-style cat, and others. Ensure they are spaced naturally, maintaining interaction possibilities and dynamic poses.
- Finish with additional props like barrels, a water tower, ropes, and crates. Confirm all shadows align with the level’s lighting for cohesive scene layering.
Notes & Precautions
- Placement order matters: add large structures first, then medium, and finally small props to reduce overlap.
- Maintain a clearance zone around platform edges to avoid clipping issues.
- Use small rotational adjustments for characters and props for natural alignment.
- Save or confirm placements periodically to prevent losing progress.
Tips & Tricks
- Use the Bank as an anchor to align other placements predictably.
- Toggle object ghosting for better visual alignment before finalizing positions.
- Duplicate and flip objects for balanced asymmetry.
- Use keyboard nudges for precise 1–2 pixel adjustments.
- View the scene from afar to check silhouette and balance.