Dreamy Room Level 290 Walkthrough & Guide
Welcome to the Dreamy Room Level 290 walkthrough. This guide will assist you in crafting a harmonious scene that reflects the delicate balance and whimsical charm of this level.
Step-by-Step Guide
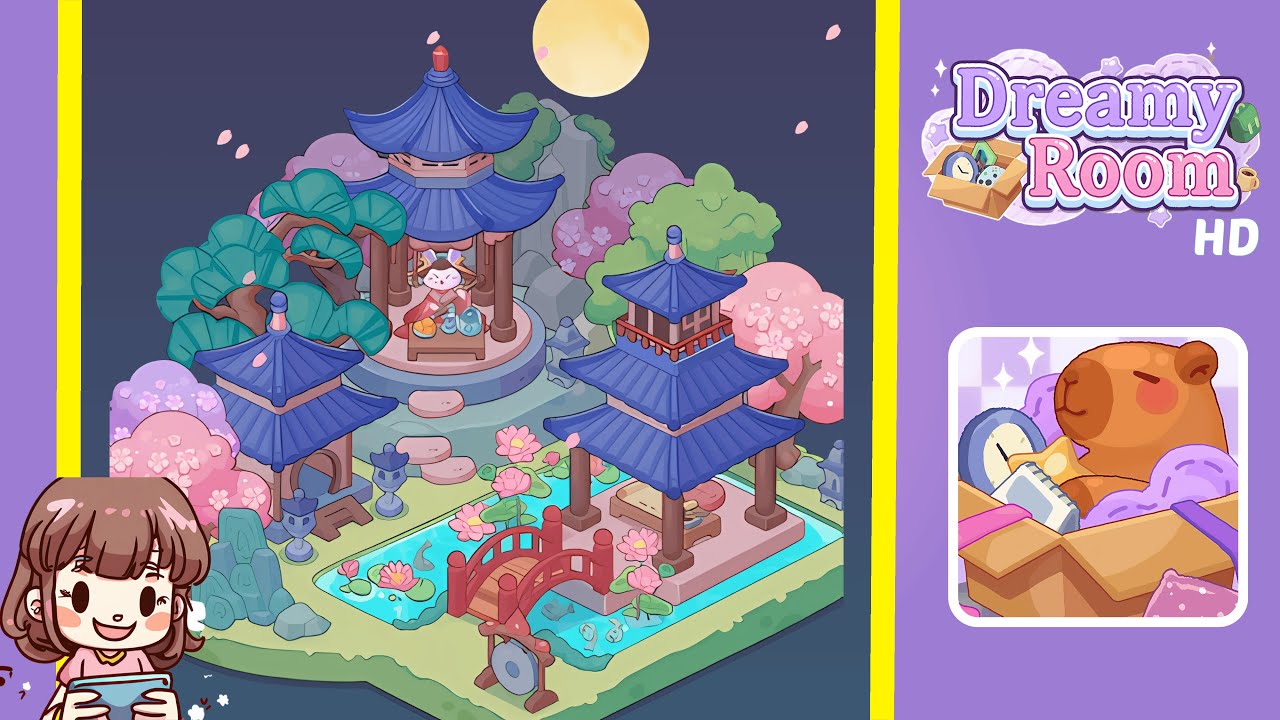
- Place the three-tier pavilion on the raised circular platform. Position the pavilion's base to align with the platform’s edge and place the white cat on the low table inside. Add a tea set and buns beside the cat, ensuring the pavilion's roof overlaps the moon and petals.
- Position the left mid pavilion with shrine and the stone lantern near the left edge. The shrine's arch should face inward, and the stone lantern should be in the foreground. Add a rock cluster near the trees for depth.
- Set the right two-tiered pagoda and resting pavilion on the right-mid area, partially above the pond boundary. The resting pavilion should connect visually with the bridge.
- Arrange the winding pond, lotus pads, koi, and red arched bridge in the foreground. The pond should form a U-shape, with visible koi and lotus clusters. Place the bridge slightly right-of-center, aligned with the stepping-stone path.
- Place stepping stones, a circular gong stand, and foreground decorations. Ensure the stones create a staggered path to the pavilion, and the gong is visible in the scene. Add lily pads and small decorative items for interest.
- Add cherry blossom trees, evergreen trees, and rear rock formations. Place the largest blossom trees on the left, medium-sized on the right, and green evergreens for a layered backdrop.
- Distribute stone lanterns, a small bench, and decorative blocks near paths and pavilions to reinforce the scene’s visual rhythm. Align items precisely to avoid negative space.
- Complete the scene with the moon, falling petals, and lighting/shadows. Position the moon subtly behind the pavilion's roofline and distribute petals toward it for a layered effect.
Notes & Precautions
- Placement accuracy is crucial; minor misalignments can affect depth perception.
- Use grid overlays if available and place elements in layers to prevent conflicts.
- Maintain scale between structures for visual harmony.
- Avoid random rotations that disrupt the isometric view.
- Save progress often to rectify potential mistakes.
Tips & Tricks
- Utilize snap-to-grid and nudge keys for precise adjustments.
- Check symmetry by temporarily mirroring scenes.
- Group and move related items for cohesive placement.
- Align roofs with the moon to guide placement.
- Experiment with petal layering to achieve the desired motion effect.