Dreamy Room Level 101 Walkthrough & Guide
Welcome to Dreamy Room Level 101, the ultimate test of your placement skills in this cozy decorating game. Begin with a sandy platform and a list of items to unpack. The main challenge is finding the exact snap points for each object’s notch and orienting pieces just right. This walkthrough will guide you through every placement from the first palm tree to the rooftop Sphinx ornament. Follow along step by step, and you’ll complete Level 101 with ease and style.
Step-by-Step Guide
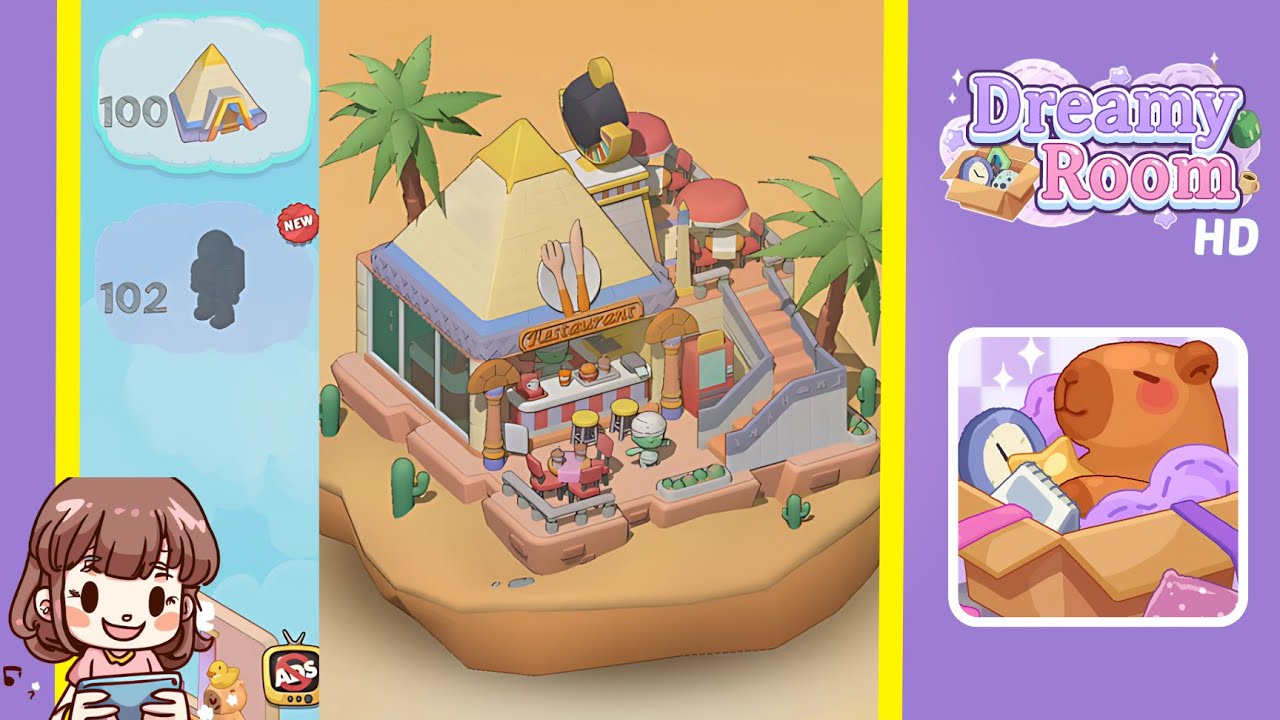
- Place the two palm trees on the platform edges. Select the palm tree icon, hover it over the south-west edge, and listen for the snap. Rotate your view 180 degrees and repeat on the north-east edge to complete the setup for the whole scene.
- Place the cluster of cacti around the island’s perimeter. Begin placing cacti one by one in the perimeter notches: front-left, rear-left, rear-center, rear-right, and front-right. Alternate tall and short cacti to recreate the natural clustering shown in the completed image.
- Place the pyramid roof centrally on the base pad. Center the large yellow-topped pyramid roof over the pink pad. Ensure the golden pyramid peak is facing forward and all base corners align flush with the platform’s bevels before proceeding.
- Place the glass window facade on the west wall. Slide the tall green-tinted window piece into the western face of the pyramid’s base, ensuring the window’s sill rests flush with the platform's edge at a perfect right angle.
- Place the restaurant sign and utensil emblem above the entrance. Position the circular white disc with fork-and-knife above the counter opening, and attach the "Restaurant" plaque below it. Rotate the text sign slightly until it clicks in.
- Place the two Egyptian-style pillars at the front corners of the counter. Locate the ornate yellow and pink columns and position them symmetrically next to the glass facade. Ensure the lotus-inspired capitals face inward toward the counter.
- Place the red-and-white counter unit, the pair of yellow bar stools, and the three countertop items on the interior base. Slot the striped counter beneath your sign, place the stools in the adjacent notches, and position the coffee cup, burger plate, and orange juice tumbler on the counter surface slots.
- Place the round patio table and four chairs on the front-left terrace. Slot the round pink table into the terrace platform, then place the four red chairs in the surrounding notches. Ensure two chairs face inward and two face outward as shown in the completed image.
- Place the staircase and adjacent red vending machine on the east side, then place the mummy figurine and fruit crate nearby. Align the staircase with the sloping notch, slot the vending machine beside it, and set the mummy figurine on the landing notch at the foot of the stairs. Finally, drop the wooden fruit crate into the rectangular notch on the right ledge.
- Place the black-and-yellow sphinx ornament in the center of the pyramid roof. Hover the sphinx head ornament above the apex notch on the pyramid roof, rotate until the glow indicator appears, and click to place.
Notes & Precautions
- Snap-Point Sensitivity: In Level 101, slight misalignment can prevent snapping. Rotate 5–10 degrees if an object won't lock in until you hear the click.
- Object Orientation: Ensure specific directional alignment for pieces like pillars and the sphinx ornament. Check the highlighted outline before releasing.
- Camera Angles: Use rotate and zoom controls freely. Adjust view to avoid obscured notch outlines.
- Undo and Retry: No penalty for removing and re-placing an item. If something feels off, try a different angle.
- Listen for Feedback: Trust the audio cues to know you’ve nailed each placement.
Tips & Tricks
- Pre-rotate Key Pieces: Before placing heavy objects, pre-rotate them to match the notch orientation.
- Use Corner Anchors First: Placing large anchors early helps fill smaller items later without blocking views.
- Quick-snap Technique: Gently nudge objects toward notches to avoid overshooting the glow indicator.
- Group Similar Items: Place similar objects in succession to maintain flow.
- Sound-off Mode: Mute music while keeping placement SFX active to make snaps distinct.