Dreamy Room Level 321 Walkthrough & Guide
Embark on the journey to construct the perfect Dreamy Room in Level 321 with this comprehensive guide. Follow the outlined steps to seamlessly blend architectural elements with decor, creating a cohesive and visually stunning space.
Step-by-Step Guide
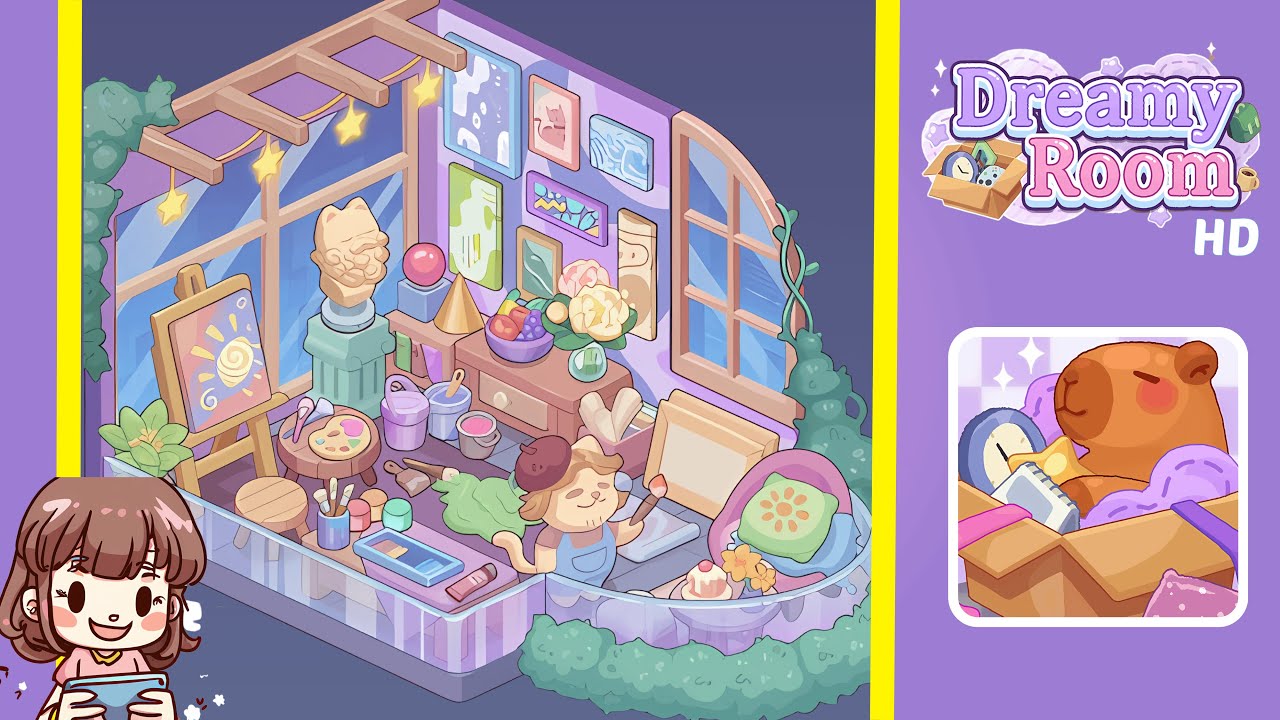
- Begin by placing the room's large glass window on the left back corner and the arched window on the right back wall. Align the left wall's full-height pane with the corner as the window must be centered along the wall for balance. Install horizontal wooden pergola beams from the left top edge toward the center, hanging star string lights from them. Lastly, pin climbing ivy on the left outer corner and around the right arched window frame.
- Center the gray tile floor plate on the main area, ensuring the seams run parallel to the room’s front edge. Attach the curved glass balcony panel between the left and right front corners. Add low planters at the balcony's ends, with a leafy plant on the left and a bushy planter on the right.
- Install a semicircular beige platform just outside the floor's right edge. Inside, wallpaper the right interior wall with a lavender-and-blue swirled accent panel. The left back wall should remain a solid lavender for contrast.
- Position the low wooden dresser against the back-right wall; center it under a gallery of picture frames. On the dresser, arrange a shallow fruit bowl and a short vase with flowers. Add two simple pedestal blocks on the left of the dresser: a taller mint pedestal holds a cat-head sculpture, while a shorter pedestal holds decorative objects.
- Create the left-studio corner by placing a wooden easel near the left glass window. In front of the easel, place a round wooden stool and a side table for the painter's palette. Scatter paint jars on the floor between the easel and central rug.
- Lay out art supplies along the front-center balcony ledge with paint tubes and a watercolor set. Beside the tray, place more paint supplies and brushes. In the right-back area, lean canvases and framed stretchers against the wall near dresser's rolled-paper drawer.
- Place a plush pink armchair in the front-right corner, angling it slightly toward the room's center. Add a floral cushion on the seat, and put a dessert plate with a cake and flowers in front. Arrange a drawer chest near the dresser with a rolled paper bundle and a wooden box on top.
- Position the artist character (a beret-wearing dog) on the green rug in the center-right foreground. Arrange nearby paint tools creatively on the rug. Finally, hang the framed art gallery and decorative frames, completing the artistic ambiance with star lights from the pergola beams.
Notes & Precautions
- Ensure isometric objects are flush with tile seams to avoid floating appearances.
- Do not overlap pergola beams over the arched window frame; keep them in front visually.
- Heavier objects like dressers and pedestals should remain against back walls for open floor space.
- The cat-head sculpture should be taller than the fruit bowl but shorter than the dresser height.
- If gallery frames seem tight, adjust frames slightly by a pixel to avoid intersection with murals.
Tips & Tricks
- Start from the back wall, locking large architectural pieces first, then proceed to mid-ground furniture and foreground details.
- Utilize the gray floor's grid tiles to evenly space objects.
- Group small items to save time and mimic the final design.
- Use micro-nudge controls for precise object alignment.
- Patience is rewarded with precision—make incremental adjustments and view from multiple angles.