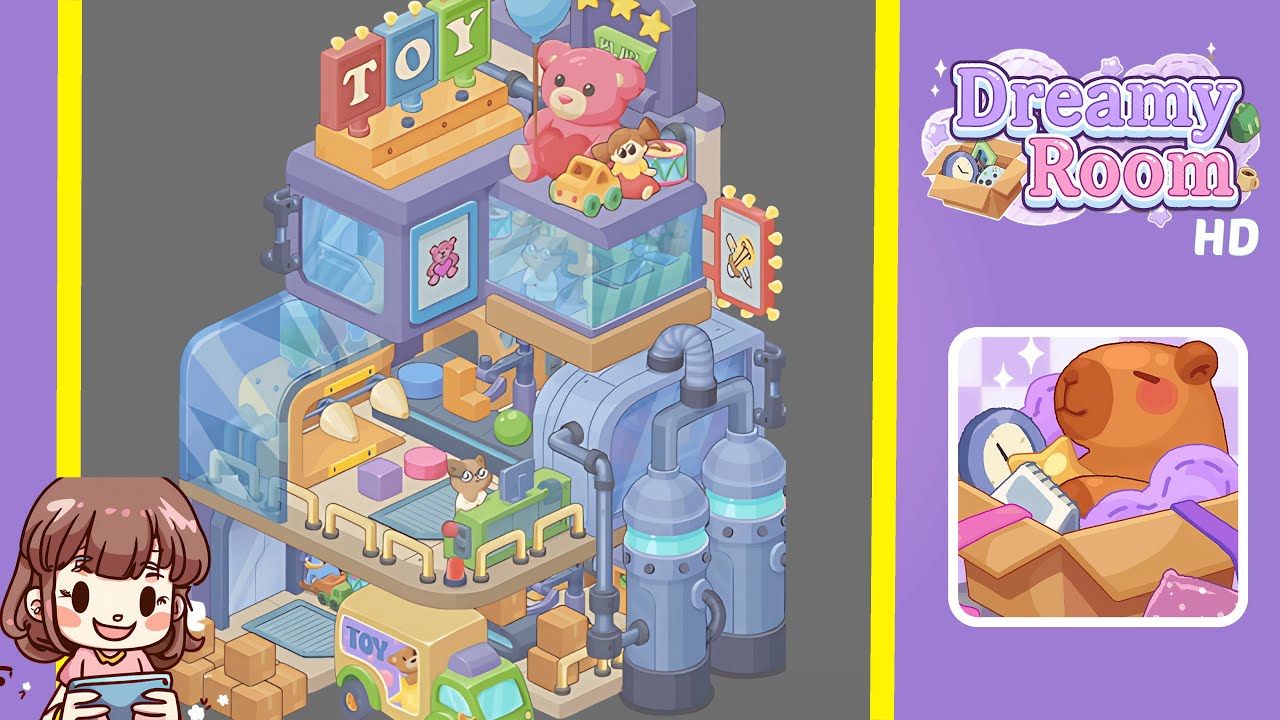
Dreamy Room Level 292 Walkthrough
Welcome to the comprehensive guide for Dreamy Room Level 292, where we will guide you through constructing a charming pastel toy factory. Follow these detailed steps to create a nostalgic tableau that combines soft colors, whimsical machines, and precise object placement.
Step-by-Step Guide
- Begin by placing the floor platform and conveyor base in the center-left corner. Position the pale beige L-shaped tile flush with the left and bottom walls to anchor the conveyor and lower platform.
- Next, place the green toy delivery truck and stack boxes at the front-left. Ensure the truck faces outward and the boxes are properly arranged without obscuring the conveyor's feed area.
- Proceed by placing the lower glass housings and mini-assembly stations. It is important to position these housings correctly to align with the conveyor and allow space for machinery operations.
- Add the upper display shelf, pink teddy, balloon, and small toys. Ensure the teddy and other items are well-arranged to enhance the display’s charm and avoid pipe overlap.
- Place the rooftop TOY marquee and the right-side lighted sign. These elements should be balanced visually with the rest of the composition, reading clearly from the top-left to the right-side.
- Install the twin silos, pipes, and background pillars at the right. Ensure proper layering to maintain the industrial aesthetic without obstructing the view of foreground toys.
- Finish with small controls, levers, rails, and final details throughout the scene. These elements add depth and realism, completing the lively factory setting.
Notes & Precautions
- Pay attention to layering; this ensures elements like toys and control panels appear properly in front of background structures.
- Ensure alignment for a consistent isometric look, especially with the marquee, truck, and teddy bear.
- Prevent collision of objects like the truck, boxes, and platform by carefully managing their snapping points.
- Check the visibility of key details such as the teddy's face and the cat operator to maintain their focal significance.
Tips & Tricks
- Adopt a three-pass approach: start with large shapes, add medium items, and finish with small accents.
- Use slight offsets to manage collisions between elements, keeping all components visible.
- Duplicate and mirror parts like the glass casing or sign for efficient assembly.
- Save incremental snapshots for easy reversion during micro-adjustments.