Dreamy Room Level 83 Walkthrough & Guide
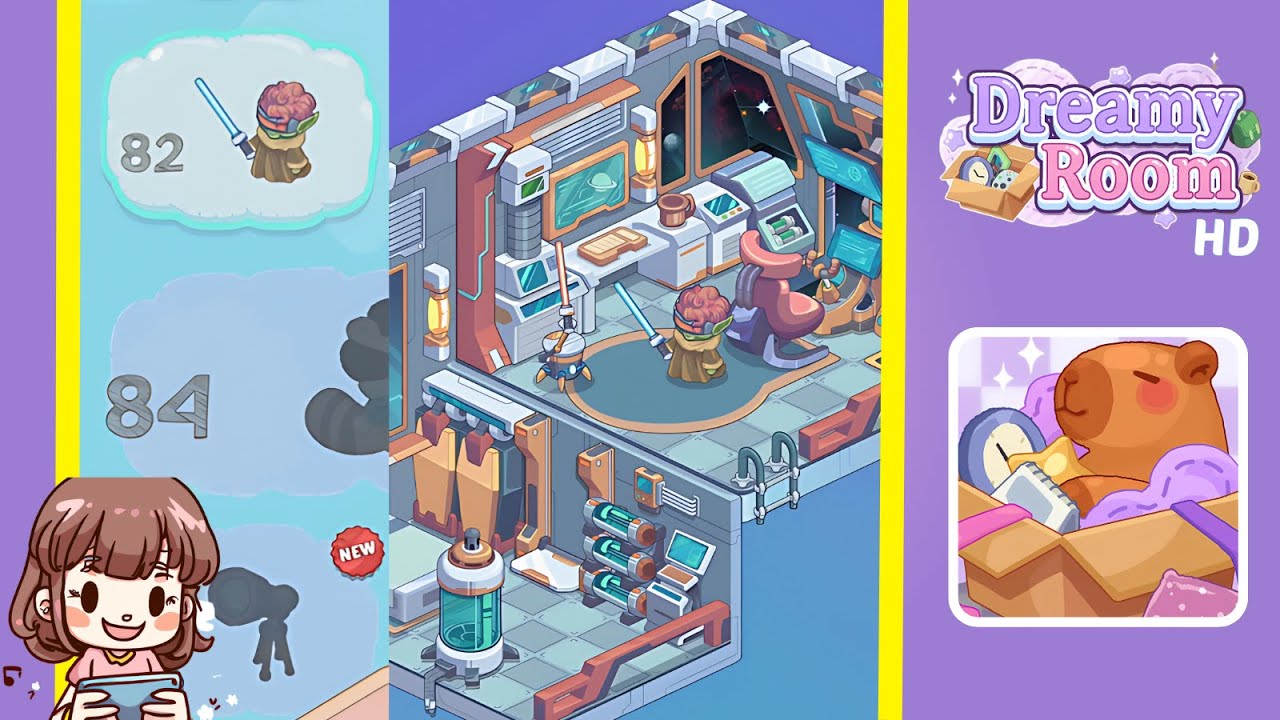
Welcome to the complete walkthrough for Dreamy Room Level 83. In this guide, you’ll transform the empty two-tiered sci-fi chamber into the cozy, futuristic space shown in the completed image. The main challenge in Dreamy Room Level 83 is figuring out the exact placement of each unique object—follow these steps closely to master the layout!
Step-by-Step Guide
- Place the single bed in the lower-left alcove. Drag the standard single bed from your inventory into the back-left corner of the lower level, flush against the wall panel.
- Place the pillow on the bed. Select the soft white pillow and drop it centered at the head of the bed so that it aligns with the wall seam.
- Place the glass bioreactor tank next to the bed. Position the tall cylindrical tank filled with glowing green fluid at the foot of the bed, a few inches from the railing edge.
- Place the battery modules on the lower-right wall. Attach the trio of horizontal battery cylinders to the right-hand wall of the lower level, stacking them in a neat row above the small shelf.
- Place the control panel beside the battery modules. Add the compact orange control console directly to the right of the battery bank, ensuring the display faces inward toward the room.
- Install the pipes and ladder by the level divider. Click the curved grey pipes and vertical ladder pieces and snap them to the corner where the two floors meet, bridging upper and lower levels.
- Place the mini laptop on the lower-right shelf. Drag the small laptop onto the built-in shelf beneath the battery modules, tilting it slightly so the screen is readable.
- Place the white-and-orange desk on the upper-left platform. Set the modular work desk on the upper level’s left side, between the left window and the corner beam.
- Place the two wall-mounted monitors above the desk. Mount both flat screens on the wall just above the desk surface—one directly over the desk, the other beside the window shutter.
- Place the scanner unit on the left of the desk. Position the vertical scanning device (with green interface) on the desk’s left end, aligned with the left monitor.
- Place the floor lamp behind the scanner. Nestle the tall lantern-style floor lamp directly behind the scanner unit, so its warm glow lights up the workspace.
- Place the oval rug on the upper floor. Center the rounded rug in the middle of the upper platform, making sure its orange trim matches the desk accents.
- Place the stump stool and lightsaber on the rug. Drop the tree-stump stool onto the front edge of the rug, then lean the glowing blue lightsaber staff against it at a slight angle.
- Place the triple-monitor console in the upper-right corner. Snap the advanced console with three floating screens into the right-hand upper corner, flush against both walls.
- Place the maintenance drone orb, coffee mug, and potted plant. Finally, place the hovering drone orb beside the desk, set the coffee mug on the desktop near the right monitor, and add the small round pot on the desk’s corner for a cozy touch.
Notes & Precautions
- Rotation matters: Each object has a preferred orientation—use the rotate tool before dropping it.
- Overlap checks: Avoid overlapping furniture; misaligned items will snap back.
- Layer awareness: Don’t place lower-level items on the upper floor by mistake; double-check the floor indicator.
- Inventory order: Group similar objects in your inventory for faster placement.
Tips & Tricks
- Use the grid overlay: Toggle the snapping grid to align objects perfectly, speeding up your placements.
- Quick-swap tools: Bind your rotate and move keys to hotkeys to rapidly tweak each item’s position.
- Save a layout: After every few placements, use the snapshot feature to record your progress—handy if you need to reset.
- Batch theme: Place items by category (furniture, tech, decor) to avoid hunting through the inventory.