Dreamy Room Level 207 Walkthrough
This guide provides a structured walkthrough for Dreamy Room Level 207, ensuring precision in placement for a charming classroom scene.
Step-by-Step Guide
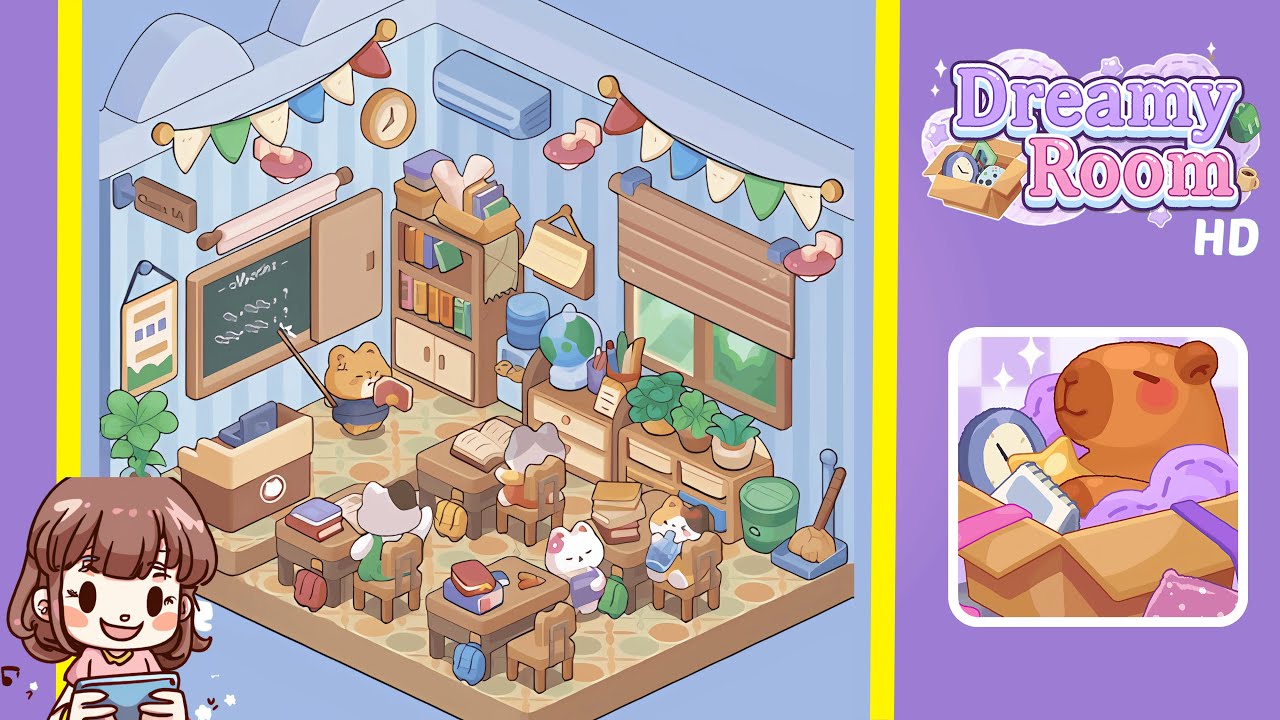
- Place the patterned floor and apply the striped wallpaper. Ensure each oval motif aligns with wall bases, and apply the wallpaper with stripes running straight from floor to ceiling.
- Install the curved ceiling arches by positioning them at equal intervals along the top beam for architectural depth and harmonious spacing.
- Hang the decorative bunting and install the pink wall lamps. Match each flag’s orientation and verify lamp height for a cohesive look.
- Mount the rolling poster rod above the chalkboard, ensuring correct spacing and height above the chalkboard frame.
- Place the chalkboard, slide open its panel, and scribble the equation, ensuring alignment and legibility.
- Hang the “Class 1A” sign and framed chart with equal margins for symmetry and organization.
- Position the teacher’s podium, laptop, and adjacent potted plant ensuring enough floor space and harmony.
- Place the teacher cat figurine facing the chalkboard, with correct orientation to maintain the scene's dynamic.
- Assemble the tall bookshelf with books, tissue box, and blanket, ensuring precise alignment and placement.
- Hang the calendar and position the water dispenser, cups, globe, stationery, and note for a complete study corner.
- Install the window, blinds, low cabinet, and potted plants on the right wall, forming a lush, colorful display.
- Place the recycling bin, broom, and dustpan in the right corner for a neat and tidy presentation.
- Arrange the student desks, chairs, backpacks, books, and student cats, ensuring perfect spacing and cohesive color order.
Notes & Precautions
- Placement Precision: Ensure every object snaps into place to avoid incomplete setups.
- No Timer: Take your time to avoid misplacements; there is no rush.
- Grid Snap Tip: Use grid snapping for accurate alignment if available.
- Overlap Warnings: Beware of overlapping items, which can cause placement rejection.
- Order Matters: Follow steps sequentially, as moving objects can become tricky later.
Tips & Tricks
- Anchor Reference Points: Begin with large pieces for precise placement of smaller items.
- Use Preview Mode: Preview placements to ensure accuracy before confirming.
- Align by Eye: Carefully align items if grid snapping is unavailable.
- Color-Match Strategy: Group items by color families for a cohesive visual effect.
- Save Frequently: Save progress after major sections to avoid repetition.