Dreamy Room Level 206 Walkthrough
Welcome to the Dreamy Room Level 206 walkthrough. Follow this guide meticulously to ensure the perfect placement of objects and achieve a harmonious finish.
Step-by-Step Guide
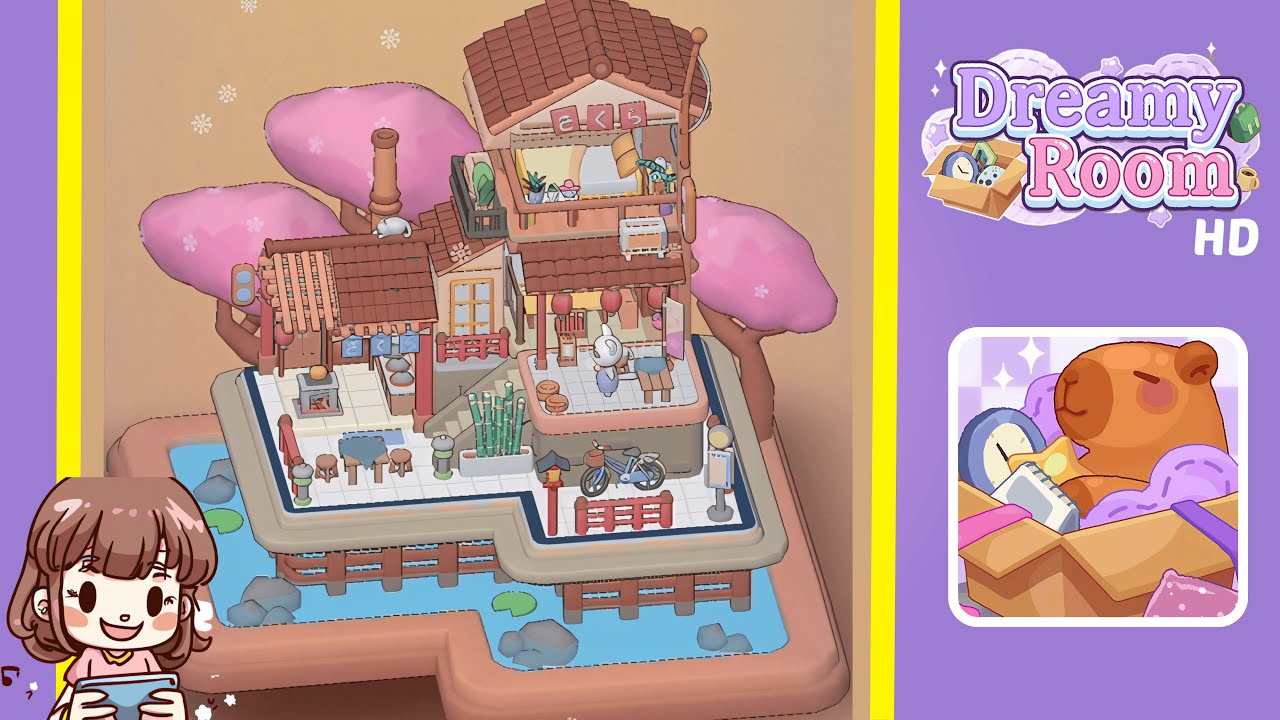
- Place the cherry blossom trees in the back corners. Position them at opposite back corners of the platform, aligning them with the pale beige trim and water, rotating each canopy inward.
- Place the main house structure on the right side of the platform. Align its base with the inner L-shape curve, leaving space for the stone stairs.
- Place the pink sakura sign under the main roof and the small white rabbit on the lower roof. Center the "さくら" sign beneath the upper eaves and position the rabbit on the first-floor overhang.
- Furnish the second-floor balcony. Start with the wooden bed, followed by the bolster pillow, cushion, wooden crate, potted plant, pink blossom pot, and white heater.
- Set up the first-floor shop stall and kitchen. Attach the blue noren curtain, place the charcoal grill, ceramic pot, serving dish, and arrange plates on the wall shelf.
- Arrange the seating area and bamboo planter near the stairs. Position the table, stool, bench, paper lanterns, and bamboo planter for a cozy dining spot.
- Setup the bench, character figure, lantern, and bamboo steamers on the middle platform. Arrange these elements carefully for a charming lounge area.
- Finish with the bicycle and bus stop sign on the walkway and add water elements around the base. Ensure everything is positioned for a balanced scene.
Notes & Precautions
- Be mindful of the snapping grid to avoid overlap or hidden objects.
- Ensure tree trunks are supported on the grid, preventing dipping.
- Adjust placements from multiple angles, considering camera shifts.
Tips & Tricks
- Adjust rotation sensitivity for smoother alignments.
- Use the overhead camera view for spotting overlaps.
- Place larger objects first for a streamlined workflow.
- Highlight the grid for precise snapping.
- Use minute adjustments for perfect item locking.