Dreamy Room Level 196 Walkthrough
Welcome to the guide for Dreamy Room Level 196—a delightful floating farm on a verdant island. Focused on precision, this walkthrough will help you complete the level with perfect placements for a flawless scene.
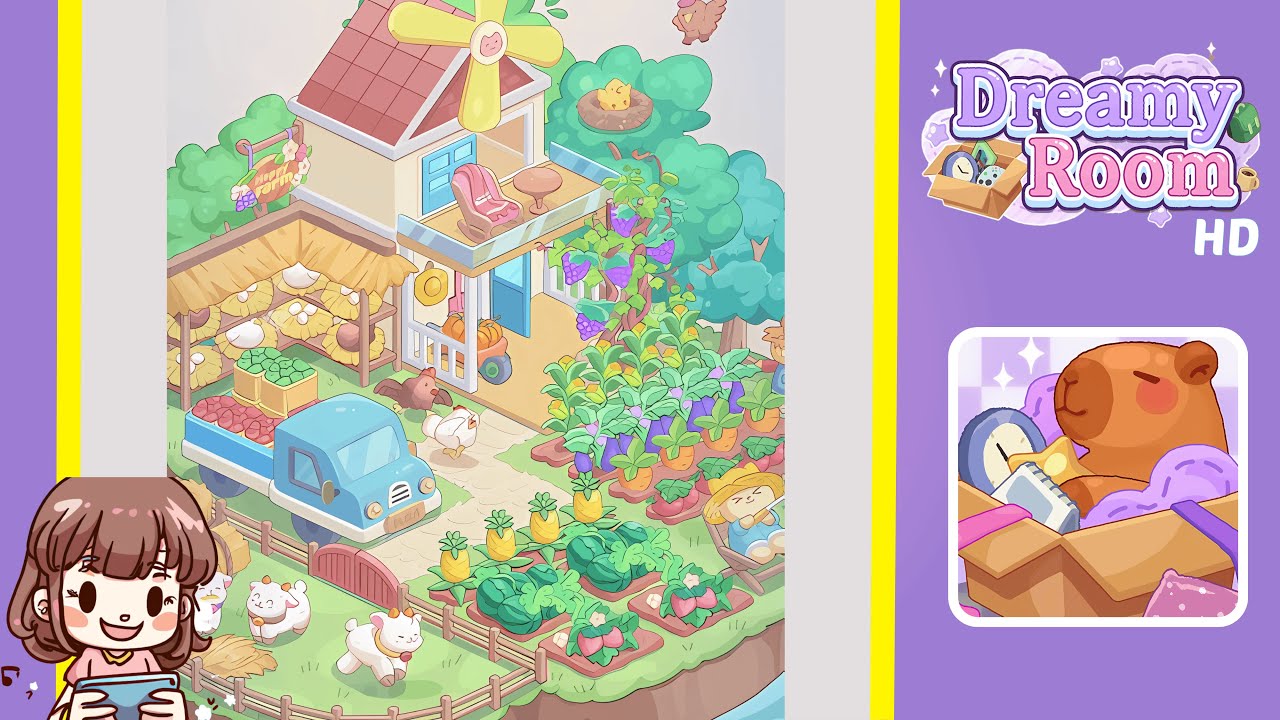
Step-by-Step Guide
- Place the floating grassy island base in the center of the scene. Ensure its edges are visible on all sides.
- Center the two-story farmhouse slightly right of the midpoint with the front door facing the bottom.
- Attach the red-tiled roof to the top of the farmhouse, ensuring a seamless join with the walls.
- Install the yellow windmill propeller at the roof's center, aligning with the triangular white beam.
- Hang the “Happy Farm” sign on the left edge among the trees, aligning with a supporting branch.
- Place the pink rocking chair and round table on the balcony, ensuring both fit within the glass barriers.
- Set up the straw-roofed market stall beneath the left trees, ensuring stability on the grass.
- Stock the stall with straw bundles, hay bales, and apple crates, ensuring perfect symmetry.
- Position the blue farm truck on the stone path, loading it with red apple crates.
- Place the brown and white chickens on the pathway, ensuring a natural pecking stance.
- Plant the grapevine trellis, and add the chick’s nest and the flying bird for perfect layering.
- Create a goat pen with fences, a gate, and hay bales, ensuring goats are comfortably placed.
- Plant vegetable beds, add a scarecrow, the fishing cat, and a water bucket for a complete garden scene.
Notes & Precautions
- Object overlap can degrade the scene's 3D illusion—use micro-adjustments for precision.
- Maintain correct layering for a visually coherent scene—order matters.
- Use grid snapping carefully to account for curved edges.
- Rotating assets can fix clipping issues.
- Avoid high object counts to maintain game performance—instead, place items one by one.
Tips & Tricks
- Layered staging helps streamline the placement puzzles from background to foreground.
- Fine-tune with arrow keys to prevent unwanted movements.
- Use custom guides for exact coordinate mapping.
- Group similar objects temporarily for aligned placements.
- Reset layers when needed for pixel-perfect results.