Dreamy Room Level 195 Walkthrough
Welcome to Dreamy Room Level 195, a cozy design challenge set within an empty carriage. This walkthrough will guide you through placing checkered tiles, arranging furniture, and adding character props for a complete room transformation.
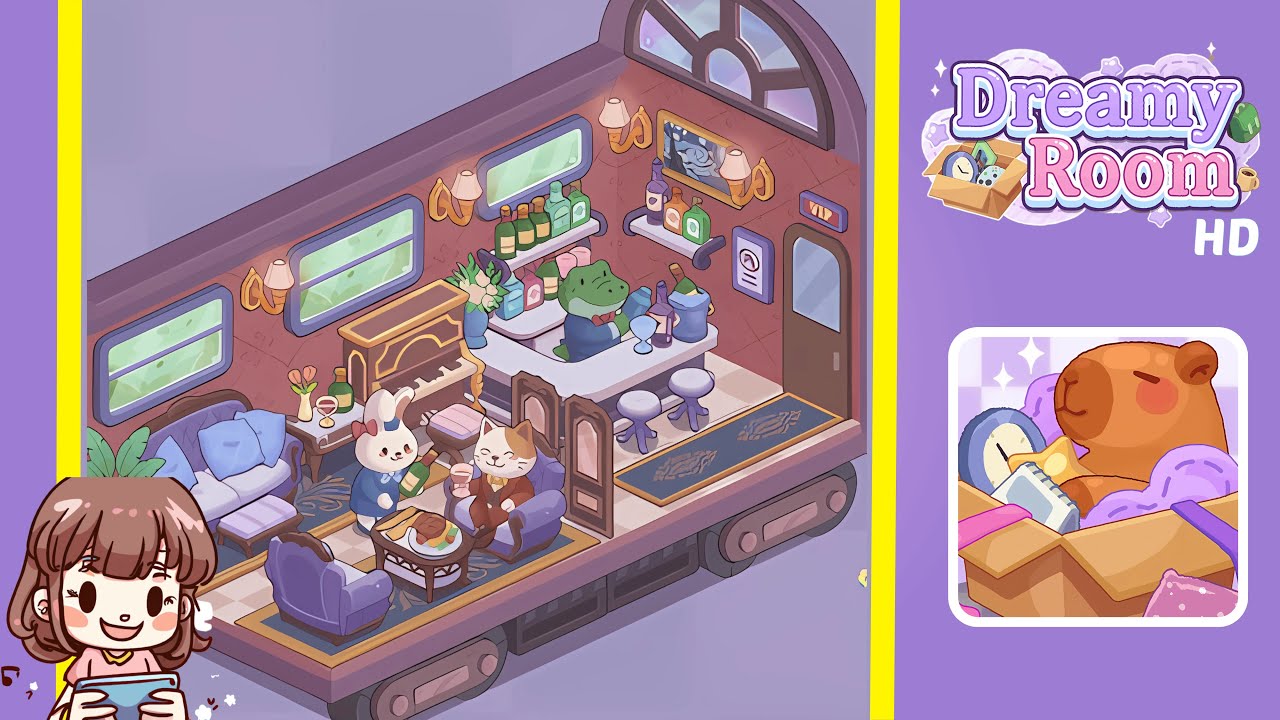
Step-by-Step Guide
- Place the checkered tile floor board in the empty carriage. Ensure the alternating light and muted pink squares align perfectly for an even foundation.
- Attach the soft rose-patterned wallpaper panels on the interior walls. Align the tiny starburst motifs seamlessly between panels for a cozy ambiance.
- Install the window frames on the side and back walls. Position three rectangular windows along the left wall and an arched window on the right.
- Set the gold wall sconces above each window for atmospheric depth. Maintain consistent height and inward angle for optimal illumination.
- Arrange the seating area with a purple loveseat and a matching footstool. Add two armchairs opposite, flanking a central coffee table for balance.
- Position the piano and decorate with a side table. Align the piano along the back wall and adorn the table with a vase, wine glass, and bottle.
- Place the dining table at the center, adding a food platter and character props such as the white rabbit and calico cat figures.
- Complete the bar area with a sleek white counter and floating shelves. Add the alligator bartender and decor like an ice bucket and framed painting.
Notes & Precautions
- Ensure proper alignment of each piece to avoid overlaps or gaps. Misalignment can disrupt animations and aesthetics.
- Take care with curved pieces, as they may leave seams if not aligned precisely.
- Review placements carefully, as there is no undo function for certain steps.
Tips & Tricks
- Start with background elements like flooring and wallpaper to set boundaries for furniture placement.
- Utilize the grid snap feature for efficient alignment.
- Lower zoom level when placing grouped items for better layout visibility.
- Save the game after completing each major area to avoid redoing completed sections.